
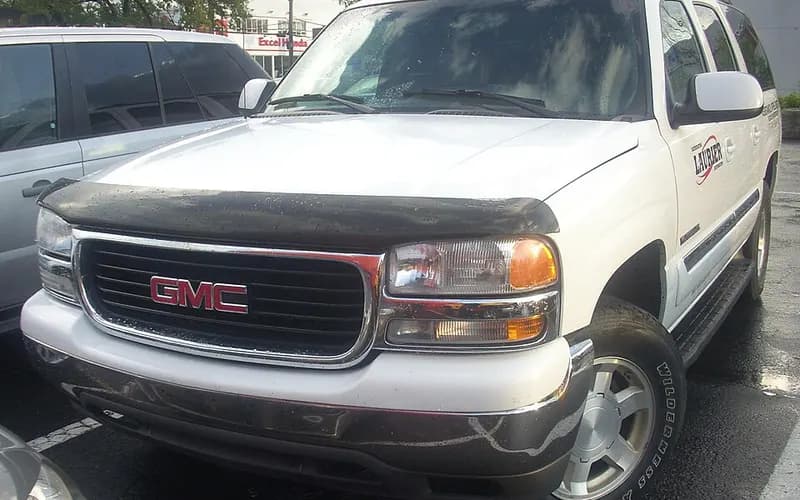
← Look into the faults of the GMC Yukon XL
Symptom
Warning light: possible causes and documented repairs — 2000–2006 GMC Yukon XL
Of the records of the 2000–2006 GMC Yukon XL, 185 state “Warning light” (Owner complaint: 62, Recall: 4, Manufacturer communication: 119). The technical documents say how to deal with 38 of its possible causes. They are listed by the number of matching records, most first.
Narrow it by model year, engine and more
Causes the technical documents say how to deal with (38)
Intake manifold gasket leak (cold idle misfire, lean codes)
10 matching records
The bulletin describes a cold engine idle misfire with DTCs P0171, P0174 or P0300.
The bulletin states the intake gasket seals may leak around the intake ports, causing the lean condition.
How to tell
What to do
- The seals may leak around the bottom side of the port, which makes the vacuum leak hard to detect.
- Lower-than-normal MAF readings may be seen if the intake seals are leaking.
- An intake manifold with warpage in excess of 3mm (.118 in.) over a 200mm (7.87-in.) area must be replaced.
- Measure the intake manifold for warpage across two runner ports only.
5 more steps ·All steps, part numbers and sources (3 sources) →
Brake pipe (brake line) corrosion and rupture
6 matching records
The pipes' steel-copper construction is vulnerable to galvanic corrosion if exposed to the environment.
NHTSA found the failures came with general excessive corrosion over most of the pipe assembly and appear to be expected wear-out of the coating in severe-corrosion states.
How to tell
What to do
- In the joint inspections, scaling or flaking corrosion was taken as indicating the onset of metal loss and given the second lowest ranking (2); a leaking or previously repaired pipe was the lowest (1).
- GM noted that pipes with excessive flaking corrosion can only be fully evaluated, including remaining service life, by removing them, cleaning off the corrosion and sectioning them to assess remaining wall thickness.
- The inspections found no specific location where corrosion was visually more severe and no pattern between vehicles.
- Service records of incident vehicles also indicate that repairs are not isolated to a specific location or brake pipe.
6 more steps ·All steps, part numbers and sources (4 sources) →
Single-cylinder misfire (P0300-P0308) and/or chirp, squeak or tick at camshaft speed: worn cam lobe / lifter, valve or valve spring
5 matching records
Customers may complain of an SES light, engine misfire and/or engine noise.
A verified noise is not eliminated by canceling fuel injectors and occurs at camshaft speed (half of crankshaft speed).
How to tell
What to do
- If pressing on the valve side of the rocker changes the noise, a lifter and/or cam lobe concern on that cylinder is most likely.
- The misfiring/ticking cylinder should have less cam lobe lift than comparison cylinders if a worn lifter roller and/or cam lobe is the cause.
- During the noise, press with a wooden hammer handle on the rocker arms at the valve side, push rod side, and side of the rocker to find which one is making noise.
- Measure the cam lobe lift at the push rod side of the rocker arm.
8 more steps ·All steps, part numbers and sources (6 sources) →
P0420 / P0430 on a new or just-replaced catalytic converter (break-in not completed)
4 matching records
An SES light may occur on low-mileage vehicles or vehicles that recently had the catalytic converter replaced.
DTCs P0420 and/or P0430 may be stored.
How to tell
What to do
- If the diagnostics still do not pass, perform SI diagnostics and repair as necessary.
- On a new/low mileage vehicle with these DTCs, use the Tech 2 to verify engine run time on the Engine Hour Meter in the IPC Data Display/Data 1 List.
- Finally, restart the engine and operate the vehicle at the conditions for running the DTC P0420/430 tests, and make sure the vehicle passes them.
- If this occurs, clear the DTCs and perform the drive cycle.
2 more steps ·All steps, part numbers and sources (3 sources) →
Unwanted ABS activation at low speed (front wheel speed sensor mounting corrosion)
3 matching records
These vehicles may have a condition permitting corrosion to occur between the front hub/bearing assembly and the wheel speed sensor.
With the brakes applied between about 6 km/h (3.7 mph) and 16 km/h (10 mph), the corrosion may cause unwanted ABS activation.
What to do
- The reading should be at least 350 mV AC; if it is less, the wheel speed sensor must be replaced.
- If the sensor's mounting surface is warped or bent, the sensor must be replaced.
- Dealers remove the sensor, clean its mounting surface on the bearing, apply rust inhibitor and grease, reinstall it and check peak-to-peak output voltage.
- The passage heading states that the repair is cleaning the wheel speed sensor mounting surface.
2 more steps ·All steps, part numbers and sources (4 sources) →
DTC P0446 set with the SES lamp on (replace the EVAP vent solenoid, not the canister)
3 matching records
How to tell
What to do
- Replace the EVAP vent solenoid.
Autoride (Z55) Service Ride Control / Service Suspension System message
2 matching records
On 2009 or earlier vehicles a Service Suspension System message may appear and the rear ride height may be incorrect.
The Electronic Suspension Control module will have DTC C0696 or C0711 set.
How to tell
What to do
- The compressor assembly may need to be removed to see whether the wiring is pinched between the compressor and the frame.
- The module checks level-system pressure at start-up and runs the compressor to add air to the shocks if it is below 10 psi (69 kPa).
- Repair the damaged or shorted circuits and reposition the wiring so it is not damaged again when the compressor is installed.
- The sensor is not serviced separately; install a complete air filter, dryer and sensor assembly.
3 more steps ·All steps, part numbers and sources (3 sources) →
Fuel module reservoir assembly: fuel pump wire connectors may overheat - recall 05V-155
2 matching records
The fuel module reservoir assemblies contain fuel pump wire connectors that may overheat under certain operating conditions.
The terminals in the 4-wire electrical connector at the top of the fuel pump assembly may suffer fretting and high resistance.
How to tell
What to do
- On-board emissions diagnostics may detect holes of approximately 0.040 inches (= 1.02 mm) or more and set a service engine soon warning light. The connector sits below the fuel level when the tank is full.
- Dealers remove the fuel tank and the module reservoir assemblies and install a new service kit.
- The bulletin explains how to install repair kit 15824379 on the fuel pump assembly; the kit contains replacement electrical connectors, a replacement fuel level sensor, related hardware and instructions.
- Installing the replacement connector components in the cover is a new procedure; the fuel level sensor is replaced by the existing SI procedure, but the float assembly is re-used, which is new.
5 more steps ·All steps, part numbers and sources (4 sources) →
Rear bank knock sensor corrosion from water intrusion (P0332)
2 matching records
Customers may report mild to severe engine ping (spark knock), usually worse during acceleration, and/or an illuminated MIL.
The technician may find DTC P0332 set.
How to tell
What to do
- If P0327 and P0332 set at the same time, inspect for poor connections at the two-wire knock sensor harness located at the left rear side of the intake manifold near the top, just under the cover.
- Check the resistance of the knock sensors including the harness before reinstalling the intake manifold.
- Replace the rear bank knock sensor and build an RTV dam around the sensor to divert water away from it.
Reduced Engine Power from throttle body connector crimp, broken wire or grounds
2 matching records
A vehicle may come in for a reduced power message and DTCs P0120, P0220, P1516, P2101 or P2135.
The TAC / throttle body codes may be caused by a loose wiring crimp at the throttle body connector or a broken throttle body circuit.
How to tell
What to do
- Inspect all related throttle body terminals for a loose wiring crimp.
- Wire breaks usually occur within 1 to 4 inches (= 25.4–101.6 mm) of the throttle body connector.
- On C/K trucks, complete SI procedures for voltage drop on grounds G103 and G104; grounds G103 or G104 may be loose or corroded.
- If a terminal crimp or broken wire is found, repair or replace only the circuits involved.
Aluminum Wheel Bead Seat: corroded
2 matching records
Vehicle Communication Interface Module: electrical fault, software
2 matching records
Air bag lamp on with DTC B0092 (passenger presence system sensor harness)
1 matching record
The air bag lamp is on, the passenger air bag indicator always reads OFF, and DTC B0092 is set.
How to tell
What to do
- The correction is to repair the passenger presence system (PPS) sensor harness.
Intermittent battery lamp with history DTC B1489 after BGCM replacement (module not SPS programmed)
1 matching record
A vehicle may have an intermittent battery lamp with a history code B1489 in the Battery Generator Control Module (BGCM).
The concern may be noticed after the BGCM has been replaced for another issue.
How to tell
What to do
- Whenever the BGCM is replaced, the module needs to be SPS programmed before the vehicle is released to the customer.
Intermittent MIL, service lamps/messages or DTCs from connector fretting corrosion
1 matching record
Intermittent illumination of the MIL, service lamps or service messages, or DTCs set by various control modules.
The passage is a heading about diagnosing and repairing fretting corrosion.
How to tell
What to do
- Disconnect the affected connector and apply dielectric lubricant.
Crankshaft position sensor may work intermittently or fail (8.1L V8) - recall 07V-521
1 matching record
The crankshaft position can operate intermittently or fail completely.
With intermittent operation the SES light may illuminate and the vehicle may run rough.
How to tell
What to do
- Dealers replace the crankshaft position sensor.
- As the remedy, an improved CKP is installed.
- The repair listed for the claim is: replace the crankshaft position sensor and perform the Crankshaft Position System Variation Learn.
- Part: 12575172 Sensor, Crankshaft Position, quantity 1 per vehicle.
ABS light with C0265/C0201/U1041 or no communication with brake module (EBCM ground G110)
1 matching record
Upon inspection, DTCs C0265 and C0201 may be set in the brake module.
There may also be a loss of communication with the brake module.
How to tell
What to do
- The EBCM ground is on the frame beneath the driver's door; among several grounds it is the heavy 12-gauge wire.
- The battery-cable-to-frame ground can cause similar ABS symptoms and can be checked as well.
- Clean the area, front and back, using a tool such as a Scotch-Brite Roloc disc or equivalent.
- Use the bolts, washers and nuts specified in the bulletin because of their conductive finish.
1 more step ·All steps, part numbers and sources (1 sources) →
Aftermarket part (not the vehicle as built): Federal-Mogul National / Carquest replacement wheel hub assembly retention nut - recall 07E-106
1 matching record
How to tell
What to do
- The recalled part numbers are 515020, 515021, 515025, 515053, 515054, 515059 and 515060.
- On 2x4 vehicles, raise the vehicle on an approved hoist first; the hub assembly is good if a yellow, green or blue paint mark is seen on the grease cap on the inboard side of the steering knuckle.
- If the paint mark is not present, remove the wheel and the brake rotor and clean rust from the hub assembly face to check for the date code stamping.
- If a round yellow sticker is present on the box label, the part is good.
2 more steps ·All steps, part numbers and sources (2 sources) →
Instrument panel cluster gauges stick, flutter or stop working
1 matching record
Customers reported that one or more instrument cluster gauges stick, flutter or become inoperative.
What to do
- Dealers replace the instrument panel cluster after verifying the condition.
No response when the OnStar button is pressed (DTC B2476): button assembly test values
1 matching record
On 1998-2000 OnStar equipped vehicles there may be no response when the OnStar button is pressed.
The OnStar VS-3B buttons may not operate and the telltale LED may not flash after the OnStar Center button or Emergency button is pressed; a DTC B2476 may also be present.
How to tell
What to do
- With the ignition in the On position, check for 7-10 volts between pin E6 and E1; if there is no voltage and the wire at the terminal is not shorted to ground, replace the VIU.
- Back probe the blue VIU connector between terminals E4 and E1: there should be no voltage with the system on and no buttons pressed.
- Press and hold the Call Answer/End button: the voltage should be 0.33 volts +/- 10%.
- Press and hold the OnStar Services button: the voltage should be 1.3 volts +/- 10%.
2 more steps ·All steps, part numbers and sources (1 sources) →
Red OnStar LED and DTC B2455 after Canada upgrade bulletin 15-08-44-001 (audio and microphone drain wires shorted)
1 matching record
A red LED and DTC B2455 set as current in the VCIM may be noticed after performing Canada upgrade bulletin 15-08-44-001.
When placing calls or connecting to OnStar, the person on the other end can hear the caller clearly.
How to tell
What to do
- Pull back the tape at X2 of the VCIM far enough to see where the bare wires are covered.
- Tape the bare wires individually to prevent them from shorting, then tape the harness back up.
P0300 after engine repairs: injector connectors crossed (cylinders 5-7 / 6-8)
1 matching record
Injector connectors for cylinders 5-7 and 6-8 can be crossed and cause an engine misfire.
The engine misfire may not be detected or may happen during deceleration.
How to tell
What to do
- If crossed injector connectors are a possible cause, use the applicable SI document to validate the injector connector routing.
- Correct the injector connector routing and re-evaluate.
Parking brake linings worn out prematurely, parking brake does not hold (PBR single-shoe drum-in-hat)
1 matching record
ODI is aware of over 600 complaints of premature parking brake wear-out in all MY 1999-2002 C/K 1500 trucks, regardless of transmission type; most involved vehicles with 20,000-60,000 miles (= 32,187–96,561 km), or 15-41 months in service.
Most complaints (over 90%) concerned a worn out or inoperative parking brake system, usually discovered during a service visit or mandatory state safety inspection.
What to do
- On complaint vehicles examined in the field, wear occurred earlier and to a greater extent on the driver's side parking brake unit and was largely localized at the tip of one of the linings.
- Bulletin 01-05-26-001 "Park Brake - Low Effort Apply System Description" (Mar 2001) describes a park brake test procedure.
- A revised clip designed to exert less force on the shoe went into MY 2003 production and into the service part stream. Installing the newer clip and replacing worn linings has been shown to remedy the defect.
- The closing report lists a bulletin of Aug 2004 as 02-05-26-001B "Brakes - Parking Brake Shoe Retainer Clip Availability", announcing a new retainer clip service kit for DIH-equipped vehicles.
5 more steps ·All steps, part numbers and sources (3 sources) →
Quadrasteer: rear wheels stay turned after the front wheels are straight (controlled re-centering after a fault, normal operation)
1 matching record
This may be accompanied by a Service 4 Wheel Steer message on the DIC and/or a DTC set in the 4 Wheel Steer module.
When a fault is detected during a turn, the Rear Wheel Steering module performs a controlled re-centering of the rear wheels, which may take up to 30 seconds.
What to do
- Do not let this normal operation add confusion to the actual concern; perform normal diagnostics for the DTC set.
Rear HVAC ticking noise, no rear temperature or mode control, DTC B0434 / B3764 (revised auxiliary HVAC control module)
1 matching record
The concerns are an intermittent ticking or clicking noise from the rear HVAC system, being unable to control the rear system temperature, and being unable to change the rear system modes.
A defaulted door stays at the default position until the code is cleared; clearing the code lets it operate properly until overtravel occurs again.
How to tell
What to do
- The overtravel DTCs are B0434 for the auxiliary (rear) temperature door and B3764 for the auxiliary (rear) mode door.
- Replace the auxiliary (rear) HVAC control module; it contains a new calibration that compensates for the actuator overtravel and the hunting, clicking and ticking noises.
- For all 2003-06 with CJ2 and C69, the auxiliary HVAC control module is part number 15832319.
- The second design rear blower control module is 89024926 for Tahoe, Yukon and Escalade (short wheelbase) and 89018846 for Suburban, Yukon XL and Escalade ESV (long wheelbase).
Service 4WD indicator and DTC B2725 (transfer case shift control switch)
1 matching record
The “Service 4WD” indicator is illuminated and DTC B2725 is set.
How to tell
What to do
- With the "Service 4WD" indicator illuminated and DTC B2725 set, the correction is to replace the transfer case shift control switch.
Service Brake Booster message on a Hydroboost vehicle with DTC C0136 (instrument cluster not SPS programmed)
1 matching record
The Service Brake Booster message notifies the driver of a Supplemental Brake Assist (SBA) concern on vehicles with a vacuum boost brake system.
There have been reports of the Service Brake Booster message being displayed on vehicles equipped with a Hydroboost brake system.
How to tell
What to do
- During normal diagnostics a DTC C0136 may be present in the IPC; this DTC is not in SI for Sport Utility vehicles, because all Sport Utilities use Hydroboost brake systems starting in 2004.
- To be sure the vehicle is repaired, cycle the ignition off and on at least 5 consecutive times, staying in each position at least 30 seconds.
- To correct the concern, SPS program the IPC.
SIR lamp on and inside mirror temperature/compass display inoperative (open air bag fuse, circuit 1139 shorted to ground)
1 matching record
Owners of a 2003-06 full-size utility or 2003-07 classic pickup may comment of a SIR MIL, and the temperature/compass display on the inside rearview mirror, if equipped, is inoperative.
The concern may be caused by an open 15 amp air bag fuse.
How to tell
What to do
- Circuit 1139 (yellow) may be shorted to ground at the left I/P junction block mounting bracket.
- To correct the concern, repair the wiring as necessary and insulate the harness and the mounting bracket with foam tape to prevent a reoccurrence.
4WD/AWD lamps and system inoperative: "sleepy" New Venture Gear transfer case control module (reprogram the TCCM)
1 matching record
How to tell
What to do
- As a temporary fix, remove and reinstall the TCCM fuse.
- Verify the sleepy module as the primary cause, then reprogram the TCCM with the latest software.
- Replace the module only if a C0550 DTC shows as current or in history; the reference is bulletin 02-04-21-006D.
Stability System Disabled / Service Stability message with DTC C0455 (bent terminals at the steering wheel position sensor)
1 matching record
Owners may comment on a Stability System Disabled or Service Stability message with DTC C0455.
The concern may be caused by bent terminals on the SWPS (Steering Wheel Position Sensor).
How to tell
What to do
- Remove the SWPS connector and inspect for bent terminals.
- In most cases the terminals can be straightened without replacing the sensor.
Purge Solenoid: failed
1 matching record
Seat Belt Buckle: failed
1 matching record
Seat Belt Warning Light: failed
1 matching record
Front right-hand brake pipe contact with body cross sill - recall 00V-345
No matching record (stated by the technical documents)
Clearance between the front right-hand brake pipe and the body cross sill can decrease until they touch.
The brake warning lamp comes on when the fluid level reaches the indicator limit.
How to tell
What to do
- Dealers inspect the front right-hand brake pipe for wear.
- A worn section is replaced with a redesigned pipe section; otherwise a spacer clip is installed.
Air bag (SIR) lamp on with DTC B1001 after BCM or SDM replacement
No matching record (stated by the technical documents)
The SIR lamp stays on steady after an SDM or BCM has been replaced, with DTC B1001 current in the SDM.
The SDM compares the restraints ID stored in the SDM to the restraints ID stored in the BCM.
How to tell
What to do
- A replaced SDM or BCM must learn the restraints ID.
- On some vehicles a calibration may need to be selected after choosing "Vehicle Theft Deterrent - Learn"; select the one labeled "Vehicle Theft Deterrent for Passlock sensor".
- A replaced SDM or BCM must learn the restraints ID, which requires performing a 10 minute V.T.D. "Vehicle Theft Deterrent - Learn" with the Tech 2.
Throttle body carbon build-up: idle surge, reduced engine power, throttle DTCs (high mileage)
No matching record (stated by the technical documents)
As carbon builds up in the throttle body of a high-mileage vehicle, the ECM/PCM learns to compensate by increasing the throttle plate angle.
With enough carbon, idle surge, deceleration surge, tip-in hesitation, reduced engine power mode and/or DTCs may occur.
How to tell
What to do
- If SI diagnosis does not isolate the cause, inspect the throttle body bore and plate for obvious carbon build-up.
- If carbon is present, follow the Throttle Body Cleaning Procedure in SI.
- Depending on the vehicle, the idle learn reset/reset idle learn is normally found on the Tech 2 ECM menu for Module Set Up or Special Functions/TAC System.
- After ensuring that the throttle body bore and plate are clean, perform an idle learn reset/reset idle learn with the Tech 2/GDS and re-evaluate the concern.
Transfer case service light, New Venture Gear transfer case (replace the encoder motor sensor and reprogram the TCCM)
No matching record (stated by the technical documents)
How to tell
What to do
- Verify that the encoder motor is the primary cause.
- Replace the encoder motor sensor and reprogram the TCCM; the labor operation is K9980.
ABS lamp with DTC C0265 (EBCM motor relay circuit) after EBCM replacement
No matching record (stated by the technical documents)
After replacing the EBCM, DTC C0265 "EBCM Motor Relay Circuit" may be present.
A dealer may have replaced multiple EBCMs without resolving it.
How to tell
What to do
The technical documents state no check or repair for it (a caution only).
Causes only records name
Not in the technical documents: named as the cause in records. A cause written in a complaint is the owner’s judgment or what a dealer said, not a confirmed fact.
Related symptoms, trouble codes and warning displays
What the technical documents state together with the faults above.
Put together by FaultCrate from public records and technical documents. The cause and the repair are for the workshop to decide with the vehicle in front of it. Counts are records, not failure rates.