
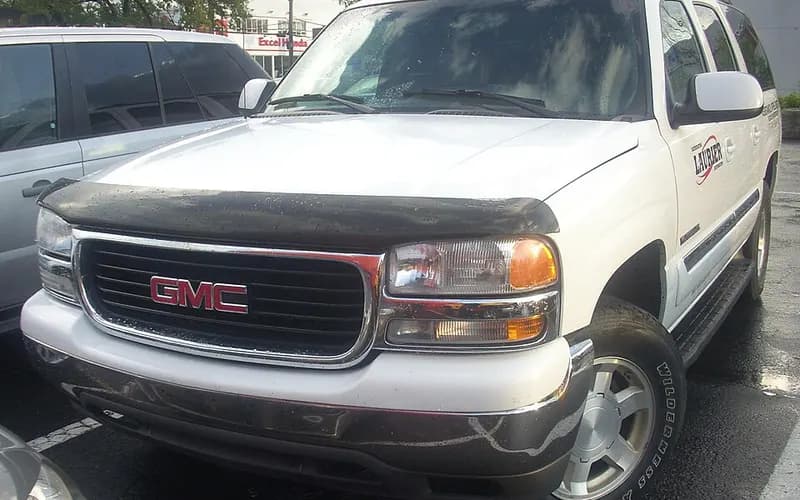
GMC Yukon XL 2000–2006
Common on this vehicle:Corrosion or rustWarning lightNoiseParking brake
Record by record
12 records state a cause or a remedy. Each record is shown as short labels in the order fault → finding the cause → correction. Press a label to narrow to the records that state it.
Component named as the cause
Work done
A ribbon is as wide as the records that state both of its ends (only the commonest are drawn). A record that names several symptoms or components runs through each. Orange is records that say the fault came back or was not fixed. Results come from owners’ reports only; one that does not say is “result not stated”. None of this is a likelihood of a cause or a rate at which work succeeds.
Read the records one by one (9)
TIRES3
Manufacturer communication2003–2006 GMC YUKON XL ・ 2022-06-13
Tire Pressure Service Information
1Fault
- Ride, handling and road noise concerns may be caused by improperly adjusted tire pressure.
- During cold weather the Tire Pressure Monitor (TPM) indicator (a yellow horseshoe with an exclamation point) may illuminate.
2Finding the cause
Steps to confirm (in the document’s order)
- The first step in diagnosing these concerns is to verify that the tires are inflated to the correct pressures.
- The tire placard is on the driver's side front or rear door edge, the center pillar, or the rear compartment lid.
- Generally a 5.6°C (10°F) temperature change equals a 6.9 kPa (1 psi) tire pressure change.
- A "cold" tire is one that has sat for at least 3 hours or been driven no more than 1.6 km (1 mi).
3Correction
Repair
- If the indicator goes off after the tires warm up, reset the pressure to placard pressure at the cold temperature.
Caution
- The recommended inflation pressure is not the pressure printed on the tire sidewall.
- Always inspect and adjust the pressure when the tires are cold.
- Vehicles with different front and rear pressures need to be adjusted after tire rotation.
- To prevent electrostatic discharge damage to the Tire Pressure Monitoring Sensor (TPMS), the technician should be statically discharged before checking or filling tires.
Read the sentences of the record
From the manufacturer’s document
- Applies to:Applies to 2022 and prior GM passenger cars and light duty trucks.
- Condition:Ride, handling and road noise concerns may be caused by improperly adjusted tire pressure.
- Confirm:The first step in diagnosing these concerns is to verify that the tires are inflated to the correct pressures.
- Confirm:The tire placard is on the driver's side front or rear door edge, the center pillar, or the rear compartment lid.
- Caution:The recommended inflation pressure is not the pressure printed on the tire sidewall.
- Confirm:Generally a 5.6°C (10°F) temperature change equals a 6.9 kPa (1 psi) tire pressure change.
- Confirm:A "cold" tire is one that has sat for at least 3 hours or been driven no more than 1.6 km (1 mi).
- Caution:Always inspect and adjust the pressure when the tires are cold.
- Condition:During cold weather the Tire Pressure Monitor (TPM) indicator (a yellow horseshoe with an exclamation point) may illuminate.
- Repair:If the indicator goes off after the tires warm up, reset the pressure to placard pressure at the cold temperature.
- Caution:Vehicles with different front and rear pressures need to be adjusted after tire rotation.
- Caution:To prevent electrostatic discharge damage to the Tire Pressure Monitoring Sensor (TPMS), the technician should be statically discharged before checking or filling tires.
Open the manufacturer’s document (PDF) ↗ The points above were read from this document.
- Remedy
- This service bulletin provides information for accurate tire pressures that ensure the safe handling and appropriate ride characteristics of GM cars and trucks.
Manufacturer communication2004 GMC YUKON XL ・ 2005-09-06
Tire Pressure Monitor Reset/Learn Procedure
1Fault
2Finding the cause
Not stated
3Correction
Read the sentences of the record
- Remedy
- TIRE PRESSURE MONITOR RESET/LEARN-WHEN THE PRESSURE IN THE AFFECTED TIRE WAS SET TO SPECIFICATION ON SOME VEHICLES, THE CHECK TIRE PRESSURE AND OR XX TIRE HIGH/LOW DISPLAY IS CANCELED WITHIN 20 SECONDS OF THE PRESSURE ADJUSTMENT. *SC
Manufacturer communication2004 GMC YUKON XL ・ 2003-11-20
Low Tire Pressure Light On After Installing Aftermarket Wheels/Tires
1Fault
2Finding the cause
Not stated
3Correction
LOW TIRE PRESSURE LIGHT ON AFTER INSTALLING AFTERMARKET WHEELS/TIRES. *TT
Read the sentences of the record
- Remedy
- LOW TIRE PRESSURE LIGHT ON AFTER INSTALLING AFTERMARKET WHEELS/TIRES. *TT
No component category2
Manufacturer communication2004–2005 GMC FULL-SIZE UTILITY TRUCKS (YUKON XL) ・ 2005-05-01
Tire Pressure Monitor system: messages, diagnosis and sensor relearn
1Fault
- The Passenger Door Module (PDM) is the receiver in the full-size utility truck; the receiver module varies by vehicle platform.
- "Check Tire Pressure" message: a sensor that detects a 1.6 psi (11 kPa) change in pressure transmits in re-measure mode; if the system detects a significant loss of pressure in any tire, the message is displayed on the DIC and the low tire pressure indicator is illuminated on the IPC.
- "Service Tire Monitor" message: if the PDM detects a malfunction in the TPM system, it causes the DIC to display this message.
2Finding the cause
Steps to confirm (in the document’s order)
- The "Service Tire Monitor" message is not normal system operation; DTCs should be set when it is displayed.
- Always check and adjust the tire pressures cold; as a rule of thumb, tire pressure changes one psi for every 10° F (6.9 kPa for every 5.6° C).
3Correction
Repair
- Both the message and the indicator can be cleared by adjusting the tire pressure to the recommended pressure.
- The tire pressure sensor relearn procedure must be performed after every PDM replacement, every sensor replacement and every tire rotation.
- J-46079 TPM Diagnostic Tool method: turn the ignition ON with the engine OFF and set the parking brake, then put the PDM in TPM learn mode by cycling the parking lamps ON and OFF 4 times within 4 seconds; the horn chirps and the low tire pressure indicator begins to flash.
- Proceed in the order left front, right front, right rear, left rear: starting with the left front tire, hold the antenna of the J-46079 against the tire sidewall close to the wheel rim at the valve stem and momentarily press the activate button.
Caution
- A "Check Tire Pressure" message does not set system codes; it is normal operation, meant to alert the driver to check and adjust tire pressure.
- Always relearn the system before replacing a suspect sensor.
Read the sentences of the record
From the manufacturer’s document
- Applies to:A Tire Pressure Monitor (TPM) system was added to certain GMC and Chevrolet full-size utility trucks for model year 2004 and continues for 2005.
- Condition:The Passenger Door Module (PDM) is the receiver in the full-size utility truck; the receiver module varies by vehicle platform.
- Condition:"Check Tire Pressure" message: a sensor that detects a 1.6 psi (11 kPa) change in pressure transmits in re-measure mode; if the system detects a significant loss of pressure in any tire, the message is displayed on the DIC and the low tire pressure indicator is illuminated on the IPC.
- Caution:A "Check Tire Pressure" message does not set system codes; it is normal operation, meant to alert the driver to check and adjust tire pressure.
- Repair:Both the message and the indicator can be cleared by adjusting the tire pressure to the recommended pressure.
- Condition:"Service Tire Monitor" message: if the PDM detects a malfunction in the TPM system, it causes the DIC to display this message.
- Confirm:The "Service Tire Monitor" message is not normal system operation; DTCs should be set when it is displayed.
- Confirm:Always check and adjust the tire pressures cold; as a rule of thumb, tire pressure changes one psi for every 10° F (6.9 kPa for every 5.6° C).
- Caution:Always relearn the system before replacing a suspect sensor.
- Repair:The tire pressure sensor relearn procedure must be performed after every PDM replacement, every sensor replacement and every tire rotation.
- Repair:J-46079 TPM Diagnostic Tool method: turn the ignition ON with the engine OFF and set the parking brake, then put the PDM in TPM learn mode by cycling the parking lamps ON and OFF 4 times within 4 seconds; the horn chirps and the low tire pressure indicator begins to flash.
- Repair:Proceed in the order left front, right front, right rear, left rear: starting with the left front tire, hold the antenna of the J-46079 against the tire sidewall close to the wheel rim at the valve stem and momentarily press the activate button.
Open this issue of GM TechLink ↗ The points above are read from an article of TechLink, GM’s monthly publication for dealership technicians. The article itself is not reproduced here.
- Remedy
- Tire Pressure Monitor A Tire Pressure Monitor (TPM) system was added to certain GMC and Chevrolet full-size utility trucks for model year 2004 and continues for 2005. The PDM is the receiver in the full-size utility truck. The receiver module varies by vehicle platform. “Check Tire Pressure” message -- If a sensor detects a 1.6 psi (11 kPa) change in pressure, it transmits in re-measure mode. If the system detects a significant loss of tire pressure in any tire, the Check Tire Pressure message is displayed on the DIC and the low tire pressure indicator is illuminated on the IPC. TIP: A “Check Tire Pressure” message will not set system codes. This is normal operation of the system. The purpose of this message is to alert the driver to check and adjust tire pressure. TIP: Both the message and indicator can be cleared by adjusting the tire pressure to the recommended pressure. “Service Tire Monitor” message -- If the PDM detects a malfunction in the TPM system, it will cause the DIC to display the Service Tire Monitor message. TIP: The “Service Tire Monitor” message is not a normal system operation. DTCs should be set when this message is displayed. - Always check and adjust the tire pressures COLD. As a rule of thumb, tire pressure will change one psi for every 10° F (6.9 kPa for every 5.6° C). - Always ‘relearn’ the system before replacing a suspect sensor. The tire pressure sensor relearn procedure must be performed after every PDM replacement, every sensor replacement, and every tire rotation. J-46079 TPM Diagnostic Tool Method -- Turn the ignition ON with the engine OFF, and set the parking brake. Place the PDM in TPM learn mode by cycling the parking lamps ON and OFF 4 times within 4 seconds. The horn will chirp and the low tire pressure indicator will begin to flash. Proceed in this order: left front, right front, right rear, left rear. Starting with the left front tire, hold the antenna of the J-46079 against the tire sidewall close to the wheel rim at the valve stem, and momentarily press the activate button.
Manufacturer communication2004 GMC YUKON XL ・ 2004-11-01
Tire pressure monitor: direct (RF) system and its sensor learn procedure
1Fault
- The direct type uses a pressure sensor/transmitter in each wheel and notifies the driver when a tire pressure is out of specification.
2Finding the cause
Steps to confirm (in the document’s order)
- On some vehicles the CHECK TIRE PRESSURE and/or XX TIRE HIGH/LOW display cancels within 20 seconds of setting the pressure to specification; on others the DIC display can take up to 20 minutes, or cancels at 20 mph (32 km/h) or greater.
3Correction
Repair
- After a tire rotation the direct system needs a learn procedure to identify the new location of each pressure sensor; refer to SI.
Read the sentences of the record
From the manufacturer’s document
- Applies to:Tahoe/Yukon/Denali, model year 04: direct (RF) system, Learn procedure, by the exterior lamp switch and a pressure change, or with J-46079.
- Applies to:Suburban/Yukon XL/Denali XL, model year 04: direct (RF) system, Learn procedure, by the exterior lamp switch and a pressure change, or with J-46079.
- Condition:The direct type uses a pressure sensor/transmitter in each wheel and notifies the driver when a tire pressure is out of specification.
- Repair:After a tire rotation the direct system needs a learn procedure to identify the new location of each pressure sensor; refer to SI.
- Confirm:On some vehicles the CHECK TIRE PRESSURE and/or XX TIRE HIGH/LOW display cancels within 20 seconds of setting the pressure to specification; on others the DIC display can take up to 20 minutes, or cancels at 20 mph (32 km/h) or greater.
Open this issue of GM TechLink ↗ The points above are read from an article of TechLink, GM’s monthly publication for dealership technicians. The article itself is not reproduced here.
- Remedy
- Tire Pressure Monitor Reset/Learn Tahoe/Yukon/Denali direct (RF) 04 Learn Exterior lamp switch/Pressure delta, or J-46079 Suburban/Yukon XL/Denali XL direct (RF) 04 Learn Exterior lamp switch/Pressure delta, or J-46079 The direct type uses a pressure sensor/transmitter mounted in each wheel. When an out of specification tire pressure is detected, the driver is notified. When tires are rotated, the direct system requires a learn procedure to identify the new location of each pressure sensor. Refer to SI for details. When the pressure in the affected tire is set to specification on some vehicles, the CHECK TIRE PRESSURE and/or XX TIRE HIGH/LOW display is canceled within 20 seconds of the pressure adjustment. On other vehicles, the DIC displays can take up to 20 minutes to cancel, or will cancel when the vehicle speed is 20 mph (32 km/h) or greater.
EQUIPMENT2
Manufacturer communication2005–2006 GMC YUKON XL ・ 2019-12-16(1 earlier editions of this document folded here)
Aluminum wheel bead seat cleaning and resurfacing procedure
1Fault
- A tire slowly loses air pressure over a period of days or weeks.
2Finding the cause
Possible causes
- Abrasive elements may intrude between the tire and wheel at the bead seat, and the relative motion between tire and wheel lets the particles wear the wheel and tire materials.
Steps to confirm (in the document’s order)
- The corrosion may be on the inboard or outboard bead seating surface and is not visible until the tire is dismounted from the wheel.
- After a water dunk tank leak test, if the source of the leak is around the bead seat of the wheel, dismount the tire to examine the bead seat.
- Bead seat corrosion looks like blistering of the wheel finish, giving a rough or uneven surface on which the tire has difficulty keeping a proper seal.
- For vehicles with 32,186 km (20,000 mi) or less, the total combined linear area of repairable corrosion is 100 mm (4 in) or less; beyond that the wheel should be replaced.
- For vehicles that have exceeded 32,186 km (20,000 mi), the total combined linear area of repairable corrosion is 200 mm (8 in) or less.
3Correction
Repair
- Use a clean-up (fine cut) sanding disc or biscuit to remove the corrosion and any flaking paint, back to material that is stable and firmly bonded to the wheel.
- Once the corrosion is eliminated, coat the repaired area with a commercially available tire sealant such as Patch Brand Bead Sealant or equivalent.
Parts
- Part number 16118, Patch Bead Sealer (1 Quart (= 0.946 L)).
Caution
- Do not replace a wheel for slow air loss unless the wheel has been evaluated and/or repair has been tried with this procedure.
Read the sentences of the record
From the manufacturer’s document
- Applies to:Applies to 2005-2020 GM passenger cars and light duty trucks.
- Condition:A tire slowly loses air pressure over a period of days or weeks.
- Cause:Abrasive elements may intrude between the tire and wheel at the bead seat, and the relative motion between tire and wheel lets the particles wear the wheel and tire materials.
- Confirm:The corrosion may be on the inboard or outboard bead seating surface and is not visible until the tire is dismounted from the wheel.
- Caution:Do not replace a wheel for slow air loss unless the wheel has been evaluated and/or repair has been tried with this procedure.
- Confirm:After a water dunk tank leak test, if the source of the leak is around the bead seat of the wheel, dismount the tire to examine the bead seat.
- Confirm:Bead seat corrosion looks like blistering of the wheel finish, giving a rough or uneven surface on which the tire has difficulty keeping a proper seal.
- Confirm:For vehicles with 32,186 km (20,000 mi) or less, the total combined linear area of repairable corrosion is 100 mm (4 in) or less; beyond that the wheel should be replaced.
- Confirm:For vehicles that have exceeded 32,186 km (20,000 mi), the total combined linear area of repairable corrosion is 200 mm (8 in) or less.
- Repair:Use a clean-up (fine cut) sanding disc or biscuit to remove the corrosion and any flaking paint, back to material that is stable and firmly bonded to the wheel.
- Repair:Once the corrosion is eliminated, coat the repaired area with a commercially available tire sealant such as Patch Brand Bead Sealant or equivalent.
- Parts:Part number 16118, Patch Bead Sealer (1 Quart (= 0.946 L)).
Open the manufacturer’s document (PDF) ↗ The points above were read from this document.
- Remedy
- This technical bulletin provides a procedure on how to clean and resurface aluminum wheel bead seats for vehicles that have the condition of Tire Slowly Goes Flat, Tire Air Loss, Low Tire Pressure Warning Light Illuminated, Aluminum Wheel Bead Seat Corrosion.
Manufacturer communication2006 GMC YUKON XL ・ 2018-06-04
Informational Bulletin Revision for 09-03-16-002A
1Fault
- It is a procedure for dealership service consultants when a customer arrives with the low tire light on or reports a check tire pressure, low tire pressure, add air to tire or service tire monitor system message.
2Finding the cause
Not stated
3Correction
Read the sentences of the record
From the manufacturer’s document
- Applies to:Applies to 2006-2014 GM passenger cars and light duty trucks.
- Condition:It is a procedure for dealership service consultants when a customer arrives with the low tire light on or reports a check tire pressure, low tire pressure, add air to tire or service tire monitor system message.
Open the manufacturer’s document (PDF) ↗ The points above were read from this document.
- Remedy
- This informational bulletin provides a revision for 09-03-16-002A to add model years, add the current Global Labor Time Code and update the tool reference information.
ELECTRICAL SYSTEM1
Manufacturer communication2000–2006 GMC YUKON XL ・ 2020-02-10(2 earlier editions of this document folded here)
Tire Pressure Monitor and Diagnostic Tool Software Update
1Fault
- The document gives the steps for downloading or updating the AFIT, TPM, GR8, MIT, PICO Scope or VDR tools.
2Finding the cause
Not stated
3Correction
Read the sentences of the record
From the manufacturer’s document
- Applies to:All brands and models, model years 1995 - 2020.
- Condition:The document gives the steps for downloading or updating the AFIT, TPM, GR8, MIT, PICO Scope or VDR tools.
Open the manufacturer’s document (PDF) ↗ The points above were read from this document.
- Remedy
- This Preliminary Information communicates to the dealer the process for downloading or updating operating software for the Tire Pressure Monitor, Active Fuel Injector tester, multi media tester, PICO Scope, GR8 starting/charging tester  and Vehicle Data Recorder tools, giving website address and step by step instructions to complete the update.
SERVICE BRAKES1
Manufacturer communication2006 GMC YUKON XL ・ 2022-06-13
Tire Pressure Monitoring System Service Information
1Fault
- A Check Tire Pressure / Low Tire Pressure message or light stays on solid with no system codes set; the system is operating as designed and correcting the tire pressure resolves it.
- A Service Tire Monitor message or light blinks and system codes set; this is a condition to be diagnosed and corrected.
- The Low Tire telltale must come on when a tire's pressure drops to 75% of the Recommended Cold Inflation pressure.
2Finding the cause
Possible causes
- If one or more tire pressure sensors do not transmit for 18 minutes of driving, the system sets a code, displays a message and blinks the light for about a minute, after which it stays on solid for the rest of the ignition cycle.
- A low pressure warning can appear when tires were rotated and pressures adjusted but the new positions were not re-learned, on vehicles with different placard pressures front and rear.
Steps to confirm (in the document’s order)
- When activating a sensor, place the antenna tip of the EL 52545 tool on the sidewall, perpendicular to the tire and close to the valve stem.
3Correction
Repair
- Re-learn the TPM sensors and adjust the tire pressure to the placard values after every tire rotation.
Caution
- Never set the tire pressure below the placard value regardless of tire or ambient temperature.
- To prevent electrostatic discharge damage to the tire pressure sensor, the technician should be statically discharged before checking or filling tires.
Read the sentences of the record
From the manufacturer’s document
- Applies to:Applies to 2022 and earlier GM passenger cars and light duty trucks.
- Applies to:Only some vehicles built prior to the 2008 model year have tire pressure monitoring; check vehicle build and RPO information to be sure.
- Condition:A Check Tire Pressure / Low Tire Pressure message or light stays on solid with no system codes set; the system is operating as designed and correcting the tire pressure resolves it.
- Condition:A Service Tire Monitor message or light blinks and system codes set; this is a condition to be diagnosed and corrected.
- Cause:If one or more tire pressure sensors do not transmit for 18 minutes of driving, the system sets a code, displays a message and blinks the light for about a minute, after which it stays on solid for the rest of the ignition cycle.
- Condition:The Low Tire telltale must come on when a tire's pressure drops to 75% of the Recommended Cold Inflation pressure.
- Cause:A low pressure warning can appear when tires were rotated and pressures adjusted but the new positions were not re-learned, on vehicles with different placard pressures front and rear.
- Repair:Re-learn the TPM sensors and adjust the tire pressure to the placard values after every tire rotation.
- Caution:Never set the tire pressure below the placard value regardless of tire or ambient temperature.
- Confirm:When activating a sensor, place the antenna tip of the EL 52545 tool on the sidewall, perpendicular to the tire and close to the valve stem.
- Caution:To prevent electrostatic discharge damage to the tire pressure sensor, the technician should be statically discharged before checking or filling tires.
Open the manufacturer’s document (PDF) ↗ The points above were read from this document.
- Remedy
- This service bulletin provides information for tire pressure monitoring (TPM) system concerns.
Showing 9 of the 12 you can open. Narrow the search to see the rest.