
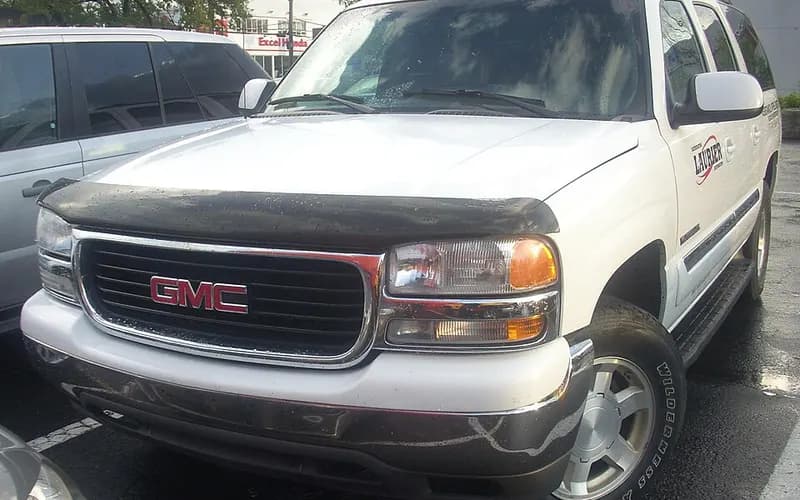
GMC Yukon XL 2000–2006
Common on this vehicle:NoiseWarning lightLoss of engine power, no accelerationVibration or shudderLeakShifting faultGauge or instrument faultParking brake
Record by record
9 records state a cause or a remedy. Each record is shown as short labels in the order fault → finding the cause → correction. Press a label to narrow to the records that state it.
Symptom
Component named as the cause
A ribbon is as wide as the records that state both of its ends (only the commonest are drawn). A record that names several symptoms or components runs through each. Orange is records that say the fault came back or was not fixed. Results come from owners’ reports only; one that does not say is “result not stated”. None of this is a likelihood of a cause or a rate at which work succeeds.
Read the records one by one (5)
POWER TRAIN4
Manufacturer communication2005–2006 GMC YUKON XL 2500 ・ 2024-06-07(4 earlier editions of this document folded here)
Water or Ethylene Glycol in Transmission Fluid
1Fault
- Water or ethylene glycol in ATF changes the friction of the clutches, frequently causing shudder during engagement or gear changes, especially during torque converter clutch engagement.
2Finding the cause
Steps to confirm (in the document’s order)
- An indication of water in the ATF: ATF blowing out of the transmission vent tube.
- The ATF may appear cloudy or, with extreme contamination, look like a strawberry milkshake.
- There may be visible water in the oil pan or a milky white substance inside the pan area.
- Spacer plate gaskets appear swollen or wrinkled in areas where they are not compressed.
- If water is found in the ATF and its source is not identified, or a leaking in-radiator transmission oil cooler is suspected, a simple and quick test kit that detects ethylene glycol in ATF is available.
3Correction
Repair
- If water or coolant is found in the transmission, all rubber-type seals, all composition-faced clutch plates and/or bands, all nylon parts and the torque converter must be replaced.
- Thoroughly clean and rebuild the transmission, using new gaskets and oil filter.
- Flush and flow check the transmission oil cooler using J-45096.
- Thoroughly inspect the engine cooling system and hoses and clean/repair as necessary.
Read the sentences of the record
From the manufacturer’s document
- Applies to:Applies to 2025 and prior GM passenger cars and trucks equipped with an automatic transmission.
- Condition:Water or ethylene glycol in ATF changes the friction of the clutches, frequently causing shudder during engagement or gear changes, especially during torque converter clutch engagement.
- Confirm:An indication of water in the ATF: ATF blowing out of the transmission vent tube.
- Confirm:The ATF may appear cloudy or, with extreme contamination, look like a strawberry milkshake.
- Confirm:There may be visible water in the oil pan or a milky white substance inside the pan area.
- Confirm:Spacer plate gaskets appear swollen or wrinkled in areas where they are not compressed.
- Confirm:If water is found in the ATF and its source is not identified, or a leaking in-radiator transmission oil cooler is suspected, a simple and quick test kit that detects ethylene glycol in ATF is available.
- Confirm:Obtain the Gly-Tek test kit from the Nelco Company and test the ATF to decide accurately whether the radiator needs to be replaced.
- Repair:If water or coolant is found in the transmission, all rubber-type seals, all composition-faced clutch plates and/or bands, all nylon parts and the torque converter must be replaced.
- Repair:Thoroughly clean and rebuild the transmission, using new gaskets and oil filter.
- Repair:Flush and flow check the transmission oil cooler using J-45096.
- Repair:Thoroughly inspect the engine cooling system and hoses and clean/repair as necessary.
Open the manufacturer’s document (PDF) ↗ The points above were read from this document.
- Remedy
- This bulletin provides information on the harmful effects of water or ethylene glycol in transmission fluid.
Manufacturer communication2006 GMC YUKON XL ・ 2017-12-22
Proper Wheel Installation and Torque Techniques
1Fault
- Vibration may be felt in the steering wheel or seat, centered at 10-14 Hz, between 93-115 km/h (58-72 mph).
2Finding the cause
Possible causes
- Inappropriate wheel torque methods may leave the wheel and tire assembly offset when mounted.
3Correction
Repair
- Remove the tire and wheel assemblies, index them at least two stud positions from the previous position, and re-install them.
- Step 1: with the wheel off the ground, install all lug nuts hand tight using only a socket.
- Step 2: snug all lug nuts in a star or criss-cross pattern with a hand wrench.
- Step 3: lower the vehicle until there is just enough contact to resist, then torque to specification with a torque wrench.
Caution
- This first order tire/wheel vibration may be misdiagnosed as assembly imbalance or excessive tire Radial Force Variation.
- Improper torque may distort the brake rotor and vary the wheel mounting, which can cause smooth road shake.
- Do not use torque sticks or an impact driver to tighten wheel lug nuts.
Read the sentences of the record
From the manufacturer’s document
- Applies to:Applies to 2006-2013 GM passenger cars and light duty trucks.
- Condition:Vibration may be felt in the steering wheel or seat, centered at 10-14 Hz, between 93-115 km/h (58-72 mph).
- Cause:Inappropriate wheel torque methods may leave the wheel and tire assembly offset when mounted.
- Caution:This first order tire/wheel vibration may be misdiagnosed as assembly imbalance or excessive tire Radial Force Variation.
- Caution:Improper torque may distort the brake rotor and vary the wheel mounting, which can cause smooth road shake.
- Repair:Remove the tire and wheel assemblies, index them at least two stud positions from the previous position, and re-install them.
- Caution:Do not use torque sticks or an impact driver to tighten wheel lug nuts.
- Repair:Step 1: with the wheel off the ground, install all lug nuts hand tight using only a socket.
- Repair:Step 2: snug all lug nuts in a star or criss-cross pattern with a hand wrench.
- Repair:Step 3: lower the vehicle until there is just enough contact to resist, then torque to specification with a torque wrench.
Open the manufacturer’s document (PDF) ↗ The points above were read from this document.
- Remedy
- This informational bulletin provides a description of the proper wheel installation and proper wheel torque techniques used to install wheels onto vehicles
Manufacturer communication2000–2006 GMC YUKON XL ・ 2008-04-07
Eaton Locking Differential Chatter Shudder Noise on Turns (RPO G80)
1Fault
2Finding the cause
3Correction
Read the sentences of the record
- Remedy
- EATON LOCKING DIFFERENTIAL CHATTER SHUDDER NOISE ON TURNS, EQUIPPED WITH A LOCKING REAR DIFFERENTIAL RPO G80. *NJ UPDATED 7/17/2008. *PE
Manufacturer communication2000–2005 GMC YUKON XL DENALI ・ 2004-11-03
NVG149 NP3 Transfer Case Bind or Shudder on Turns
1Fault
2Finding the cause
3Correction
NVG149 NP3 TRANSFER CASE MAY EXHIBIT A BIND OR SHUDDER ON TURNS. *TC
Read the sentences of the record
- Remedy
- NVG149 NP3 TRANSFER CASE MAY EXHIBIT A BIND OR SHUDDER ON TURNS. *TC
ENGINE AND ENGINE COOLING1
Manufacturer communication2004–2006 GMC YUKON XL 2500 ・ 2023-11-22
Vibration Analysis Worksheet Service Bulletin
1Fault
2Finding the cause
Steps to confirm (in the document’s order)
- When diagnosing vibration, use the worksheet together with the Vibration Analysis - Road Testing procedure in the service information.
- Place the sensor where the vibration is felt: on the seat track for a seat complaint, on the steering column for a steering wheel complaint.
- Moving the sensor to other areas, look for the same Hz reading with the greatest amplitude.
- If a system balance was attempted and the vibration remains, check ring gear backlash at each tooth; readings should not vary more than 0.050 mm (0.002 in).
- Aluminum wheel/tire runout measured on the vehicle: maximum 0.030 in (.762 mm).
3Correction
Read the sentences of the record
From the manufacturer’s document
- Applies to:Applies to 2024 and prior GM passenger cars and trucks.
- Confirm:When diagnosing vibration, use the worksheet together with the Vibration Analysis - Road Testing procedure in the service information.
- Confirm:Place the sensor where the vibration is felt: on the seat track for a seat complaint, on the steering column for a steering wheel complaint.
- Confirm:Moving the sensor to other areas, look for the same Hz reading with the greatest amplitude.
- Confirm:If a system balance was attempted and the vibration remains, check ring gear backlash at each tooth; readings should not vary more than 0.050 mm (0.002 in).
- Confirm:Aluminum wheel/tire runout measured on the vehicle: maximum 0.030 in (.762 mm).
- Confirm:Hub mounting surface runout: maximum 0.005 in (0.132 mm).
- Confirm:Wheel stud runout: maximum 0.010 in (0.254 mm).
Open the manufacturer’s document (PDF) ↗ The points above were read from this document.
- Remedy
- This service bulletin provides a vibration analysis worksheet the technician can use in conjunction with the appropriate Vibration Analysis-Road testing procedure when diagnosing vibration concerns.
Showing 5 of the 9 you can open. Narrow the search to see the rest.