
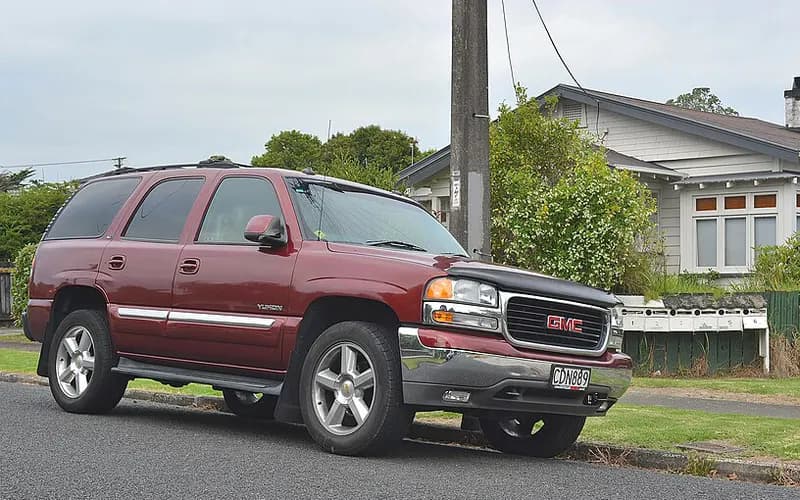
GMC Yukon 2000–2006
Common on this vehicle:Warning lightNoiseLoss of engine power, no accelerationMisfire or rough idleLeakGauge or instrument faultStalls or shuts offDoes not start
Record by record
32 records state a cause or a remedy. Each record is shown as short labels in the order fault → finding the cause → correction. Press a label to narrow to the records that state it.
Symptom
Component named as the cause
How it is said to have ended
- says it came back2
A ribbon is as wide as the records that state both of its ends (only the commonest are drawn). A record that names several symptoms or components runs through each. Orange is records that say the fault came back or was not fixed. Results come from owners’ reports only; one that does not say is “result not stated”. None of this is a likelihood of a cause or a rate at which work succeeds.
Read the records one by one (22)
Known issuesCastech cylinder head porosity crack (gradual coolant loss)3
Owner complaint2004 GMC YUKON ・ 2013-09-03
Slug buildup, oil pressure loss, and coolant loss
1Fault
2Finding the cause
3Correction
Read the sentences of the record
- Fault
- MY CAR BEGAN TO HAVE A BUILD UP OF SLUGS AND BEGAN LOOSING OIL PRESSURE AND COOLANT AND NEEDED OIL ADDED AND COOLANT FREQUENTLY.
- Cause
- I WAS ADVISED TO CHANGE THE OIL FREQUENTLY TO CLEAN THE SLUG OUT BUT IT CONTINUED TO BUILD UP AND THE MYSTERY OF LOOSING COOLANT OIL PRESSURE HAS BOTTOMED OUT TWO MORE TIMES AND I FOUND A ARTICLE ON THE INTERNET THAT A NUMBER OF GMC VEHICLES INCLUDING MINE WERE BUILT WITH DEFECTIVE CYLINDER HEADS DUE TO CRACKS OVER TIME WHICH ALLOWS COOLANT TO LEAK INTO ENGINE AND MIX WITH THE OIL WHICH BUILDS UP SLUG.
- Remedy
- THE SLUGS WERE CLEANED AND A NEW OIL PUMP WAS PLACED BECAUSE OF THE BUILD UP OF SLUGS.
Manufacturer communication2001–2006 GMC YUKON DENALI ・ 2024-03-19
Internal Coolant Leak from Cylinder Head Location
1Fault
- Some vehicles may experience a gradual coolant loss over time.
2Finding the cause
Possible causes
- A very low percentage of cylinder heads manufactured with an embossed Castech logo may develop a porosity crack in a very specific area.
Steps to confirm (in the document’s order)
- Check whether the head is a Castech casting by looking for the casting logo on top of the intake port, under the rocker arm support rail and in the spring deck cavity portion of the cylinder head.
- If the head is a Castech casting, inspect the area around the five oil drain holes for witness marks indicating coolant seepage over time.
- The crack can be in any of the five cylinder head oil drains and shows as a clean or shiny area on an otherwise stained surface.
- Pressurizing the cooling system at this time may reveal coolant, air, or a combination weeping in the described area.
3Correction
Repair
- If inspection reveals evidence of coolant witness marks, replace the entire cylinder head assembly.
Caution
- If the cylinder heads are not a Castech casting, follow normal diagnostic procedures in SI to determine the cause of the coolant loss.
- If no evidence of coolant loss is found on inspection of Castech casting cylinder heads, follow normal diagnostic procedures in SI to determine the cause of the coolant loss.
Read the sentences of the record
From the manufacturer’s document
- Applies to:Applies to 2001-2006 GMC Envoy, Jimmy, Sierra and Yukon models, among other listed GM models, with the 4.8L, 5.3L or 5.7L VORTEC GEN III, GEN IV V8 engine.
- Condition:Some vehicles may experience a gradual coolant loss over time.
- Cause:A very low percentage of cylinder heads manufactured with an embossed Castech logo may develop a porosity crack in a very specific area.
- Confirm:Check whether the head is a Castech casting by looking for the casting logo on top of the intake port, under the rocker arm support rail and in the spring deck cavity portion of the cylinder head.
- Confirm:If the head is a Castech casting, inspect the area around the five oil drain holes for witness marks indicating coolant seepage over time.
- Confirm:The crack can be in any of the five cylinder head oil drains and shows as a clean or shiny area on an otherwise stained surface.
- Confirm:Pressurizing the cooling system at this time may reveal coolant, air, or a combination weeping in the described area.
- Repair:If inspection reveals evidence of coolant witness marks, replace the entire cylinder head assembly.
- Caution:If the cylinder heads are not a Castech casting, follow normal diagnostic procedures in SI to determine the cause of the coolant loss.
- Caution:If no evidence of coolant loss is found on inspection of Castech casting cylinder heads, follow normal diagnostic procedures in SI to determine the cause of the coolant loss.
Open the manufacturer’s document (PDF) ↗ The points above were read from this document.
- Remedy
- This bulletin advises the technician of possible location of an internal coolant leak from a specific cylinder head and location.
Owner complaint2004 GMC YUKON ・ 2016-07-18
Engine losing coolant with no apparent external leakage
1Fault
2Finding the cause
3Correction
Not stated
What the documents say to do
Castech cylinder head porosity crack (gradual coolant loss)Confirm
- Inspect the cylinder head to determine whether the casting was made by Castech.
Repair
- If coolant witness marks are found, replace the entire cylinder head assembly.
Caution
- If the heads are not Castech castings, follow normal diagnostic procedures to find the cause of the coolant loss.
Read the sentences of the record
- Fault
- ENGINE LOSING COOLANT, WITH NO APPARENT SIGNS OF LEAKAGE.
- Cause
- COOLANT APPEARS TO BE LEAKING INTO THE ENGINE OIL, CAUSING IT TO SLUDGE, THEREBY CAUSING ENGINE FAILURE.
Known issuesSingle-cylinder misfire (P0300-P0308) and/or chirp, squeak or tick at camshaft speed: worn cam lobe / lifter, valve or valve spring2
Manufacturer communication2002–2006 GMC YUKON DENALI ・ 2018-11-13(2 earlier editions of this document folded here)
Service Engine Soon Lamp, Misfire, Engine Noise Diagnostic Information
1Fault
- Customers may complain of an SES light, engine misfire, and/or engine noise.
- If the SES light is on, there will be a P0300-P0308 DTC with misfires counting on a single cylinder, which may or may not be felt.
- A verified noise is not eliminated by canceling fuel injectors and occurs at camshaft speed (half of crankshaft speed).
2Finding the cause
- Valve Spring: broken
- Active Fuel Management Lifter: failed
- Valve: defective
- Camshaft Lobe: worn
- Lifter Roller: worn
Possible causes
- If SI diagnosis does not isolate the cause, it may be a worn camshaft lobe and/or lifter roller, a sticking valve, valve leakage, a broken valve spring, or a collapsed AFM (Active Fuel Management) lifter.
Steps to confirm (in the document’s order)
- During the noise, press with a wooden hammer handle on the rocker arms at the valve side, push rod side, and side of the rocker to find which one is making noise.
- If pressure on the valve side of the rocker changes the noise, it is most likely a lifter and/or cam lobe concern on that cylinder.
- Measure the cam lobe lift at the push rod side of the rocker arm.
- A good indicator of a sticking valve is engine misfires that continue to count on an aggressive deceleration with engine braking.
- Release the air pressure from the cylinder and work the valve up and down in the guide while turning it 360 degrees; if any binding is felt, a stem to guide clearance concern exists.
3Correction
Repair
- If a worn camshaft lobe or lifter roller is found, follow SI procedures to replace the camshaft and all lifters.
- Also replace the plastic lifter guide for the lifter that had the damaged cam lobe and/or lifter roller.
- Refer to the latest version of PIP4753 for decarboning instructions.
- If a broken valve spring is found, replace the broken valve spring as necessary.
Caution
- If an AFM lifter concern is suspected, refer to the latest version of PIP4568 for additional information.
Read the sentences of the record
From the manufacturer’s document
- Applies to:Applies to GMC Yukon models, 2002 - 2018, with a V8 engine.
- Condition:Customers may complain of an SES light, engine misfire, and/or engine noise.
- Condition:If the SES light is on, there will be a P0300-P0308 DTC with misfires counting on a single cylinder, which may or may not be felt.
- Condition:A verified noise is not eliminated by canceling fuel injectors and occurs at camshaft speed (half of crankshaft speed).
- Cause:If SI diagnosis does not isolate the cause, it may be a worn camshaft lobe and/or lifter roller, a sticking valve, valve leakage, a broken valve spring, or a collapsed AFM (Active Fuel Management) lifter.
- Confirm:During the noise, press with a wooden hammer handle on the rocker arms at the valve side, push rod side, and side of the rocker to find which one is making noise.
- Confirm:If pressure on the valve side of the rocker changes the noise, it is most likely a lifter and/or cam lobe concern on that cylinder.
- Confirm:Measure the cam lobe lift at the push rod side of the rocker arm.
- Repair:If a worn camshaft lobe or lifter roller is found, follow SI procedures to replace the camshaft and all lifters.
- Repair:Also replace the plastic lifter guide for the lifter that had the damaged cam lobe and/or lifter roller.
- Confirm:A good indicator of a sticking valve is engine misfires that continue to count on an aggressive deceleration with engine braking.
- Confirm:Release the air pressure from the cylinder and work the valve up and down in the guide while turning it 360 degrees; if any binding is felt, a stem to guide clearance concern exists.
- Repair:Refer to the latest version of PIP4753 for decarboning instructions.
- Confirm:Typically, the Cylinder Leakage Test outlined in SI should isolate valve leakage.
- Repair:If a broken valve spring is found, replace the broken valve spring as necessary.
- Caution:If an AFM lifter concern is suspected, refer to the latest version of PIP4568 for additional information.
Open the manufacturer’s document (PDF) ↗ The points above were read from this document.
- Remedy
- This Preliminary Information communication provides information to the technician about vehicles that have a Service Engine Soon Malfunction Indicator Lamp on, engine misfire, and/or engine noise. Technician may find Diagnostic Trouble Codes P0300-P0308. If published Service Information diagnostics does not isolate the cause of this concern technician should check for a worn camshaft lobe and/or lifter roller, a sticking valve, valve leakage, a broken valve spring, and a collapsed active fuel management lifter.
Manufacturer communication2000–2006 GMC YUKON DENALI ・ 2017-08-15
Service Engine Soon Lamp and Engine Misfire Information
1Fault
2Finding the cause
3Correction
What the documents say to do
Single-cylinder misfire (P0300-P0308) and/or chirp, squeak or tick at camshaft speed: worn cam lobe / lifter, valve or valve springConfirm
- If pressing on the valve side of the rocker changes the noise, a lifter and/or cam lobe concern on that cylinder is most likely.
Repair
- If a worn camshaft lobe or lifter roller is found, follow SI procedures to replace the camshaft and all lifters.
- Also replace the plastic lifter guide for the lifter that had the damaged cam lobe and/or lifter roller.
Caution
- A damaged cam lobe is easy to overlook when inspecting through the lifter bores; unworn lifter rollers do not mean the cam lobes are okay.
Read the sentences of the record
Open the manufacturer’s document (PDF) ↗ What is shown here is NHTSA’s summary; the procedure is in the document itself.
- Remedy
- This Preliminary Information communication provides information to the technician about vehicles that have a Service Engine Soon Malfunction Indicator Lamp on, engine misfire, and/or engine noise. Technician may find Diagnostic Trouble Codes P0300-P0308. If published Service Information diagnostics does not isolate the cause of this concern technician should check for a worn camshaft lobe and/or lifter roller, a sticking valve, valve leakage, a broken valve spring, and a collapsed active fuel management lifter.
Known issuesOil leak after cold start from frozen PCV system (rear main seal)1
Manufacturer communication2002–2006 GMC YUKON DENALI ・ 2017-08-15
Oil Leak at Cold Start in Low Ambient Temperature
1Fault
- An oil leak may appear shortly after a cold start in extremely low ambient temperatures (approximately below 10*F) or with excessive short trip drive cycles.
2Finding the cause
Possible causes
- An oil leak from the rear main seal is the result of a frozen PCV system and excessive crankcase pressure.
3Correction
Repair
- Clean the area of the oil leak, clean and dry the PCV hoses, and replace the oil fill cap with part number 12589430 (vented oil fill cap) to prevent a reoccurrence.
Part numbers printed in the document
12589430Oil Filler CapLook up at RockAuto (aftermarket candidates) ↗Search the web ↗
No successor stated(replaces 21007373 / 24100010 / 24100296 / 12573342)as stated by GMPartsGiant (checked 2026-10-06) ↗
The numbers are as the document prints them. The name and the replacing number are what the pages of GMPartsGiant, a reseller of genuine parts and not GM, state. Aftermarket equivalents are not checked here (the links only search by number). Confirm the fit for the vehicle (VIN) before ordering.
Parts
- Oil fill cap part number 12589430 (vented oil fill cap).
Part numbers printed in the document
12589430Oil Filler CapLook up at RockAuto (aftermarket candidates) ↗Search the web ↗
No successor stated(replaces 21007373 / 24100010 / 24100296 / 12573342)as stated by GMPartsGiant (checked 2026-10-06) ↗
The numbers are as the document prints them. The name and the replacing number are what the pages of GMPartsGiant, a reseller of genuine parts and not GM, state. Aftermarket equivalents are not checked here (the links only search by number). Confirm the fit for the vehicle (VIN) before ordering.
Read the sentences of the record
From the manufacturer’s document
- Applies to:Applies to 2002-2014 GMC Yukon, Yukon XL, Yukon Denali and Yukon XL Denali.
- Applies to:Applies to vehicles with a V-8 gas engine except L83, L86 and LV3.
- Condition:An oil leak may appear shortly after a cold start in extremely low ambient temperatures (approximately below 10*F) or with excessive short trip drive cycles.
- Cause:An oil leak from the rear main seal is the result of a frozen PCV system and excessive crankcase pressure.
- Repair:Clean the area of the oil leak, clean and dry the PCV hoses, and replace the oil fill cap with part number 12589430 (vented oil fill cap) to prevent a reoccurrence.
- Parts:Oil fill cap part number 12589430 (vented oil fill cap).
Open the manufacturer’s document (PDF) ↗ The points above were read from this document.
- Remedy
- This Preliminary Information communication provides information to the technician about vehicles that have an oil leak shortly after a cold start when extremely low ambient temperatures are present. Technician will need to clean the area of the oil leak, clean and dry the PCV hoses, and replace the oil fill cap with part number 12589430.
ENGINE AND ENGINE COOLING10
Manufacturer communication2000–2006 GMC YUKON DENALI ・ 2023-04-12(4 earlier editions of this document folded here)
ACDelco Spin-On Oil Filter Torque Specification Notification
1Fault
- An oil leak from underneath the front of the vehicle after an earlier oil service; the leak can take several thousand miles to appear.
2Finding the cause
Possible causes
- The oil may be leaking from between the oil filter gasket and the mounting surface.
Steps to confirm (in the document’s order)
- The filter may be very easy to remove, sometimes by hand.
3Correction
Repair
- Lubricate the new oil filter gasket with clean engine oil.
- Install the oil filter 1 full turn after the gasket contacts the sealing surface on the filter mounting flange.
Read the sentences of the record
From the manufacturer’s document
- Applies to:Applies to all passenger cars and trucks, model years 2000 to 2024.
- Condition:An oil leak from underneath the front of the vehicle after an earlier oil service; the leak can take several thousand miles to appear.
- Cause:The oil may be leaking from between the oil filter gasket and the mounting surface.
- Confirm:The filter may be very easy to remove, sometimes by hand.
- Repair:Lubricate the new oil filter gasket with clean engine oil.
- Repair:Install the oil filter 1 full turn after the gasket contacts the sealing surface on the filter mounting flange.
Open the manufacturer’s document (PDF) ↗ The points above were read from this document.
- Remedy
- This service bulletin provides service information on new torque specification and installation procedure for ACDelco Spin-On Oil Filters.
Manufacturer communication2000–2006 GMC YUKON DENALI ・ 2023-01-06
EVAP Leak Diagnostic Service Bulletin (DTCs P0442/P0455)
1Fault
- The MIL is illuminated, and DTC P0442 (EVAP small leak detected) and/or P0455 (EVAP large leak detected) may be set in the ECM.
2Finding the cause
Possible causes
- P0455 sets because of a large leak or a purge blockage: an unseated tube connection, a damaged tube, a canister vent valve stuck open, or a purge valve stuck closed.
- P0442 sets because of a small leak, which can come from a purge valve stuck open or a canister vent valve stuck open.
Steps to confirm (in the document’s order)
- Inspect every purge connection for proper installation, and look along the lines for damage or wear; if damage is seen, confirm it with the smoke test.
- Some leaks show only under pressure and some only under vacuum, so check both ways; cycling the purge and vent solenoids with GDS2 while inspecting may show a sticking valve.
- Critical connections to check include: purge tube to purge valve (at the intake manifold), purge tube to chassis EVAP line (rear of the engine, near the transmission), chassis EVAP line to canister, and fuel tank load line to canister.
- Also check the vent valve line at the vent valve, the fuel tank load line jumper connection near the fuel tank, and that the fuel tank cap is closed properly.
- If all connections are good, check the vent valve for a stuck-open position; if the vent valve works correctly, go on to the purge valve.
3Correction
Parts
- No parts are required for this repair.
Caution
- For diagnostic instructions, DTC information and required tools, always follow the service information document for the vehicle and DTC being worked on.
Read the sentences of the record
From the manufacturer’s document
- Applies to:This bulletin only applies to vehicles with gasoline engines.
- Condition:The MIL is illuminated, and DTC P0442 (EVAP small leak detected) and/or P0455 (EVAP large leak detected) may be set in the ECM.
- Cause:P0455 sets because of a large leak or a purge blockage: an unseated tube connection, a damaged tube, a canister vent valve stuck open, or a purge valve stuck closed.
- Cause:P0442 sets because of a small leak, which can come from a purge valve stuck open or a canister vent valve stuck open.
- Confirm:Inspect every purge connection for proper installation, and look along the lines for damage or wear; if damage is seen, confirm it with the smoke test.
- Confirm:Some leaks show only under pressure and some only under vacuum, so check both ways; cycling the purge and vent solenoids with GDS2 while inspecting may show a sticking valve.
- Confirm:Critical connections to check include: purge tube to purge valve (at the intake manifold), purge tube to chassis EVAP line (rear of the engine, near the transmission), chassis EVAP line to canister, and fuel tank load line to canister.
- Confirm:Also check the vent valve line at the vent valve, the fuel tank load line jumper connection near the fuel tank, and that the fuel tank cap is closed properly.
- Confirm:If all connections are good, check the vent valve for a stuck-open position; if the vent valve works correctly, go on to the purge valve.
- Confirm:Work in this order: EVAP lines properly installed and fully seated; damage on the EVAP lines; vent valve malfunction; purge valve malfunction.
- Parts:No parts are required for this repair.
- Caution:For diagnostic instructions, DTC information and required tools, always follow the service information document for the vehicle and DTC being worked on.
Open the manufacturer’s document (PDF) ↗ The points above were read from this document.
- Remedy
- This service bulletin provides diagnostic tips/steps on testing for possible EVAP leaks in the system to correct a customer concern of an MIL Illuminated with DTCs P0442 and/or P0455 Set.
Manufacturer communication2000–2006 GMC YUKON DENALI ・ 2022-09-07
MIL Illuminated with Fuel Trim and Oxygen Sensor Codes
1Fault
- Leak
- Warning light
- P0101
- P0137 (general documents only)
- P0138 (general documents only)
- P0140 (general documents only)
- P0141
- P0157 (general documents only)
- Customers may comment that the MIL is illuminated.
- Initial diagnosis may show fuel trim and O2 sensor related codes including P0101, P0137, P0138, P0140, P0141, P0157, P0158, P0160 and P0161.
- The listed codes also include P0171, P0174, P0420, P0430, P1174 and P1175.
2Finding the cause
Possible causes
- These methods find small leaks around the O2 sensor embossments and slight cracks in an intake plenum or gasket.
Steps to confirm (in the document’s order)
- If normal SI diagnostics do not lead to a resolution and an intake vacuum leak or exhaust leak is suspected, use the GE-52250 Variable Pressure Leak Detector (preferred), the J-41416 ultrasonic leak tester, or possibly soapy water with low pressure air into the tailpipe to find the leak.
- For an intake leak, introduce the smoke into the brake booster hose or the oil dipstick tube; soapy water can be sprayed near the gasket, seams and all vacuum nipples.
- For an exhaust leak, put the hose with smoke or air into the tailpipe sealed with shop towels, then spray soapy water around seals, seams and bosses.
3Correction
Parts
- No parts are required for this repair.
Caution
- All of these tests are much more effective if the throttle body is covered or sealed.
Read the sentences of the record
From the manufacturer’s document
- Applies to:Applies to Buick, Cadillac, Chevrolet and GMC passenger cars and trucks, model years 2000 to 2022, gasoline engines only.
- Condition:Customers may comment that the MIL is illuminated.
- Condition:Initial diagnosis may show fuel trim and O2 sensor related codes including P0101, P0137, P0138, P0140, P0141, P0157, P0158, P0160 and P0161.
- Condition:The listed codes also include P0171, P0174, P0420, P0430, P1174 and P1175.
- Confirm:If normal SI diagnostics do not lead to a resolution and an intake vacuum leak or exhaust leak is suspected, use the GE-52250 Variable Pressure Leak Detector (preferred), the J-41416 ultrasonic leak tester, or possibly soapy water with low pressure air into the tailpipe to find the leak.
- Caution:All of these tests are much more effective if the throttle body is covered or sealed.
- Confirm:For an intake leak, introduce the smoke into the brake booster hose or the oil dipstick tube; soapy water can be sprayed near the gasket, seams and all vacuum nipples.
- Confirm:For an exhaust leak, put the hose with smoke or air into the tailpipe sealed with shop towels, then spray soapy water around seals, seams and bosses.
- Cause:These methods find small leaks around the O2 sensor embossments and slight cracks in an intake plenum or gasket.
- Parts:No parts are required for this repair.
Open the manufacturer’s document (PDF) ↗ The points above were read from this document.
- Remedy
- This bulletin provides information on tools available to find an intake vacuum leak or exhaust leak to correct a condition of MIL Illuminated with Multiple Fuel Trim and/or Oxygen Sensor Codes Set.
Owner complaint2005 GMC YUKON DENALI ・ 2010-12-15
Exhaust manifold bolts break on 4.8, 5.3, 5.7, 6.0 liter engines
1Fault
2Finding the cause
3Correction
Not stated
Read the sentences of the record
- Cause
- 1999 TO PRESENT 4.8,5.3 5.7,6.0 LITER ENGINES FROM GM HAVE INFERIOR GRADE METAL IN THE EXHAUST MANIFOLD BOLTS CAUSING THEM TO BREAK.
Manufacturer communication2003–2005 GMC YUKON ・ 2005-11-07
Oil Leak at Extreme Cold Temperatures Communication
1Fault
2Finding the cause
Not stated
3Correction
OIL LEAK UNDER EXTREME COLD TEMPERATURES (-34 DEGREES C) (-30 DEGREES F) OR COLDER). *TT
Read the sentences of the record
- Remedy
- OIL LEAK UNDER EXTREME COLD TEMPERATURES (-34 DEGREES C) (-30 DEGREES F) OR COLDER). *TT
Manufacturer communication2001–2004 GMC YUKON ・ 2004-11-05
Oil Pan or Oil Cooler Line Leak
1Fault
2Finding the cause
3Correction
Read the sentences of the record
- Remedy
- OIL PAN OR OIL COOLER LINE LEAK. *SC
Manufacturer communication2003–2004 GMC YUKON ・ 2004-08-23
Engine Cylinder Head Cup Plug Coolant Leak
1Fault
2Finding the cause
3Correction
Read the sentences of the record
- Remedy
- ENGINE CYLINDER HEAD CUP PLUG COOLANT LEAK. *MJ
Manufacturer communication2001–2004 GMC YUKON ・ 2004-07-15
Oil Pan or Oil Cooler Line Leak on V-8 Engines
1Fault
2Finding the cause
3Correction
OIL PAN OR OIL COOLER LINE LEAK ON GEN III V-8 ENGINES EQUIPPED WITH AN OIL COOLER. *TT
Read the sentences of the record
- Remedy
- OIL PAN OR OIL COOLER LINE LEAK ON GEN III V-8 ENGINES EQUIPPED WITH AN OIL COOLER. *TT
Owner complaint2005 GMC YUKON DENALI ・ 2010-08-03
Broken exhaust manifold bolts on 2005 Yukon Denali 6L engine
1Fault
2Finding the cause
3Correction
Not stated
Read the sentences of the record
- Fault
- 2 BOLTS HOLDING THE MANIFOLD TO THE 6 L ENGINE OF MY YUKON DENALI 2005 ARE BROKEN.
Owner complaint2001 GMC YUKON ・ 2006-03-20
Transmission seal failure with fuel leak and other defects
1Fault
2Finding the cause
3Correction
Not stated
Read the sentences of the record
- Fault
- THE RADIATOR SEAL FAILED. (1 more)
ENGINE6
Manufacturer communication2000–2006 GMC YUKON DENALI ・ 2018-09-17(4 earlier editions of this document folded here)
Engine Block Cylinder Bore Damage Preliminary Information
1Fault
- The tip is for cases where cylinder bore damage, scoring or out of round is suspected as the cause of engine oil consumption, misfire, cylinder leakage or blow by.
2Finding the cause
Possible causes
- Dirt intrusion: if the air filtering system has been compromised the engine wears out very quickly; grit is found in the intake runners and the bores look lightly sand blasted.
- Catalytic converter failure: if the converter brick is broken, its dust can be drawn back into the engine, and the bores look sand blasted.
Steps to confirm (in the document’s order)
- The peak to valley specification for the crosshatch is .65-2.8 microns.
- Cylinder damage or scoring: the cylinder walls have grooves deep enough to catch with a fingernail.
- An out of round bore has areas where the crosshatch is missing or worn in different sections of the bore.
- If crosshatch is present all the way around the bore from top to bottom, the bore is not out of round.
3Correction
Repair
- With converter dust, the back cylinders go first if caught early; otherwise there is no crosshatch left and the engine needs to be replaced.
Caution
- GM has not had an issue with cylinders being machined out of round for any engine family in recent history.
- A cylinder suspected of being oversize can only be confirmed by checking with an air gauge at the engine plant.
Read the sentences of the record
From the manufacturer’s document
- Applies to:Applies to all brands, models and engines, 2000 - 2019.
- Condition:The tip is for cases where cylinder bore damage, scoring or out of round is suspected as the cause of engine oil consumption, misfire, cylinder leakage or blow by.
- Caution:GM has not had an issue with cylinders being machined out of round for any engine family in recent history.
- Confirm:The peak to valley specification for the crosshatch is .65-2.8 microns.
- Confirm:Cylinder damage or scoring: the cylinder walls have grooves deep enough to catch with a fingernail.
- Confirm:An out of round bore has areas where the crosshatch is missing or worn in different sections of the bore.
- Confirm:If crosshatch is present all the way around the bore from top to bottom, the bore is not out of round.
- Cause:Dirt intrusion: if the air filtering system has been compromised the engine wears out very quickly; grit is found in the intake runners and the bores look lightly sand blasted.
- Cause:Catalytic converter failure: if the converter brick is broken, its dust can be drawn back into the engine, and the bores look sand blasted.
- Repair:With converter dust, the back cylinders go first if caught early; otherwise there is no crosshatch left and the engine needs to be replaced.
- Caution:A cylinder suspected of being oversize can only be confirmed by checking with an air gauge at the engine plant.
Open the manufacturer’s document (PDF) ↗ The points above were read from this document.
- Remedy
- This Preliminary Information communication provides information to the technician about engine block of possible cylinder bore damage, scoring or out of round as the possible cause of engine oil consumption, misfire, cylinder leakage or blow by. Technician will need to inspect the engine for Cylinder damage or scoring, An out of round cylinder bore, Dirt intrusion, and Catalytic Converter failure.
Owner complaint2000 GMC YUKON ・ 2014-07-08
Cylinder head cracking and coolant leak causing engine failure
1Fault
2Finding the cause
3Correction
Not stated
Read the sentences of the record
- Fault
- THE CAR HAS BEEN LEAKING COOLANT FOR OVER A YEAR AND CAUSED MAJOR ENGINE FAILURE.
- Cause
- VEHICLE WAS SHIPPED WITH HEADS THAT WOULD CRACK OVER TIME.
Owner complaint2004 GMC YUKON DENALI ・ 2013-07-29
Ticking noise from engine compartment on start up
1Fault
2Finding the cause
3Correction
Not stated
Read the sentences of the record
- Fault
- UPON START UP OF VEHICLE, A TICKING NOISE WAS HEARD FROM THE ENGINE COMPARTMENT.
- Cause
- UPON INVESTIGATION ON THE INTERNET, THIS IS A VERY COMMON ISSUE WITH THE GM 6.0 LITER AND OTHER ENGINES.
- Inspection
- UPON INSPECTION, FOUND THAT THE LEFT REAR EXHAUST BOLT ON THE EXHAUST MANIFOLD HAD BROKEN OFF CAUSING EXHAUST LEAK.
Owner complaint2006 GMC YUKON DENALI ・ 2017-10-25
Exhaust leak due to broken bolt on passenger side
1Fault
2Finding the cause
3Correction
Not stated
Read the sentences of the record
- Fault
- EXHAUST LEAK BOLT BROKEN PASSENGER SIDE
Owner complaint2003 GMC YUKON ・ 2015-03-06
Broken exhaust manifold bolts causing exhaust leak and engine light
1Fault
2Finding the cause
3Correction
Not stated
Read the sentences of the record
- Fault
- NOW INSTEAD OF 6 BOLTS I HAVE 4 BOLTS.
Owner complaint2003 GMC YUKON DENALI ・ 2014-02-24
Engine oil leakage at rear crankshaft seal and plate
1Fault
2Finding the cause
3Correction
Not stated
Read the sentences of the record
- Fault
- ENGINE LEAKING OIL REAR CRANK SEAL AND PLATE.
Showing 22 of the 32 you can open. Narrow the search to see the rest.