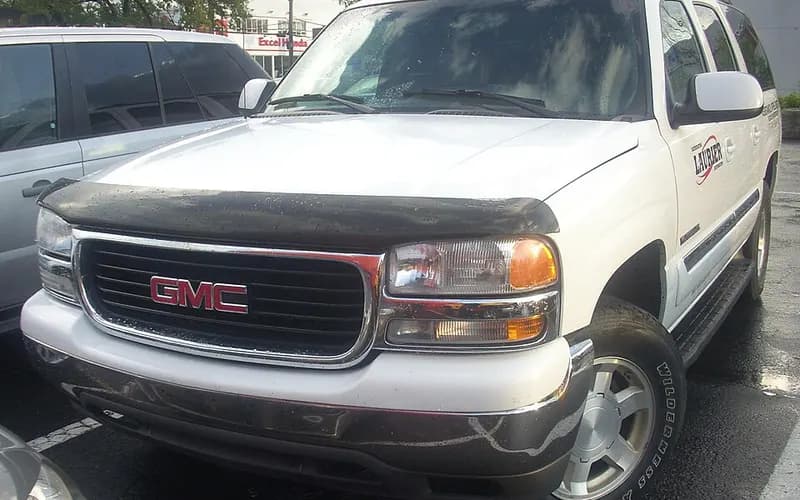
GMC Yukon XL 2000–2006
Common on this vehicle:Gauge or instrument faultLights (headlights, turn signals)LeakAir conditioning or heater
Record by record
26 records state a cause or a remedy. Each record is shown as short labels in the order fault → finding the cause → correction. Press a label to narrow to the records that state it.
Read the records one by one (13)
Known issuesInstrument panel cluster gauges stick, flutter or stop working1
Manufacturer communication2003–2004 GMC YUKON XL ・ 2008-01-10
Cadillac, Chevrolet, GMC instrument cluster gauge needle function
1Fault
2Finding the cause
Not stated
3Correction
What the documents say to do
Instrument panel cluster gauges stick, flutter or stop workingRepair
- Dealers replace the instrument panel cluster after verifying the condition.
Read the sentences of the record
- Remedy
- CADILLAC CHEVROLET GMC SERVICE CAMPAIGN: SEE DOCUMENT SEARCH BUTTON FOR OWNER LETTER. INSTRUMENT PANEL CLUSTER GAUGE NEEDLE FUNCTION MAY CAUSE INACCURATE READINGS ON SOME 2003-2004 CADILLAC, CHEVROLET, AND GMC VEHICLES. *NJ UPDATED 2/5/08. *NJ UPDATED 9/5/08. *PE UPDATED 11/4/08. *PE
Known issuesVehicle body tilt or lean left / right (torsion bar front suspension)1
Manufacturer communication2000–2006 GMC YUKON XL ・ 2017-08-15
Vehicle Lean Preliminary Information
1Fault
- The procedure is for customer complaints of the vehicle leaning left or right, whether the lean appears in the front, the rear, or both ends.
2Finding the cause
Steps to confirm (in the document’s order)
- Measure the fender wheel-opening heights, front and rear, to quantify the lean.
- P height and R height are each the distance from the ground to the highest point of the wheel opening, measured through the center of the wheel.
- If the left-to-right difference in P and/or R height is 1/2 inch (12 mm) or less, no repairs are suggested because the vehicle is within specification; if it exceeds 1/2 inch (12 mm), follow one of the three diagnostics.
3Correction
Repair
- Generally the stance can be adjusted with the torsion bar adjuster bolts.
- If Z height is out of spec and the D height difference is greater than 1/2 (12 mm), adjust Z height until it is within spec and the P and R height differences are less than 1/2 inch (12 mm).
- If adjustment is not possible, check the front eye of the rear leaf springs for matching color-coded tape or paint; if the two sides differ, switch the springs side to side, and if they match, replace the leaf spring on the lower side only.
- After all adjustments are done, perform a front-end alignment and check headlight aim.
Caution
- Before measuring, set the tire pressures to the pressure shown on the certification label.
- Before measuring, check the fuel level and add weight if necessary to simulate a full tank.
- The P and R heights are not set at the factory, and no specification is given for them.
Read the sentences of the record
From the manufacturer’s document
- Applies to:The model list includes the 1999 - 2006 GMC Yukon, Yukon XL, Yukon Denali and Yukon Denali XL.
- Applies to:It applies to vehicles with torsion bar front suspension.
- Condition:The procedure is for customer complaints of the vehicle leaning left or right, whether the lean appears in the front, the rear, or both ends.
- Confirm:Measure the fender wheel-opening heights, front and rear, to quantify the lean.
- Confirm:P height and R height are each the distance from the ground to the highest point of the wheel opening, measured through the center of the wheel.
- Caution:Before measuring, set the tire pressures to the pressure shown on the certification label.
- Caution:Before measuring, check the fuel level and add weight if necessary to simulate a full tank.
- Confirm:If the left-to-right difference in P and/or R height is 1/2 inch (12 mm) or less, no repairs are suggested because the vehicle is within specification; if it exceeds 1/2 inch (12 mm), follow one of the three diagnostics.
- Repair:Generally the stance can be adjusted with the torsion bar adjuster bolts.
- Repair:If Z height is out of spec and the D height difference is greater than 1/2 (12 mm), adjust Z height until it is within spec and the P and R height differences are less than 1/2 inch (12 mm).
- Repair:If adjustment is not possible, check the front eye of the rear leaf springs for matching color-coded tape or paint; if the two sides differ, switch the springs side to side, and if they match, replace the leaf spring on the lower side only.
- Repair:After all adjustments are done, perform a front-end alignment and check headlight aim.
- Caution:The P and R heights are not set at the factory, and no specification is given for them.
Open the manufacturer’s document (PDF) ↗ The points above were read from this document.
- Remedy
- This Preliminary Information communication provides information to the technician about vehicles that have a lean to the left or right. Technician will need to measure fender wheel-opening heights, front and rear, to quantify vehicle lean. Fender wheel-opening heights are related to, but distinct from, trim height. The front wheel-opening height is known as P height, and the rear wheel-opening height is known as R height. Adjust and heights that are out of specification. After all adjustments are done, perform a front-end alignment and check headlight aim.
ELECTRICAL SYSTEM7
Manufacturer communication2003–2006 GMC YUKON XL DENALI ・ 2023-12-26(5 earlier editions of this document folded here)
Speedometer Needle Accuracy Information
1Fault
- A customer may say the speedometer needle appears inaccurate.
2Finding the cause
Possible causes
- The speedometer needle is driven electrically by a stepper motor and some variation in accuracy is possible.
- Tire size, tread life and inflation may cause some variation in the readings.
Steps to confirm (in the document’s order)
- Digital readouts such as the "Digital Speedometer" on the DIC read the Vehicle Speed Sensor (VSS) directly and are much more accurate.
- The specification for needle accuracy is +/- 2 MPH (= 3.22 km/h) at any given speed when looking straight at the needle.
3Correction
Read the sentences of the record
From the manufacturer’s document
- Applies to:Applies to 2003-2015 GMC Sierra and Yukon models (note: the Yukon years run later than the years this service covers).
- Condition:A customer may say the speedometer needle appears inaccurate.
- Cause:The speedometer needle is driven electrically by a stepper motor and some variation in accuracy is possible.
- Confirm:Digital readouts such as the "Digital Speedometer" on the DIC read the Vehicle Speed Sensor (VSS) directly and are much more accurate.
- Cause:Tire size, tread life and inflation may cause some variation in the readings.
- Confirm:The specification for needle accuracy is +/- 2 MPH (= 3.22 km/h) at any given speed when looking straight at the needle.
Open the manufacturer’s document (PDF) ↗ The points above were read from this document.
- Remedy
- Speedometer Needle Accuracy Information.
Manufacturer communication2003–2006 GMC YUKON XL DENALI ・ 2023-10-18(1 earlier editions of this document folded here)
IPC odometer programming method notification
1Fault
- It is a reference guide for identifying which odometer programming method to use after replacing the instrument panel cluster (IPC).
2Finding the cause
Not stated
3Correction
Repair
- The table lists the 2003-2006 Yukon with the odometer value stored in the IPC and SPS as the programming method.
- The SPS method is IPC reprogramming and setup using the service programming system (SPS).
Caution
- Vehicles not listed in the document need to follow the SPS Programming for Odometer.
- Stable battery voltage is critical during programming; any fluctuation, spiking, over voltage or loss of voltage will interrupt it.
- Install the EL-49642 SPS Programming Support Tool (GM Dealer Equipment Item #PSC-550) to maintain system voltage; if not available, connect a fully charged 12V jumper or booster pack disconnected from the AC supply, and do not connect a battery charger.
Read the sentences of the record
From the manufacturer’s document
- Applies to:The bulletin is addressed to 2020 and prior GM passenger cars and trucks sold in the U.S. and Canada only.
- Condition:It is a reference guide for identifying which odometer programming method to use after replacing the instrument panel cluster (IPC).
- Repair:The table lists the 2003-2006 Yukon with the odometer value stored in the IPC and SPS as the programming method.
- Repair:The SPS method is IPC reprogramming and setup using the service programming system (SPS).
- Caution:Vehicles not listed in the document need to follow the SPS Programming for Odometer.
- Caution:Stable battery voltage is critical during programming; any fluctuation, spiking, over voltage or loss of voltage will interrupt it.
- Caution:Install the EL-49642 SPS Programming Support Tool (GM Dealer Equipment Item #PSC-550) to maintain system voltage; if not available, connect a fully charged 12V jumper or booster pack disconnected from the AC supply, and do not connect a battery charger.
Open the manufacturer’s document (PDF) ↗ The points above were read from this document.
- Remedy
- This informational bulletin provides information for the IPC odometer programming method quick reference guide.
Manufacturer communication2003–2006 GMC YUKON XL DENALI ・ 2021-04-16
IPC Odometer Programming Method Quick Reference
1Fault
2Finding the cause
Not stated
3Correction
Read the sentences of the record
- Remedy
- IPC Odometer Programming Method Quick Reference Guide
Manufacturer communication2003–2006 GMC YUKON XL ・ 2018-05-21(1 earlier editions of this document folded here)
Radio and Instrument Cluster Warranty Claims
1Fault
- Radios and instrument panel clusters have been returned with physical damage that makes problem analysis difficult and the root cause impossible to determine.
2Finding the cause
Not stated
3Correction
Read the sentences of the record
From the manufacturer’s document
- Applies to:Applies to 2013 and prior GM passenger cars and light duty trucks.
- Condition:Radios and instrument panel clusters have been returned with physical damage that makes problem analysis difficult and the root cause impossible to determine.
Open the manufacturer’s document (PDF) ↗ The points above were read from this document.
- Remedy
- This informational bulletin provides information regarding the inappropriate warranty claims submitted for damaged radios and instrument panel clusters, provides exampls on whats an acceptable for warranty and whats not
Manufacturer communication2000–2006 GMC YUKON XL ・ 2017-12-14
Inaccurate Odometer Reading – Preliminary Information
1Fault
- A customer may say the odometer appears inaccurate compared with a known distance traveled.
2Finding the cause
Steps to confirm (in the document’s order)
- Use a hand-held GPS unit to test the odometer.
- On a straight road over a mile long, mark the GPS waypoint when the odometer (not the trip odometer) rolls over a digit.
- Confirm that the original size tires and wheels are mounted and that the axle ratio is as specified on the SPID label and unmodified.
- If those are correct and the odometer is beyond the limit, consider the relationship between the VSS and the reluctor on the transmission output shaft.
- Closely inspect the associated wiring and any connectors in the circuits.
3Correction
Repair
- Finally, it may be necessary to exchange the IPC with a replacement unit.
Caution
- Generally a tolerance of plus or minus 4% is allowed.
- Do not compare with another vehicle or with the trip odometer.
Read the sentences of the record
From the manufacturer’s document
- Applies to:Applies to all brands and models, model years 2000 - 2018.
- Condition:A customer may say the odometer appears inaccurate compared with a known distance traveled.
- Caution:Generally a tolerance of plus or minus 4% is allowed.
- Confirm:Use a hand-held GPS unit to test the odometer.
- Confirm:On a straight road over a mile long, mark the GPS waypoint when the odometer (not the trip odometer) rolls over a digit.
- Caution:Do not compare with another vehicle or with the trip odometer.
- Confirm:Confirm that the original size tires and wheels are mounted and that the axle ratio is as specified on the SPID label and unmodified.
- Confirm:If those are correct and the odometer is beyond the limit, consider the relationship between the VSS and the reluctor on the transmission output shaft.
- Confirm:Closely inspect the associated wiring and any connectors in the circuits.
- Repair:Finally, it may be necessary to exchange the IPC with a replacement unit.
Open the manufacturer’s document (PDF) ↗ The points above were read from this document.
- Remedy
- This Preliminary Information communication provides information to the technician about vehicle's odometer appears to be inaccurate relative to a known distance traveled. Technician should obtain a hand-held GPS unit to test the odometer. If a hand held GPS unit is not available, the only other option is to verify the miles traveled using a surveyor's wheel or a dynamometer.
Manufacturer communication2000–2006 GMC YUKON XL ・ 2017-08-15
Instrument Panel Cluster Mileage Programming Information
1Fault
2Finding the cause
Not stated
3Correction
Repair
- When the odometer cannot be set to the actual vehicle mileage, it must be set at zero and a label affixed to the driver's door frame by the service agent.
Read the sentences of the record
From the manufacturer’s document
- Applies to:Applies to 2014 and prior GM passenger cars and trucks.
- Repair:When the odometer cannot be set to the actual vehicle mileage, it must be set at zero and a label affixed to the driver's door frame by the service agent.
Open the manufacturer’s document (PDF) ↗ The points above were read from this document.
- Remedy
- This Preliminary Information communication provides information to the technician that after replacing the Instrument Panel Cluster the exchange center is unable to program the actual mileage on the odometer or the actual mileage is unknown. Dealer will need to follow dealer to the General Motors service policies and procedures manual section 3.2.4 odometer servicing.
Manufacturer communication2003–2004 GMC YUKON XL ・ 2008-11-06
Instrument Panel Gauge Needles Condition
1Fault
2Finding the cause
Not stated
3Correction
Read the sentences of the record
- Remedy
- CADILLAC CHEVROLET GMC SERVICE CAMPAIGN: SEE DOCUMENT SEARCH BUTTON FOR OWNER LETTER. SOME VEHICLES COULD DEVELOP A CONDITION WHERE ONE OR MORE OF THE INSTRUMENT PANEL GAUGE NEEDLES MAY STICK, FLUTTER, OR BECOME INOPERATIVE. CSC LETTER RECEIVED. UPDATED 11/6/08. *PE
EXTERIOR LIGHTING4
Manufacturer communication2001–2006 GMC YUKON XL DENALI ・ 2024-01-19(1 earlier editions of this document folded here)
Headlamp, Tail Lamp, License Lamp or Fog/Driving Lamp Damage
1Fault
2Finding the cause
Possible causes
- A variety of chemicals can cause crazing or cracking of the polycarbonate lens.
- Bulbs with a higher output than original equipment run hotter, and the excess heat can melt the socket, housing or lens.
Steps to confirm (in the document’s order)
- Broken mounting tabs, rear housing fractures and loose components inside the lamp assembly are evidence of impact damage.
3Correction
Repair
- When servicing any exterior lighting assembly, transfer any electrical connection seals to the new part.
Caution
- Clean exterior lamps and lenses only with lukewarm or cold water, a soft cloth and a car washing soap.
- Do not let a shop mat or fender cover drape over a headlamp while the DRL or headlamps are on; the lens may craze or deform.
Read the sentences of the record
From the manufacturer’s document
- Applies to:Applies to 2024 and prior GM passenger cars and trucks.
- Cause:A variety of chemicals can cause crazing or cracking of the polycarbonate lens.
- Caution:Clean exterior lamps and lenses only with lukewarm or cold water, a soft cloth and a car washing soap.
- Caution:Do not let a shop mat or fender cover drape over a headlamp while the DRL or headlamps are on; the lens may craze or deform.
- Confirm:Broken mounting tabs, rear housing fractures and loose components inside the lamp assembly are evidence of impact damage.
- Cause:Bulbs with a higher output than original equipment run hotter, and the excess heat can melt the socket, housing or lens.
- Repair:When servicing any exterior lighting assembly, transfer any electrical connection seals to the new part.
Open the manufacturer’s document (PDF) ↗ The points above were read from this document.
- Remedy
- This informational bulletin provides information for dealers/technicians on Headlamp, Tail Lamp, License Lamp or Fog/Driving Lamp Damage.
Manufacturer communication2000–2006 GMC YUKON XL DENALI ・ 2023-02-28(5 earlier editions of this document folded here)
Exterior Lamp Condensation and Water Leaks Service Bulletin
1Fault
- Exterior lamps such as cornering, turn signal, backup, head or tail lamps may show very small water droplets, a fine mist or white fog (condensation) on the inside of the lens.
2Finding the cause
Possible causes
- Condensation occurs when the air inside the lamp assembly reaches the dew point through atmospheric changes.
- Non-OE lamps are most often presented as holding moisture or with inoperative bulbs from corroded electrical connections; they appear to be installed as part of a collision repair.
Steps to confirm (in the document’s order)
- Normal: the mist is located mainly in the lens corners near the vents and does not cover more than half the lens surface.
- Normal: the moisture clears when the vehicle is parked in a dry environment or driven with the lights on.
- Leak: water has accumulated in the bottom of the lamp assembly.
- Leak: the condition will not clear when the vehicle is parked in a dry environment or driven with the lights on.
3Correction
Repair
- A condition covering more than half the surface of the lamp lens indicates the need to service the lens or lamp assembly.
Caution
- Depending on the lamp and the atmospheric conditions, the time needed to clear the lamp may vary from 2 to 6 hours.
- If the normal conditions are noted, advise the customer that replacing the lamp assembly may not correct the condition.
- Moisture that "comes and goes" is considered a normal condition.
Read the sentences of the record
From the manufacturer’s document
- Applies to:Applies to 2023 and prior GM passenger cars and trucks, including medium duty trucks and excluding LCF medium duty trucks.
- Condition:Exterior lamps such as cornering, turn signal, backup, head or tail lamps may show very small water droplets, a fine mist or white fog (condensation) on the inside of the lens.
- Cause:Condensation occurs when the air inside the lamp assembly reaches the dew point through atmospheric changes.
- Caution:Depending on the lamp and the atmospheric conditions, the time needed to clear the lamp may vary from 2 to 6 hours.
- Confirm:Normal: the mist is located mainly in the lens corners near the vents and does not cover more than half the lens surface.
- Confirm:Normal: the moisture clears when the vehicle is parked in a dry environment or driven with the lights on.
- Caution:If the normal conditions are noted, advise the customer that replacing the lamp assembly may not correct the condition.
- Repair:A condition covering more than half the surface of the lamp lens indicates the need to service the lens or lamp assembly.
- Confirm:Leak: water has accumulated in the bottom of the lamp assembly.
- Confirm:Leak: the condition will not clear when the vehicle is parked in a dry environment or driven with the lights on.
- Caution:Moisture that "comes and goes" is considered a normal condition.
- Cause:Non-OE lamps are most often presented as holding moisture or with inoperative bulbs from corroded electrical connections; they appear to be installed as part of a collision repair.
Open the manufacturer’s document (PDF) ↗ The points above were read from this document.
- Remedy
- This service bulletin provides information for dealers/technicians on Exterior Lamp Condensation and Water Leaks and Replacement Guidelines.
Manufacturer communication2003–2006 GMC YUKON XL DENALI ・ 2007-11-02
Turn Signal in Outside Rearview Mirror Does Not Illuminate
1Fault
2Finding the cause
Not stated
3Correction
Read the sentences of the record
- Remedy
- TURN SIGNAL IN CAMPER STYLE OUTSIDE REARVIEW MIRROR (RPO DPN) DOES NOT ILLUMINATE TURN SIGNAL FLASH (REPLACE UPPER MIRROR GLASS) *NJ
Manufacturer communication2003–2004 GMC YUKON XL ・ 2004-05-04
Hazard Light Flashes When Turn Signal Applied
1Fault
2Finding the cause
Not stated
3Correction
Read the sentences of the record
- Remedy
- HAZARD LIGHT FLASHES WHEN TURN SIGNAL APPLIED. *MR
Showing 13 of the 26 you can open. Narrow the search to see the rest.
1 owner complaints have no classified sentences yet, so their causes and repairs are not picked out. Their text is in the list of records.