
GMC Yukon 2000–2006
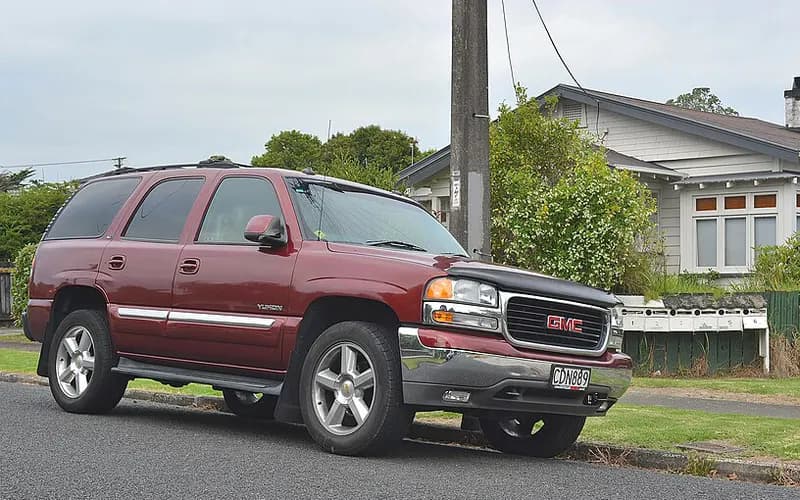
Common on this vehicle:Warning lightLeakNoiseVibration or shudderMisfire or rough idleGauge or instrument faultAir conditioning or heaterCorrosion or rust
Record by record
16 records state a cause or a remedy. Each record is shown as short labels in the order fault → finding the cause → correction. Press a label to narrow to the records that state it.
A ribbon is as wide as the records that state both of its ends (only the commonest are drawn). A record that names several symptoms or components runs through each. Orange is records that say the fault came back or was not fixed. Results come from owners’ reports only; one that does not say is “result not stated”. None of this is a likelihood of a cause or a rate at which work succeeds.
Read the records one by one (11)
Known issuesHVAC blower motor resistor module / connector overheating2
Recall2003–2006 GMC YUKON ・ 2011-02-21
HVAC Blower Motor Resistor Module Overheating
1Fault
2Finding the cause
3Correction
Not stated
What the documents say to do
HVAC blower motor resistor module / connector overheatingRepair
- Dealers install a new blower motor resistor and resistor module connector.
- Cut the wires back far enough to remove any melted insulation.
Caution
- The connector must be replaced even if it was replaced in an earlier repair.
Read the sentences of the record
- Cause
- On certain vehicles, the interface between the electrical terminals of the Heating, Ventilation, and Air Conditioning (HVAC) blower relay resistor module and the wiring connector (which powers the module) may be incapable of conducting higher current levels for sustained periods of operation. In addition, moisture and other contaminants (such as road de-icing materials) may enter the fresh air intake plenum and contact the internal circuit of the module or corrode the terminals. These conditions may cause the relay resistor module or wiring connector to overheat, causing various symptoms such as: the HVAC blower may not function on certain or all blower speed settings; a burning-plastic smell or smoke may be present in the vehicle, or; the HVAC blower may run continually with the ignition in the OFF position. These warning signs could, in certain instances, be leading indicators of an impending vehicle fire, which could result in property damage and/or personal injury. Correction: Owners will be provided with additional warranty coverage for the blower motor resistor module/wiring connector overheating condition. Under this "special warranty coverage", should this condition occur within 10 years or 240,000 km from first vehicle registration, dealers will install a replacement blower motor resistor and resistor module connector.
Manufacturer communication2003–2006 GMC YUKON ・ 2011-06-27
General Motors HVAC Blower Service Campaign
1Fault
2Finding the cause
3Correction
What the documents say to do
HVAC blower motor resistor module / connector overheatingRepair
- Dealers install a new blower motor resistor and resistor module connector.
- Cut the wires back far enough to remove any melted insulation.
Caution
- The connector must be replaced even if it was replaced in an earlier repair.
Read the sentences of the record
- Remedy
- GENERAL MOTORS SERVICE CAMPAIGN: SEE DOCUMENT SEARCH BUTTON FOR OWNER LETTER. THE HVAC BLOWER MAY NOT WORK AT CERTAIN FUNCTIONS OR MAY BECOME INOPERABLE. THERE COULD BE A BURNING SMELL OR SMOKE. *RM UPDATED 4/6/12. *PE
Known issuesHydro-boost brake assist and power steering share one hydraulic supply (four campaigns)2
Recall2006 GMC YUKON ・ 2005-05-10
1Fault
- Under extreme steering maneuvers, such as turning the steering wheel fully left or right while braking, the hose may fracture and leak fluid; power steering assist would be lost and steering effort would increase.
- On vehicles with hydro-boost power brakes it could also result in loss of power brake assist and increased braking effort; if the fluid sprays onto hot engine parts, an engine compartment fire could occur.
- With the Hydroboost braking system, braking assist will be limited to the reserve power assist system; the braking systems on vehicles without Hydroboost are unaffected.
2Finding the cause
Possible causes
- The high pressure power-steering hose was manufactured with an incorrect compound, making it susceptible to high pressure failure at the elevated fluid temperatures and pressures that can occur during simultaneous braking and steering inputs.
Steps to confirm (in the document’s order)
- Inspect and record the date code on the power steering pressure line; it is printed on the hose and repeated approximately every 6 inches (150 mm).
- Vehicles with the hydro-boost system have two hoses to inspect, others only one; the conduit may have to be removed to read the date code.
- The suspect date codes are 07135F-2 and 07145F-2; if the hose carries one of them, it must be replaced.
3Correction
Repair
- If the date code is not one of the listed codes, replace the conduit if applicable; no further action is required.
- For Silverado/Tahoe/Sierra/Yukon/Escalade, hose replacement follows SI documents 756552 (Non Hydro-Boost Pressure line), 651043 (Power Steering Pump to Hydro-Boost Pressure line) and 651019 (Hydro-Boost to Steering Gear Pressure Line).
Parts
- Less than 10% of the involved vehicles will require hose replacement; if parts are required, the appropriate hose(s) are ordered from GMSPO.
Caution
- This bulletin is a revision to address hoses used to service 1991-2006 vehicles; dealers who ordered these hoses for service are identified in the attachment to the administrative message.
- Vehicle eligibility should be confirmed through GMVIS before beginning recall repairs; not all vehicles within the breakpoints may be involved.
Read the sentences of the record
From the manufacturer’s document
- Applies to:Applies to certain 2005 Chevrolet Corvette, Silverado and GMC Sierra, and 2006 Buick Rainier, Cadillac Escalade, Chevrolet Corvette, Express, Silverado, Tahoe, TrailBlazer, TrailBlazer EXT, GMC Envoy, Envoy XL, Savana, Sierra, Yukon and HUMMER H2.
- Applies to:For the 2006 GMC Yukon the VIN breakpoints are 6R104469 through 6R120468.
- Applies to:Some of the affected hoses were shipped to dealers by GMSPO between July 25, 2005 and August 24, 2005 and could have been used to service 1991-2006 vehicles.
- Cause:The high pressure power-steering hose was manufactured with an incorrect compound, making it susceptible to high pressure failure at the elevated fluid temperatures and pressures that can occur during simultaneous braking and steering inputs.
- Condition:Under extreme steering maneuvers, such as turning the steering wheel fully left or right while braking, the hose may fracture and leak fluid; power steering assist would be lost and steering effort would increase.
- Condition:On vehicles with hydro-boost power brakes it could also result in loss of power brake assist and increased braking effort; if the fluid sprays onto hot engine parts, an engine compartment fire could occur.
- Condition:With the Hydroboost braking system, braking assist will be limited to the reserve power assist system; the braking systems on vehicles without Hydroboost are unaffected.
- Confirm:Inspect and record the date code on the power steering pressure line; it is printed on the hose and repeated approximately every 6 inches (150 mm).
- Confirm:Vehicles with the hydro-boost system have two hoses to inspect, others only one; the conduit may have to be removed to read the date code.
- Confirm:The suspect date codes are 07135F-2 and 07145F-2; if the hose carries one of them, it must be replaced.
- Repair:If the date code is not one of the listed codes, replace the conduit if applicable; no further action is required.
- Repair:For Silverado/Tahoe/Sierra/Yukon/Escalade, hose replacement follows SI documents 756552 (Non Hydro-Boost Pressure line), 651043 (Power Steering Pump to Hydro-Boost Pressure line) and 651019 (Hydro-Boost to Steering Gear Pressure Line).
- Parts:Less than 10% of the involved vehicles will require hose replacement; if parts are required, the appropriate hose(s) are ordered from GMSPO.
- Caution:This bulletin is a revision to address hoses used to service 1991-2006 vehicles; dealers who ordered these hoses for service are identified in the attachment to the administrative message.
- Caution:Vehicle eligibility should be confirmed through GMVIS before beginning recall repairs; not all vehicles within the breakpoints may be involved.
- Cause
- CERTAIN PASSENGER VEHICLES MAY HAVE BEEN BUILT WITH A POWER STEERING HOSE THAT IS NOT TO SPECIFICATION. UNDER EXTREME STEERING MANEUVERS, SUCH AS TURNING THE STEERING WHEEL FULLY TO THE LEFT OR RIGHT WHILE BRAKING, THE HOSE MAY FRACTURE AND LEAK FLUID.
- Remedy
- DEALERS WILL INSPECT THE POWER STEERING HOSE(S) FOR TWO SUSPECT DATE CODES AND REPLACE THEM IF REQUIRED. THE RECALL WILL BEGIN ON OCTOBER 14, 2005. OWNERS MAY CONTACT CHEVROLET AT 1-800-630-2438, GMC AT 1-866-996-9463, BUICK AT 1-866-608-8080, CADILLAC AT 1-866-982-2339, ISUZU AT 1-800-255-6727, OR HUMMER AT 1-800-732-5493.
- Consequence
- IF THIS WERE TO OCCUR, POWER STEERING ASSIST WOULD BE LOST AND INCREASED STEERING EFFORT WOULD BE REQUIRED. ON VEHICLES EQUIPPED WITH HYDRO-BOOST POWER BRAKES, IT COULD ALSO RESULT IN LOSS OF POWER BRAKE ASSIST AND INCREASED BRAKING EFFORT WOULD BE REQUIRED. IF THE POWER STEERING FLUID SPRAY WERE TO SPRAY ONTO HOT ENGINE PARTS, AN ENGINE COMPARTMENT FIRE COULD OCCUR.
Recall2006 GMC YUKON ・ 2005-10-07
Power steering hose fracture risk recall
1Fault
2Finding the cause
3Correction
Not stated
What the documents say to do
Hydro-boost brake assist and power steering share one hydraulic supply (four campaigns)Confirm
- Perform the "Power Steering System Test" found in SI and make any necessary repairs based on system diagnosis.
Repair
- Dealers replace the hydro-boost relief valve.
- Dealers test the hydro-boost assembly for functional operation and replace it if it fails.
Caution
- An inoperative pump raises steering and braking effort but does not completely remove the ability to steer or slow the vehicle.
Read the sentences of the record
- Cause
- Certain vehicles may have been built with a power steering hose that is not to specification. Under extreme steering manoeuvres, such as turning the steering wheel fully to the left or right while braking, the hose may fracture and leak fluid. If this were to occur, power steering assist would be lost and increased steering effort would be required. On vehicles equipped with hydro-boost power brakes, it could also result in loss of power brake assist and increase braking effort would be required. If power steering fluid were to spray onto hot engine parts, an engine compartment fire could occur. Correction: Dealers will inspect the power steering hose(s) for two suspect date codes and replace them if required.
ENGINE AND ENGINE COOLING3
Manufacturer communication2000–2006 GMC YUKON DENALI ・ 2019-03-18
Diagnostic Tip: Using Smoke Machine and Ultrasonic Detector for Air Leaks
1Fault
- Leak
- Smoke or fire
- P0101
- P0137 (general documents only)
- P0138 (general documents only)
- P0140 (general documents only)
- P0141
- P0157 (general documents only)
- The SES light is on, and initial diagnosis may show fuel trim and/or O2 sensor related codes such as P0171, P0174, P0420 and P0430.
2Finding the cause
Steps to confirm (in the document’s order)
- If normal SI diagnostics do not resolve it and an intake vacuum leak or exhaust leak is suspected, the J41413-200 Evaporative System Tester smoke machine, the J-41416 ultrasonic leak tester, or soapy water with low pressure air into the tailpipe may help find the leak.
- For an intake leak, the smoke can be introduced into the brake booster hose or the oil dipstick tube.
- Soapy water can be sprayed near the gasket and seams and on all vacuum nipples.
- For an exhaust leak, a hose into the tailpipe carrying smoke or air, sealed with shop towels, is effective.
- Then spray soapy water around the seals, seams and bosses.
3Correction
Caution
- All of these tests are much more effective if the throttle body is covered/sealed.
Read the sentences of the record
From the manufacturer’s document
- Applies to:Applies to all 2000 - 2019 models with gasoline engines.
- Condition:The SES light is on, and initial diagnosis may show fuel trim and/or O2 sensor related codes such as P0171, P0174, P0420 and P0430.
- Confirm:If normal SI diagnostics do not resolve it and an intake vacuum leak or exhaust leak is suspected, the J41413-200 Evaporative System Tester smoke machine, the J-41416 ultrasonic leak tester, or soapy water with low pressure air into the tailpipe may help find the leak.
- Caution:All of these tests are much more effective if the throttle body is covered/sealed.
- Confirm:For an intake leak, the smoke can be introduced into the brake booster hose or the oil dipstick tube.
- Confirm:Soapy water can be sprayed near the gasket and seams and on all vacuum nipples.
- Confirm:For an exhaust leak, a hose into the tailpipe carrying smoke or air, sealed with shop towels, is effective.
- Confirm:Then spray soapy water around the seals, seams and bosses.
- Confirm:These methods are very good for finding small leaks around the O2 sensor bosses and slight cracks in an intake plenum or gasket.
Open the manufacturer’s document (PDF) ↗ The points above were read from this document.
- Remedy
- This preliminary information document communicates a tip on the way to diagnose possible induction or exhaust air leaks using the evaporative emission cart smoke machine and ultrasonic leak detector tools.
Manufacturer communication2000–2006 GMC YUKON DENALI ・ 2017-08-15(1 earlier editions of this document folded here)
Engine Check Lamp P0442 Evaporative Emissions System Notification
1Fault
- The service engine soon lamp (MIL) is on for DTC P0442, but a leak cannot be verified with the system test in the service information.
2Finding the cause
Steps to confirm (in the document’s order)
- With the scan tool, command the EVAP system CLOSED, start the engine and watch the tank pressure sensor value for about two minutes.
- If the tank pressure value changes (shows vacuum), remove the purge solenoid and pressurize its fuel tank side with the GE 41413-A / J 41413-A tester.
- If the tank pressure value does not change, install the CH-48096 adaptor between the purge line from the canister and the purge solenoid; use no other adaptor or pressurization method.
- With the EVAP system CLOSED, pressurize through the adaptor and let the system stabilize, watching the gauge for at least 5 minutes, then add smoke.
- Look for smoke or UV trace fluid at the purge solenoid, the engine side, the fuel cap or capless fill door, and the canister vent solenoid filter or fresh-air line.
3Correction
Repair
- If smoke passes through the purge solenoid, replace the purge solenoid.
Caution
- After verifying P0442, do not disturb any fuel system component before testing.
- Test pressure must not exceed 13 in H2O (0.5 PSI (= 3.45 kPa)); more can make components perform inaccurately and lead to misdiagnosis.
- A large temperature difference between vehicle, shop and tester seriously affects accuracy; let the vehicle adjust to shop temperature first.
Read the sentences of the record
From the manufacturer’s document
- Applies to:Applies to 2016 and prior passenger cars and trucks.
- Condition:The service engine soon lamp (MIL) is on for DTC P0442, but a leak cannot be verified with the system test in the service information.
- Caution:After verifying P0442, do not disturb any fuel system component before testing.
- Confirm:With the scan tool, command the EVAP system CLOSED, start the engine and watch the tank pressure sensor value for about two minutes.
- Confirm:If the tank pressure value changes (shows vacuum), remove the purge solenoid and pressurize its fuel tank side with the GE 41413-A / J 41413-A tester.
- Repair:If smoke passes through the purge solenoid, replace the purge solenoid.
- Confirm:If the tank pressure value does not change, install the CH-48096 adaptor between the purge line from the canister and the purge solenoid; use no other adaptor or pressurization method.
- Confirm:With the EVAP system CLOSED, pressurize through the adaptor and let the system stabilize, watching the gauge for at least 5 minutes, then add smoke.
- Confirm:Look for smoke or UV trace fluid at the purge solenoid, the engine side, the fuel cap or capless fill door, and the canister vent solenoid filter or fresh-air line.
- Confirm:If smoke testing finds nothing, the leak may exist only under vacuum: use the scan tool Purge/Seal function to pull a vacuum and watch the FTP sensor parameter for vacuum decay.
- Caution:Test pressure must not exceed 13 in H2O (0.5 PSI (= 3.45 kPa)); more can make components perform inaccurately and lead to misdiagnosis.
- Caution:A large temperature difference between vehicle, shop and tester seriously affects accuracy; let the vehicle adjust to shop temperature first.
Open the manufacturer’s document (PDF) ↗ The points above were read from this document.
- Remedy
- This Preliminary Information communication provides information to the technician about vehicles that have a Service Engine Soon Malfunction Indicator Lamp. Technician may find Diagnostic Trouble Code P0442. Technician will need to review Techlink article from May 2013 titled "Using the Evaporative Emissions System Tester" Technician will need to follow these steps to help diagnose the issue. First after the P0442 has been verified do not disturb any of the fuel system components. The technician now can use the scan tool to close the Evaporative Emissions System. If possible change the tank pressure sensor units from inch_H2O to milimeter_Hg for better resolution. Now the vehicle can be stared to monitor the tank pressure sensor output value for approximately two minutes. If the tank pressure sensor value does change, pressurize the fuel tank side of the purge solenoid with the GE 41413-A / J 41413-A and the necessary adaptors. Now add smoke and allow pressure to stabilize for 2 minutes. If smoke is allowed to pass through the purge solenoid, replace the purge solenoid. If the tank pressure sensor value does not change, then install CH-48096 adaptor between the purge line from the canister and the purge solenoid. With the Evaporative Emissions System closed, pressurize the system through the CH-48096 adaptor and allow the system to completely stabilize, by observing the Press / Vac Gauge for a minimum of 5 minutes. Now add smoke to the system with GE 41413-A / J 41413-A after system stabilization. Now inspect the purge solenoid, engine side, fuel cap, canister vent solenoid filter and any line quick connects. When the leak is unable to be located, test under a vacuum condition. his type of leak may be detected by using the scan tool Purge/Seal function to create a vacuum in the Evaporative Emissions System and then observe the FTP sensor parameter for vacuum decay.
Manufacturer communication2003–2006 GMC YUKON ・ 2011-03-16
Oil Consumption/Exhaust Smoke - PCV Baffle or Lifter Concern
1Fault
2Finding the cause
3Correction
Read the sentences of the record
- Remedy
- BUICK/CADILLAC/CHEVROLET/GMC/HUMMER/PONTIAC/SAAB: OIL CONSUMPTION AND/OR EXHAUST SMOKE-POSSIBLE PCV BAFFLE OR LIFTER CONCERN. UPON INSPECTION, OBVIOUS OIL WILL BE FOUND IN THE INTAKE MANIFOLD AND/OR PCV VACUUM TUBE. *PE UPDATED 3/21/11. *PE UPDATED 5/9/11. *PE UPDATED 5/25/11. *PE UPDATED 06/16/2011. *KB UPDATED A SECOND TIME ON 06/16/2011. *KB UPDATED 6/27/11. *PE
ELECTRICAL SYSTEM1
Owner complaint2006 GMC YUKON DENALI ・ 2018-09-05
Passenger side under-dash area caught fire while driving
1Fault
2Finding the cause
3Correction
Not stated
Read the sentences of the record
- Fault
- THE PASSENGER SIDE UNDER DASH BORED CAUGHT ON FIRE. (1 more)
- Cause
- I BELIEVE IT WAS THE MOTER BLOWER THAT SET ON FIRE DUE TO THATS WERE FIRE CAME FROM .AS WELL WHEN I LOOKED UNDER THE HOOD THERE WAS NOTHING WRONG WITH IT STILL PERFECT CONDITION.
EQUIPMENT1
Manufacturer communication2000–2006 GMC YUKON DENALI ・ 2018-06-11(4 earlier editions of this document folded here)
GM Products for Eliminating Vehicle Odors
1Fault
- GM Vehicle Care Odor Eliminator has been shown to greatly reduce or remove mold and mildew smells resulting from vehicle water leaks, as well as customer created odors such as smoke.
2Finding the cause
Steps to confirm (in the document’s order)
- First confirm that all water leaks have been repaired and determine which areas were water soaked or wet; components with visible mold/mildew staining should be replaced.
3Correction
Repair
- If the interior is removed, treat the floor pan and primed/painted surfaces with a bleach/soap solution, rinse with clean water and dry.
- For hard surfaces, add 8 oz. of GM Vehicle Care Odor Eliminator (1 cup) to dish soap in a spray bottle and top off the bottle with tap water.
- Treat all carpeting and upholstered seats lightly to moderately with the formula at full strength, using a wide fan spray setting.
- For the ventilation system, start the vehicle, turn the fan on high cool (not the A/C setting), and spray the formula (10 trigger pulls) into the outside fresh air intake vent at the cowl.
Parts
- Part number 88861431 (in Canada, 88861436): GM Vehicle Care Odor Eliminator, 32 oz (946 mL) non-aerosol bottle.
Part numbers printed in the document
88861431Odor Eliminator, Spray Acdelco 32OzLook up at RockAuto (aftermarket candidates) ↗Search the web ↗
Discontinued (no successor stated)as stated by GMPartsGiant (checked 2026-10-06) ↗
88861436Look up at RockAuto (aftermarket candidates) ↗Search the web ↗
The numbers are as the document prints them. The name and the replacing number are what the pages of GMPartsGiant, a reseller of genuine parts and not GM, state. Aftermarket equivalents are not checked here (the links only search by number). Confirm the fit for the vehicle (VIN) before ordering.
Caution
- Do not let the product come into contact with vinegar or any acidic substance.
Read the sentences of the record
From the manufacturer’s document
- Applies to:Applies to 2015 and prior GM passenger cars and trucks.
- Condition:GM Vehicle Care Odor Eliminator has been shown to greatly reduce or remove mold and mildew smells resulting from vehicle water leaks, as well as customer created odors such as smoke.
- Caution:Do not let the product come into contact with vinegar or any acidic substance.
- Confirm:First confirm that all water leaks have been repaired and determine which areas were water soaked or wet; components with visible mold/mildew staining should be replaced.
- Repair:If the interior is removed, treat the floor pan and primed/painted surfaces with a bleach/soap solution, rinse with clean water and dry.
- Repair:For hard surfaces, add 8 oz. of GM Vehicle Care Odor Eliminator (1 cup) to dish soap in a spray bottle and top off the bottle with tap water.
- Repair:Treat all carpeting and upholstered seats lightly to moderately with the formula at full strength, using a wide fan spray setting.
- Repair:For the ventilation system, start the vehicle, turn the fan on high cool (not the A/C setting), and spray the formula (10 trigger pulls) into the outside fresh air intake vent at the cowl.
- Parts:Part number 88861431 (in Canada, 88861436): GM Vehicle Care Odor Eliminator, 32 oz (946 mL) non-aerosol bottle.
Open the manufacturer’s document (PDF) ↗ The points above were read from this document.
- Remedy
- This informational bulletin provides information on what products GM has to aid in the eliminating unwanted odors in a vehicle.
EXTERIOR LIGHTING1
Manufacturer communication2006 GMC YUKON DENALI ・ 2017-08-15
GM Position on Tinted/Smoked Exterior Lighting
1Fault
- A replacement exterior lamp may not match the opposite side because the customer had an outside vendor tint or smoke the lens.
2Finding the cause
Not stated
3Correction
Read the sentences of the record
From the manufacturer’s document
- Applies to:Applies to 2015 and prior GM passenger cars and light duty trucks.
- Condition:A replacement exterior lamp may not match the opposite side because the customer had an outside vendor tint or smoke the lens.
Open the manufacturer’s document (PDF) ↗ The points above were read from this document.
- Remedy
- This informational bulletin communicates GM's position on exterior lighting components ?tinted or smoked? by an outside vendor.
LATCHES/LOCKS/LINKAGES1
Owner complaint2006 GMC YUKON DENALI ・ 2012-08-10
1Fault
2Finding the cause
3Correction
Not stated
Read the sentences of the record
- Fault
- THE CONTACT STATED THAT THE REAR LIFTGATE WOULD NOT OPEN.
- Inspection
- THE VEHICLE WAS TAKEN TO AN INDEPENDENT MECHANIC FOR DIAGNOSTICS WHERE THE MECHANIC ADVISED THAT THE PLASTIC HOUSING AROUND THE CABLE THAT CONTROLLED THE REAR LIFTGATE MECHANISM WAS MELTED.
Showing 11 of the 16 you can open. Narrow the search to see the rest.