
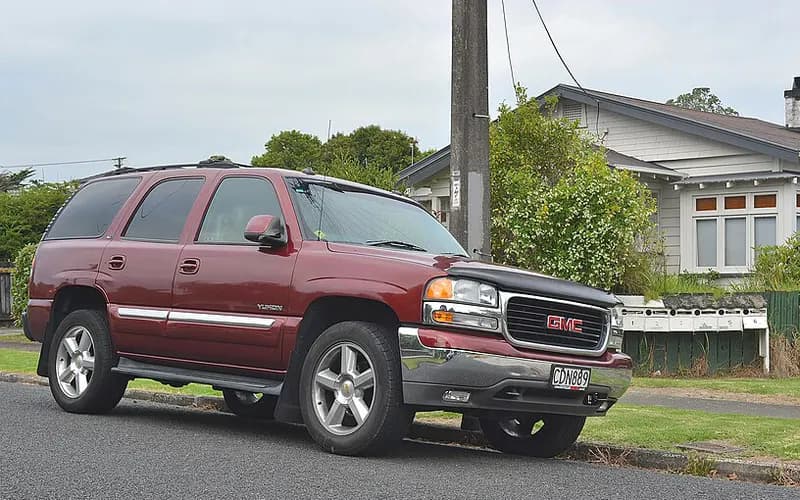
GMC Yukon 2000–2006
Common on this vehicle:Warning lightLeakNoiseVibration or shudderMisfire or rough idleGauge or instrument faultAir conditioning or heaterCorrosion or rust
Record by record
24 records state a cause or a remedy. Each record is shown as short labels in the order fault → finding the cause → correction. Press a label to narrow to the records that state it.
Symptom
Component named as the cause
How it is said to have ended
- says it was fixed1
- says it did not fix it1
A ribbon is as wide as the records that state both of its ends (only the commonest are drawn). A record that names several symptoms or components runs through each. Orange is records that say the fault came back or was not fixed. Results come from owners’ reports only; one that does not say is “result not stated”. None of this is a likelihood of a cause or a rate at which work succeeds.
Read the records one by one (19)
Known issuesBrake pipe (brake line) corrosion and rupture3
Owner complaint2006 GMC YUKON DENALI ・ 2017-09-08
Severe brake line corrosion and wheel speed sensor corrosion causing ABS activation at low speeds
1Fault
2Finding the cause
3Correction
Not stated
What the documents say to do
Brake pipe (brake line) corrosion and ruptureConfirm
- In the joint inspections, scaling or flaking corrosion was taken as indicating the onset of metal loss and given the second lowest ranking (2); a leaking or previously repaired pipe was the lowest (1).
Repair
- GM recommends replacing the entire set of pipes whenever any pipe leaks or is corroded enough to need replacement.
- On June 28, 2013 GM released 66 new part numbers for servicing brake pipes in 1999-2007 GMT800 pickups and utility vehicles.
Caution
- Analysis of repair records indicates that consumers often elect to repair only the failed circuit.
Read the sentences of the record
- Fault
- MALFUNCTION OCCURS INTERMITTENTLY.
- Cause
- SEVERE BRAKE LINE CORROSION AND CORROSION AT WHEEL SPEED SENSORS CAUSES ABS TO ACTIVATE AT LOW SPEEDS. (1 more)
- Consequence
- I HAD 2 NEAR MISS CRASHES AND THEN CAR WOULD NOT STOP AND I HIT A FENCE IN MY YARD YESTERDAY.
Owner complaint2006 GMC YUKON ・ 2018-06-08
Brake failure due to rusted brake lines
1Fault
2Finding the cause
3Correction
Not stated
What the documents say to do
Brake pipe (brake line) corrosion and ruptureConfirm
- In the joint inspections, scaling or flaking corrosion was taken as indicating the onset of metal loss and given the second lowest ranking (2); a leaking or previously repaired pipe was the lowest (1).
Repair
- GM recommends replacing the entire set of pipes whenever any pipe leaks or is corroded enough to need replacement.
- On June 28, 2013 GM released 66 new part numbers for servicing brake pipes in 1999-2007 GMT800 pickups and utility vehicles.
Caution
- Analysis of repair records indicates that consumers often elect to repair only the failed circuit.
Read the sentences of the record
- Consequence
- NEARLY HAD A REAR EMD COLLISION WHEN THEY FAILED TRYING TO STOP AT 50 MPH (= 80.5 km/h). (1 more)
Owner complaint2006 GMC YUKON ・ 2022-09-06
Airbag light stays on; brake lines burst; dim lights
1Fault
2Finding the cause
3Correction
Read the sentences of the record
- Fault
- Air bags light stays on and will not go out.
Known issuesHVAC blower motor resistor module / connector overheating1
Recall2003–2006 GMC YUKON ・ 2011-02-21
HVAC Blower Motor Resistor Module Overheating
1Fault
2Finding the cause
3Correction
Not stated
What the documents say to do
HVAC blower motor resistor module / connector overheatingRepair
- Dealers install a new blower motor resistor and resistor module connector.
- Cut the wires back far enough to remove any melted insulation.
Caution
- The connector must be replaced even if it was replaced in an earlier repair.
Read the sentences of the record
- Cause
- On certain vehicles, the interface between the electrical terminals of the Heating, Ventilation, and Air Conditioning (HVAC) blower relay resistor module and the wiring connector (which powers the module) may be incapable of conducting higher current levels for sustained periods of operation. In addition, moisture and other contaminants (such as road de-icing materials) may enter the fresh air intake plenum and contact the internal circuit of the module or corrode the terminals. These conditions may cause the relay resistor module or wiring connector to overheat, causing various symptoms such as: the HVAC blower may not function on certain or all blower speed settings; a burning-plastic smell or smoke may be present in the vehicle, or; the HVAC blower may run continually with the ignition in the OFF position. These warning signs could, in certain instances, be leading indicators of an impending vehicle fire, which could result in property damage and/or personal injury. Correction: Owners will be provided with additional warranty coverage for the blower motor resistor module/wiring connector overheating condition. Under this "special warranty coverage", should this condition occur within 10 years or 240,000 km from first vehicle registration, dealers will install a replacement blower motor resistor and resistor module connector.
Known issuesCosmetic brake rotor corrosion: burnish, do not resurface1
Manufacturer communication2005–2006 GMC FULLSIZE AND MIDSIZE PICKUPS/UTILITIES (YUKON) ・ 2007-04-01
Brake issues: burnish rotors for cosmetic brake corrosion, do not resurface them
1Fault
2Finding the cause
Not stated
3Correction
Repair
- Burnish the rotors for cosmetic brake corrosion.
- The reference given for this row is 00-05-22-002I.
Caution
- Do not resurface the brake rotors for cosmetic corrosion.
Read the sentences of the record
From the manufacturer’s document
- Applies to:The row is for 2005-06 All Fullsize and Midsize Pickups/Utilities, Vans and H2, H3 with brake issues.
- Repair:Burnish the rotors for cosmetic brake corrosion.
- Caution:Do not resurface the brake rotors for cosmetic corrosion.
- Repair:The reference given for this row is 00-05-22-002I.
Open this issue of GM TechLink ↗ The points above are read from an article of TechLink, GM’s monthly publication for dealership technicians. The article itself is not reproduced here.
- Remedy
- Truck Issues — Fix It Right the First Time 2005-06 All Fullsize and Midsize Pickups/Utilities, Vans and H2, H3 – Brake issues Burnish rotors for cosmetic brake corrosion. Don't resurface brake rotors for cosmetic corrosion. Don't resurface brake rotors for cosmetic corrosion. 00-05-22-002I
Known issuesIntermittent MIL, service lamps/messages or DTCs from connector fretting corrosion1
Manufacturer communication2005–2006 GMC YUKON DENALI ・ 2010-03-06
Intermittent MIL and Service Lamp Illumination
1Fault
2Finding the cause
3Correction
Read the sentences of the record
- Remedy
- GM/HUMMER/SAAB: INTERMITTENT ILLUMINATION OF MIL, SERVICE LAMPS, SERVICE MESSAGES, OR DTC SET BY VARIOUS CONTROL MODULES-DIAGNOSING AND REPAIRING FRETTING CORROSION (DISCONNECT AFFECTED CONNECTOR AND APPLY DIELECTRIC LUBRICANT). *PE UPDATED 3/26/10. *PE UPDATED 6/6/11. *PE UPDATED 3/12/12. *PE
Known issuesDoor sags or is hard to open or close (worn or corroded hinge pins and bushings)1
Manufacturer communication2000–2006 GMC YUKON DENALI ・ 2006-11-01
Sagging or hard-to-operate door: door hinge pin and bushing kits
1Fault
- Customers may comment that a door sags or is hard to open or close.
2Finding the cause
Possible causes
- This could be caused by worn or corroded door hinge pins and bushings.
3Correction
Repair
- Replace the door hinge pins and bushings with kits now available from GM SPO.
Parts
- Kit 89025539 is for the front door of C/K trucks and utilities.
- Kit 89025543 is for the rear door of C/K trucks and utilities.
Part numbers printed in the document
89025539Pin Kit,Front Side Door HingeLook up at RockAuto (aftermarket candidates) ↗Search the web ↗
Replaced by: 19329763as stated by GMPartsGiant (checked 2026-10-06) ↗Look up at RockAuto (aftermarket candidates) ↗Search the web ↗
89025543Pin Kit,Rear Side Door HingeLook up at RockAuto (aftermarket candidates) ↗Search the web ↗
Replaced by: 19302122as stated by GMPartsGiant (checked 2026-10-06) ↗Look up at RockAuto (aftermarket candidates) ↗Search the web ↗
The numbers are as the document prints them. The name and the replacing number are what the pages of GMPartsGiant, a reseller of genuine parts and not GM, state. Aftermarket equivalents are not checked here (the links only search by number). Confirm the fit for the vehicle (VIN) before ordering.
Read the sentences of the record
From the manufacturer’s document
- Applies to:The vehicles listed include 2000-2006 Chevrolet Suburban, Tahoe, GMC Yukon, Yukon XL, Yukon Denali and Yukon Denali XL.
- Condition:Customers may comment that a door sags or is hard to open or close.
- Cause:This could be caused by worn or corroded door hinge pins and bushings.
- Repair:Replace the door hinge pins and bushings with kits now available from GM SPO.
- Parts:Kit 89025539 is for the front door of C/K trucks and utilities.
- Parts:Kit 89025543 is for the rear door of C/K trucks and utilities.
Open this issue of GM TechLink ↗ The points above are read from an article of TechLink, GM’s monthly publication for dealership technicians. The article itself is not reproduced here.
- Remedy
- Hinge Repair 2000-2006 Chevrolet Suburban, Tahoe, GMC Yukon, Yukon XL, Yukon Denali, Yukon Denali XL Customers may comment that a door sags or is hard to open or close. This could be caused by worn or corroded door hinge pins and bushings. To repair this concern, replace the door hinge pins and bushings with kits now available from GM SPO. 89025539 Front Door C/K Trucks/Utilities 89025543 Rear Door C/K Trucks/Utilities
EQUIPMENT4
Manufacturer communication2000–2006 GMC YUKON DENALI ・ 2021-04-26
Aluminum Wheel Refinishing Service Bulletin
1Fault
2Finding the cause
Not stated
3Correction
Read the sentences of the record
- Remedy
- Refinishing Aluminum Wheels This bulletin updates General Motor's position on refinishing aluminum wheels. GM does not endorse any repairs that involve welding, bending, straightening o re-machining. Only cosmetic refinishing of the wheel's coatings, using recommended procedures, is allowed. Evaluating Damage In evaluating damage, it is the GM Dealer's responsibility to inspect the wheel for corrosion, scrapes, gouges, etc. The Dealer must insure that such damage is not deeper than what can be sanded or polished off. The wheel must be inspected for cracks. If cracks are found, discard the wheel. Any wheels with bent rim flanges must not be repaired or refinished. Wheels that have been refinished by an outside company must be returned to the same vehicle. The Dealer must record the wheel ID stamp or the cast date on the wheel in order to assure this requirement. Refer to Refinisher's Responsibility  Outside Company later in this bulletin.
Manufacturer communication2000–2006 GMC YUKON DENALI ・ 2021-04-26
Aluminum Wheel Refinishing Guidelines
1Fault
2Finding the cause
Not stated
3Correction
Read the sentences of the record
- Remedy
- Refinishing Aluminum Wheels This bulletin updates General Motor's position on refinishing aluminum wheels. GM does not endorse any repairs that involve welding, bending, straightening o re-machining. Only cosmetic refinishing of the wheel's coatings, using recommended procedures, is allowed. Evaluating Damage In evaluating damage, it is the GM Dealer's responsibility to inspect the wheel for corrosion, scrapes, gouges, etc. The Dealer must insure that such damage is not deeper than what can be sanded or polished off. The wheel must be inspected for cracks. If cracks are found, discard the wheel. Any wheels with bent rim flanges must not be repaired or refinished. Wheels that have been refinished by an outside company must be returned to the same vehicle. The Dealer must record the wheel ID stamp or the cast date on the wheel in order to assure this requirement. Refer to Refinisher's Responsibility  Outside Company later in this bulletin.
Manufacturer communication2005–2006 GMC YUKON DENALI ・ 2019-12-16(1 earlier editions of this document folded here)
Aluminum wheel bead seat cleaning and resurfacing procedure
1Fault
- A tire slowly loses air pressure over a period of days or weeks.
2Finding the cause
Possible causes
- Abrasive elements may intrude between the tire and wheel at the bead seat, and the relative motion between tire and wheel lets the particles wear the wheel and tire materials.
Steps to confirm (in the document’s order)
- The corrosion may be on the inboard or outboard bead seating surface and is not visible until the tire is dismounted from the wheel.
- After a water dunk tank leak test, if the source of the leak is around the bead seat of the wheel, dismount the tire to examine the bead seat.
- Bead seat corrosion looks like blistering of the wheel finish, giving a rough or uneven surface on which the tire has difficulty keeping a proper seal.
- For vehicles with 32,186 km (20,000 mi) or less, the total combined linear area of repairable corrosion is 100 mm (4 in) or less; beyond that the wheel should be replaced.
- For vehicles that have exceeded 32,186 km (20,000 mi), the total combined linear area of repairable corrosion is 200 mm (8 in) or less.
3Correction
Repair
- Use a clean-up (fine cut) sanding disc or biscuit to remove the corrosion and any flaking paint, back to material that is stable and firmly bonded to the wheel.
- Once the corrosion is eliminated, coat the repaired area with a commercially available tire sealant such as Patch Brand Bead Sealant or equivalent.
Parts
- Part number 16118, Patch Bead Sealer (1 Quart (= 0.946 L)).
Caution
- Do not replace a wheel for slow air loss unless the wheel has been evaluated and/or repair has been tried with this procedure.
Read the sentences of the record
From the manufacturer’s document
- Applies to:Applies to 2005-2020 GM passenger cars and light duty trucks.
- Condition:A tire slowly loses air pressure over a period of days or weeks.
- Cause:Abrasive elements may intrude between the tire and wheel at the bead seat, and the relative motion between tire and wheel lets the particles wear the wheel and tire materials.
- Confirm:The corrosion may be on the inboard or outboard bead seating surface and is not visible until the tire is dismounted from the wheel.
- Caution:Do not replace a wheel for slow air loss unless the wheel has been evaluated and/or repair has been tried with this procedure.
- Confirm:After a water dunk tank leak test, if the source of the leak is around the bead seat of the wheel, dismount the tire to examine the bead seat.
- Confirm:Bead seat corrosion looks like blistering of the wheel finish, giving a rough or uneven surface on which the tire has difficulty keeping a proper seal.
- Confirm:For vehicles with 32,186 km (20,000 mi) or less, the total combined linear area of repairable corrosion is 100 mm (4 in) or less; beyond that the wheel should be replaced.
- Confirm:For vehicles that have exceeded 32,186 km (20,000 mi), the total combined linear area of repairable corrosion is 200 mm (8 in) or less.
- Repair:Use a clean-up (fine cut) sanding disc or biscuit to remove the corrosion and any flaking paint, back to material that is stable and firmly bonded to the wheel.
- Repair:Once the corrosion is eliminated, coat the repaired area with a commercially available tire sealant such as Patch Brand Bead Sealant or equivalent.
- Parts:Part number 16118, Patch Bead Sealer (1 Quart (= 0.946 L)).
Open the manufacturer’s document (PDF) ↗ The points above were read from this document.
- Remedy
- This technical bulletin provides a procedure on how to clean and resurface aluminum wheel bead seats for vehicles that have the condition of Tire Slowly Goes Flat, Tire Air Loss, Low Tire Pressure Warning Light Illuminated, Aluminum Wheel Bead Seat Corrosion.
Manufacturer communication2003–2006 GMC YUKON DENALI ・ 2018-06-04
Informational Bulletin Revision for 2010-2013 Model Years
1Fault
- For hem flange corrosion, Kent Moore tool J-46162 makes it easier to open the hem flange.
2Finding the cause
Not stated
3Correction
Repair
- Fit the tool from kit J-46162 into an air impact gun and open the hem flange starting at one end.
- Clean out the corrosion by sand blasting or with a 3M Strip Disc, P/N 07460.
- Apply anticorrosion primer to the hem flange, then a bead of LORD FUSOR adhesive, P/N 108B or 109B.
- Close the hem flange with the tool in the kit and clean off the excess adhesive from the repair area.
- Finally prime and refinish the area as required.
Caution
- If perforation is present, replace the affected panel.
Read the sentences of the record
From the manufacturer’s document
- Applies to:2013 and prior GM passenger cars and trucks.
- Condition:For hem flange corrosion, Kent Moore tool J-46162 makes it easier to open the hem flange.
- Repair:Fit the tool from kit J-46162 into an air impact gun and open the hem flange starting at one end.
- Repair:Clean out the corrosion by sand blasting or with a 3M Strip Disc, P/N 07460.
- Caution:If perforation is present, replace the affected panel.
- Repair:Apply anticorrosion primer to the hem flange, then a bead of LORD FUSOR adhesive, P/N 108B or 109B.
- Repair:Close the hem flange with the tool in the kit and clean off the excess adhesive from the repair area.
- Repair:Finally prime and refinish the area as required.
Open the manufacturer’s document (PDF) ↗ The points above were read from this document.
- Remedy
- This informational bulletin provides a revision for 02-08-98-002C to add the 2010-2013 model years and revise the Approved Refinish Materials booklet information.
EQUIPMENT ADAPTIVE/MOBILITY2
Manufacturer communication2000–2006 GMC YUKON DENALI ・ 2021-04-26
Underbody Component Corrosion Guidance
1Fault
2Finding the cause
Not stated
3Correction
Read the sentences of the record
- Remedy
- Underbody Component Corrosion The following information may be helpful when addressing underbody component corrosion with customers. Some customers may comment that one or more of their vehicle's underbody components are showing some form of corrosion. This corrosion may be red in appearance (rust) if the component is steel, forged iron or cast iron. This corrosion may also be grey or white in color if the component is constructed of an aluminum alloy.
Manufacturer communication2000–2006 GMC YUKON DENALI ・ 2021-04-26
Underbody Component Corrosion Information
1Fault
2Finding the cause
Not stated
3Correction
Read the sentences of the record
- Remedy
- Underbody Component Corrosion The following information may be helpful when addressing underbody component corrosion with customers. Some customers may comment that one or more of their vehicle's underbody components are showing some form of corrosion. This corrosion may be red in appearance (rust) if the component is steel, forged iron or cast iron. This corrosion may also be grey or white in color if the component is constructed of an aluminum alloy.
No component category1
Manufacturer communication2003–2006 GMC FULL-SIZE PICKUPS AND UTILITIES (YUKON) ・ 2005-12-01
PCM harness connector damage: correct way to seat and torque the connectors
1Fault
- Many PCM warranty claims are due to damage in the harness connecting system.
- The damage listed: stripped bolts, a stripped screw hole on the header connector, bent connectors and terminals, and water intrusion/corrosion.
2Finding the cause
Possible causes
- In many cases the correct method of installing the harness connector to the PCM header was not followed.
3Correction
Repair
- Each of the individual 80-pin connectors must be fully hand-seated into the PCM connector.
- After the connectors are seated, torque the securing bolt to the specification embossed on the wiring harness connector.
Caution
- Do not seat the connector with sharp force, such as striking it with the heel of the hand.
Read the sentences of the record
From the manufacturer’s document
- Applies to:Applies to 2003-06 full-size pickups and utilities.
- Condition:Many PCM warranty claims are due to damage in the harness connecting system.
- Condition:The damage listed: stripped bolts, a stripped screw hole on the header connector, bent connectors and terminals, and water intrusion/corrosion.
- Cause:In many cases the correct method of installing the harness connector to the PCM header was not followed.
- Repair:Each of the individual 80-pin connectors must be fully hand-seated into the PCM connector.
- Caution:Do not seat the connector with sharp force, such as striking it with the heel of the hand.
- Repair:After the connectors are seated, torque the securing bolt to the specification embossed on the wiring harness connector.
Open this issue of GM TechLink ↗ The points above are read from an article of TechLink, GM’s monthly publication for dealership technicians. The article itself is not reproduced here.
- Remedy
- PCM Connectors This information applies to 2003-06 full-size pickups and utilities. Many PCM warranty claims are due to damage in the harness connecting system. - Stripped bolts - Stripped screw hole on the header connector - Bent connectors, terminals - Water intrusion/corrosion In many cases, the correct method of installing the harness connector to PCM header was not followed. Each of the individual 80-pin connectors must be fully hand-seated into the PCM connector. IMPORTANT: Do not seat the connector with sharp force, such as striking the connector with the heel of your hand. After the connectors are seated, torque the securing bolt to the specification embossed on the wiring harness connector (fig. 20) .
ELECTRICAL SYSTEM1
Manufacturer communication2002–2006 GMC YUKON DENALI ・ 2019-07-29(2 earlier editions of this document folded here)
Electrical Ground Repair with Conductive Fasteners
1Fault
- Loose, stripped or corroded ground connections increase the possibility of improper system function and loss of module communication, and may lead to unnecessary repairs and component replacement.
2Finding the cause
Not stated
3Correction
Repair
- M6 weld stud: select a location next to the damaged or missing M6 ground stud with 20 mm (0.79 in) clearance behind the panel and 20 mm (0.79 in) clearance around the M6 conductive rivet stud flange.
- Drill a 10 mm (0.40 in) diameter hole through the panel.
- Remove paint and primer from the area around the 10 mm (0.40 in) hole until bare metal is visible.
- With a small brush apply Dielectric Lubricant GM P/N 12377900 (Canadian P/N 10953529) to the threads of the M6 conductive rivet stud.
- Install the M6 conductive nut on the rivet stud and tighten to 71 lb in (= 8.02 N·m).
3 more pointsPart numbers printed in the document
12377900Lubricant, Dielectric Acdelco 2OzLook up at RockAuto (aftermarket candidates) ↗Search the web ↗
No successor statedas stated by GMPartsGiant (checked 2026-10-06) ↗
10953529Look up at RockAuto (aftermarket candidates) ↗Search the web ↗
The numbers are as the document prints them. The name and the replacing number are what the pages of GMPartsGiant, a reseller of genuine parts and not GM, state. Aftermarket equivalents are not checked here (the links only search by number). Confirm the fit for the vehicle (VIN) before ordering.
Parts
- Approved fasteners: 11561645 M6 nut, 11570340 M6 rivet stud, 11588564 M8 bolt, 11609412 M8 nut, 11609538 M7 bolt (self-threading), 11609669 M6 bolt.
Part numbers printed in the document
11561645NutLook up at RockAuto (aftermarket candidates) ↗Search the web ↗
No successor stated(replaces 11518173 / 11086223)as stated by GMPartsGiant (checked 2026-10-06) ↗
11570340Rivet, Stud W/Wedges Knurls And SealersLook up at RockAuto (aftermarket candidates) ↗Search the web ↗
No successor statedas stated by GMPartsGiant (checked 2026-10-06) ↗
11588564Bolt Assembly, Hx Head Fl Washer M, PointLook up at RockAuto (aftermarket candidates) ↗Search the web ↗
No successor statedas stated by GMPartsGiant (checked 2026-10-06) ↗
11609412Nut, Hexagon W/Conical Washer,M8X1.25, 7.5 Thick, 19 Outside DiameterLook up at RockAuto (aftermarket candidates) ↗Search the web ↗
No successor stated(replaces 11509226 / 22640336)as stated by GMPartsGiant (checked 2026-10-06) ↗
11609538Bolt/Screw, Tap Hexagon Head Trim Flat WasherLook up at RockAuto (aftermarket candidates) ↗Search the web ↗
No successor statedas stated by GMPartsGiant (checked 2026-10-06) ↗
11609669Bolt/Screw, Hx Head Flt WasherLook up at RockAuto (aftermarket candidates) ↗Search the web ↗
No successor stated(replaces 11517342 / 10156138)as stated by GMPartsGiant (checked 2026-10-06) ↗
The numbers are as the document prints them. The name and the replacing number are what the pages of GMPartsGiant, a reseller of genuine parts and not GM, state. Aftermarket equivalents are not checked here (the links only search by number). Confirm the fit for the vehicle (VIN) before ordering.
Caution
- Use only the GM-approved replacement fasteners with conductive finish for electrical ground repair.
Read the sentences of the record
From the manufacturer’s document
- Applies to:Applies to 2020 and prior GM passenger cars and trucks, including Medium Duty and Heavy Duty.
- Condition:Loose, stripped or corroded ground connections increase the possibility of improper system function and loss of module communication, and may lead to unnecessary repairs and component replacement.
- Caution:Use only the GM-approved replacement fasteners with conductive finish for electrical ground repair.
- Repair:M6 weld stud: select a location next to the damaged or missing M6 ground stud with 20 mm (0.79 in) clearance behind the panel and 20 mm (0.79 in) clearance around the M6 conductive rivet stud flange.
- Repair:Drill a 10 mm (0.40 in) diameter hole through the panel.
- Repair:Remove paint and primer from the area around the 10 mm (0.40 in) hole until bare metal is visible.
- Repair:With a small brush apply Dielectric Lubricant GM P/N 12377900 (Canadian P/N 10953529) to the threads of the M6 conductive rivet stud.
- Repair:Install the M6 conductive nut on the rivet stud and tighten to 71 lb in (= 8.02 N·m).
- Repair:If the M6 weld nut at the ground location is damaged or stripped, a M7 conductive self-threading bolt may be used to secure the ground wire terminal.
- Repair:Install the M7 conductive self-threading bolt and tighten to 80 lb in (= 9.04 N·m).
- Repair:Install the M8 conductive nut on the bolt and tighten to 16 lb ft (= 21.7 N·m).
- Parts:Approved fasteners: 11561645 M6 nut, 11570340 M6 rivet stud, 11588564 M8 bolt, 11609412 M8 nut, 11609538 M7 bolt (self-threading), 11609669 M6 bolt.
Open the manufacturer’s document (PDF) ↗ The points above were read from this document.
- Remedy
- This bulletin provides information for electrical ground repairs using new General Motors replacement fasteners with conductive finish.
EXTERIOR LIGHTING1
Owner complaint2006 GMC YUKON DENALI ・ 2014-05-17
Upper brake indicator light on rear liftgate malfunctioned
1Fault
2Finding the cause
3Correction
Read the sentences of the record
- Fault
- THE UPPER BRAKE INDICATOR LIGHT (BAR) ON TOP OF THE REAR LIFT GATE DOOR MALFUNCTIONED.
- Cause
- IT SEEMS TO ME THAT IT SHORTED OUT OR MAY HAVE HAD WIRES THAT BECAME CORRODED.
POWER TRAIN1
Manufacturer communication2000–2006 GMC YUKON ・ 2008-12-18
GMC: Transmission oil cooler line fluid leak (2000-2006)
1Fault
2Finding the cause
3Correction
Read the sentences of the record
- Remedy
- GMC: FLUID LEAK FROM TRANSMISSION OIL COOLER LINES DUE TO CORROSION. ALL 2000-2006 LIGHT DUTY TRUCKS EQUIPPED WITH THE LIGHT DUTY AUTOMATIC TRANSMISSION. *PE
STRUCTURE1
Manufacturer communication2003–2006 GMC YUKON DENALI ・ 2011-05-26
Frame Corrosion on Some Truck Models
1Fault
2Finding the cause
3Correction
GM: ON SOME TRUCK MODELS THERE IS SOME FRAME CORROSION. *RM UPDATED ON 5/2/2012. *KB
Read the sentences of the record
- Remedy
- GM: ON SOME TRUCK MODELS THERE IS SOME FRAME CORROSION. *RM UPDATED ON 5/2/2012. *KB
WHEELS1
Manufacturer communication2005–2006 GMC YUKON DENALI ・ 2018-06-04(2 earlier editions of this document folded here)
Chromed Aluminum Wheels—Chemical Staining and Corrosion
1Fault
2Finding the cause
Possible causes
- Chemical staining mostly results from acid based cleaners; the stains are frequently milky, black or greenish.
- A second type of staining comes from road chemicals such as calcium chloride used for dust control on unpaved roads; it looks like small pitting.
- A third type comes from prolonged exposure to brake dust, which penetrates the chrome.
3Correction
Repair
- After cleaning, wax the wheel with ACDelco Cleaner Wax, P/N 88865218 (in Canada, 2675208), to protect it from brake dust.
- For milky stains from acidic cleaners, apply 3M Chrome and Metal Polish #39527 with a clean terry cloth towel; the staining diminishes as it is applied.
Part numbers printed in the document
88865218Wax,Cleaner Acdelco 16OzLook up at RockAuto (aftermarket candidates) ↗Search the web ↗
Discontinued (no successor stated)as stated by GMPartsGiant (checked 2026-10-06) ↗
The numbers are as the document prints them. The name and the replacing number are what the pages of GMPartsGiant, a reseller of genuine parts and not GM, state. Aftermarket equivalents are not checked here (the links only search by number). Confirm the fit for the vehicle (VIN) before ordering.
Caution
- Do not use cleaning solutions containing hydrofluoric, oxalic and most other acids on chrome wheels (or any wheels).
- Any wheel cleaner must be thoroughly rinsed off the wheel with clean, clear water.
- The wheels must be cleaned before the polish is applied, to avoid scratching the wheel surface.
- The polish reduces the thickness of the chrome plating and, used incorrectly or excessively, may remove it altogether.
- On wheels spotted by road chemicals the procedure may improve the condition marginally but will not restore the finish or remove the pitting.
Read the sentences of the record
From the manufacturer’s document
- Applies to:2015 and prior GM passenger cars and trucks.
- Cause:Chemical staining mostly results from acid based cleaners; the stains are frequently milky, black or greenish.
- Caution:Do not use cleaning solutions containing hydrofluoric, oxalic and most other acids on chrome wheels (or any wheels).
- Caution:Any wheel cleaner must be thoroughly rinsed off the wheel with clean, clear water.
- Cause:A second type of staining comes from road chemicals such as calcium chloride used for dust control on unpaved roads; it looks like small pitting.
- Cause:A third type comes from prolonged exposure to brake dust, which penetrates the chrome.
- Repair:After cleaning, wax the wheel with ACDelco Cleaner Wax, P/N 88865218 (in Canada, 2675208), to protect it from brake dust.
- Repair:For milky stains from acidic cleaners, apply 3M Chrome and Metal Polish #39527 with a clean terry cloth towel; the staining diminishes as it is applied.
- Caution:The wheels must be cleaned before the polish is applied, to avoid scratching the wheel surface.
- Caution:The polish reduces the thickness of the chrome plating and, used incorrectly or excessively, may remove it altogether.
- Caution:On wheels spotted by road chemicals the procedure may improve the condition marginally but will not restore the finish or remove the pitting.
Open the manufacturer’s document (PDF) ↗ The points above were read from this document.
- Remedy
- This informational bulletin provides information on chemical staining, pitting, corrosion and/or spotted appearance of chromed aluminum wheels, along with warranty information regarding these conditions.
Showing 19 of the 24 you can open. Narrow the search to see the rest.