
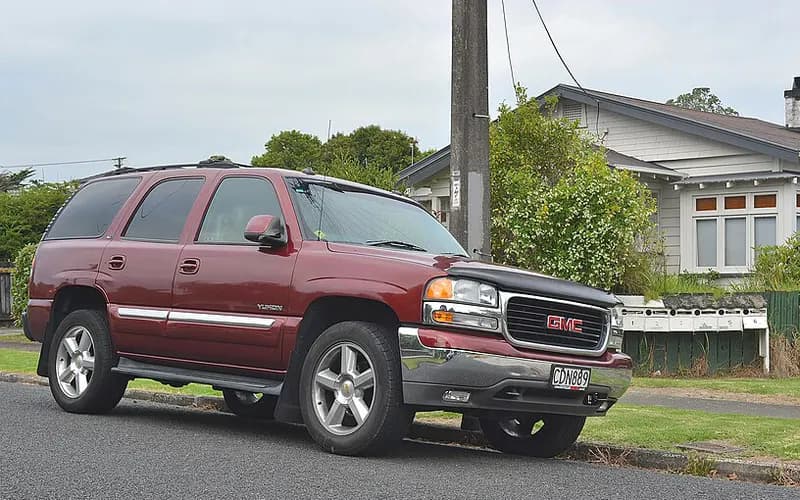
GMC Yukon 2000–2006
Common on this vehicle:Warning lightLeakGauge or instrument faultOverheatingSmoke or fireHard start or long crankAir conditioning or heaterLiftgate, rear glass or door lock
Record by record
7 records state a cause or a remedy. Each record is shown as short labels in the order fault → finding the cause → correction. Press a label to narrow to the records that state it.
Symptom
Component named as the cause
How it is said to have ended
- says it held for a while1
- says it came back1
A ribbon is as wide as the records that state both of its ends (only the commonest are drawn). A record that names several symptoms or components runs through each. Orange is records that say the fault came back or was not fixed. Results come from owners’ reports only; one that does not say is “result not stated”. None of this is a likelihood of a cause or a rate at which work succeeds.
Read the records one by one (6)
FUEL SYSTEM, GASOLINE3
Owner complaint2001 GMC YUKON ・ 2005-06-08
Gasoline leakage and check engine light
1Fault
2Finding the cause
3Correction
Read the sentences of the record
- Fault
- DT: 2001, GMC YUKON, VEHICLE HAD GASOLINE LEAKAGE, CONSUMER COULD SMELL LEAK, CHECK ENGINE LIGHT CAME ON.
- Remedy
- DEALER RESET BUTTON.
Owner complaint2003 GMC YUKON ・ 2004-10-17
Engine stalling while driving with check engine and traction control lights on
1Fault
2Finding the cause
3Correction
Read the sentences of the record
- Fault
- DRIVING 60 MPH (= 96.6 km/h) ON A 20 MILE (= 32.2 km) BRIDGE, THE ENGINE FAILED (ENGINE LIGHT AND TRACTION CONTROL LIGHT WERE ON. (1 more)
- Remedy
- REPLACED HARNESS. (1 more)
- Inspection
- THEY FOUND 2 MORE BROKEN WIRES. (1 more)
Owner complaint2001 GMC YUKON ・ 2004-04-01
Engine light and fuel leak while driving
1Fault
2Finding the cause
3Correction
Not stated
Read the sentences of the record
- Fault
- WHEN DRIVING, THE ENGINE LIGHT APPEARED ON THE DASHBOARD. (2 more)
- Inspection
- THE CONSUMER DROVE THE VEHICLE TO THE DEALERSHIP FOR INSPECTION, AND THE MECHANIC DETERMINED THAT THE FUEL PUMP WIRING FAILED, CAUSING THE FUEL TO LEAK FROM THE FUEL TANK. (1 more)
AIR BAGS1
Owner complaint2005 GMC YUKON DENALI ・ 2014-05-21
Airbag light on and multiple electrical, mechanical and comfort issues since 2005
1Fault
2Finding the cause
3Correction
Read the sentences of the record
- Fault
- AIRBAG LIGHT CONTINUOUSLY ON - READS, SERVICE AIRBAG. (13 more)
- Inspection
- I HAVE TAKEN IT IN FOR SERVICE SEVERAL TIMES BUT MIRACULOUSLY THE GMC SERVICE CENTER SAYS THE LIGHT DOESN'T COME ON WHEN THEY HAVE IT.
ENGINE1
Manufacturer communication2000–2006 GMC YUKON DENALI ・ 2024-07-16
Fuel Injection Cleaner Kit Service Bulletin
1Fault
- Hard start or long crank
- Misfire or rough idle
- Does not start
- Warning light
- Check engine / Service Engine Soon
- P0300
- P0301
- P0302
- P0303
- P0304
- P0305
- Rough idle, crank no start, extended crank or misfire, with the engine warning lamp on and DTC P0300, P0301, P0302, P0303, P0304, P0305, P0306, P0307 or P0308 set.
- When the engine is cold, compression on multiple cylinders may be zero.
- The engine may pop through the intake or exhaust while cranking, and the spark plugs may be fuel fouled.
2Finding the cause
Possible causes
- Major carbon build-up on the intake and/or exhaust valves from fuel contamination or incomplete burning of the fuel; misfires should not appear before at least 8,000 km (5,000 mi).
3Correction
Repair
- If there is no valve damage and no cam follower out of place, perform the cleaning procedure to free sticking valves and remove carbon from the valves and pistons.
- If valves are damaged or cam followers are out of place, make the engine mechanical repairs first and then perform the cleaning procedure to prevent a return.
- Fill Cleaner Kit J-35800-A with about 650 ml (22 oz, 2 cans) of Air Intake, Combustion Chamber Cleaner and set the air pressure at the tool to 260 kPa (40 psi).
- With GDS 2 or a scan tool, command engine idle to 2000 rpm so the engine does not stall.
- With the engine at operating temperature in a well-ventilated area, slowly and carefully induce the cleaner into the engine, taking about 3 minutes.
Parts
- The Top Engine Cleaning Kit (ACDelco Air Intake, Valve and Combustion Chamber Cleaner and ACDelco Fuel System Cleaner 44K) is 19435372 for the U.S. and Canada.
Part numbers printed in the document
19435372MAINTENANCE KIT,FUEL SYSTEM ACDELCO 3-11OZLook up at RockAuto (aftermarket candidates) ↗Search the web ↗
No successor statedas stated by GMPartsGiant (checked 2026-10-06) ↗
The numbers are as the document prints them. The name and the replacing number are what the pages of GMPartsGiant, a reseller of genuine parts and not GM, state. Aftermarket equivalents are not checked here (the links only search by number). Confirm the fit for the vehicle (VIN) before ordering.
Caution
- Inducing too much cleaner at too low an RPM, or stalling the engine with too much cleaner at once, may hydro-lock the engine and bend a connecting rod.
Read the sentences of the record
From the manufacturer’s document
- Applies to:Applies to GM passenger cars and trucks with gasoline engines only, model years 2000 to 2025.
- Condition:Rough idle, crank no start, extended crank or misfire, with the engine warning lamp on and DTC P0300, P0301, P0302, P0303, P0304, P0305, P0306, P0307 or P0308 set.
- Condition:When the engine is cold, compression on multiple cylinders may be zero.
- Condition:The engine may pop through the intake or exhaust while cranking, and the spark plugs may be fuel fouled.
- Cause:Major carbon build-up on the intake and/or exhaust valves from fuel contamination or incomplete burning of the fuel; misfires should not appear before at least 8,000 km (5,000 mi).
- Repair:If there is no valve damage and no cam follower out of place, perform the cleaning procedure to free sticking valves and remove carbon from the valves and pistons.
- Repair:If valves are damaged or cam followers are out of place, make the engine mechanical repairs first and then perform the cleaning procedure to prevent a return.
- Caution:Inducing too much cleaner at too low an RPM, or stalling the engine with too much cleaner at once, may hydro-lock the engine and bend a connecting rod.
- Repair:Fill Cleaner Kit J-35800-A with about 650 ml (22 oz, 2 cans) of Air Intake, Combustion Chamber Cleaner and set the air pressure at the tool to 260 kPa (40 psi).
- Repair:With GDS 2 or a scan tool, command engine idle to 2000 rpm so the engine does not stall.
- Repair:With the engine at operating temperature in a well-ventilated area, slowly and carefully induce the cleaner into the engine, taking about 3 minutes.
- Parts:The Top Engine Cleaning Kit (ACDelco Air Intake, Valve and Combustion Chamber Cleaner and ACDelco Fuel System Cleaner 44K) is 19435372 for the U.S. and Canada.
Open the manufacturer’s document (PDF) ↗ The points above were read from this document.
- Remedy
- This service bulletin advises of a new fuel injection cleaner kit used for decarbonizing the intake valves to correct conditions of rough idle, Crank no start, extended crank or misfire, MIL with DTCs, and explains how Top Tier fuels should be used to reduce carbon build-up.
ENGINE AND ENGINE COOLING1
Manufacturer communication2000–2006 GMC YUKON DENALI ・ 2017-08-15(1 earlier editions of this document folded here)
Engine Check Lamp P0442 Evaporative Emissions System Notification
1Fault
- The service engine soon lamp (MIL) is on for DTC P0442, but a leak cannot be verified with the system test in the service information.
2Finding the cause
Steps to confirm (in the document’s order)
- With the scan tool, command the EVAP system CLOSED, start the engine and watch the tank pressure sensor value for about two minutes.
- If the tank pressure value changes (shows vacuum), remove the purge solenoid and pressurize its fuel tank side with the GE 41413-A / J 41413-A tester.
- If the tank pressure value does not change, install the CH-48096 adaptor between the purge line from the canister and the purge solenoid; use no other adaptor or pressurization method.
- With the EVAP system CLOSED, pressurize through the adaptor and let the system stabilize, watching the gauge for at least 5 minutes, then add smoke.
- Look for smoke or UV trace fluid at the purge solenoid, the engine side, the fuel cap or capless fill door, and the canister vent solenoid filter or fresh-air line.
3Correction
Repair
- If smoke passes through the purge solenoid, replace the purge solenoid.
Caution
- After verifying P0442, do not disturb any fuel system component before testing.
- Test pressure must not exceed 13 in H2O (0.5 PSI (= 3.45 kPa)); more can make components perform inaccurately and lead to misdiagnosis.
- A large temperature difference between vehicle, shop and tester seriously affects accuracy; let the vehicle adjust to shop temperature first.
Read the sentences of the record
From the manufacturer’s document
- Applies to:Applies to 2016 and prior passenger cars and trucks.
- Condition:The service engine soon lamp (MIL) is on for DTC P0442, but a leak cannot be verified with the system test in the service information.
- Caution:After verifying P0442, do not disturb any fuel system component before testing.
- Confirm:With the scan tool, command the EVAP system CLOSED, start the engine and watch the tank pressure sensor value for about two minutes.
- Confirm:If the tank pressure value changes (shows vacuum), remove the purge solenoid and pressurize its fuel tank side with the GE 41413-A / J 41413-A tester.
- Repair:If smoke passes through the purge solenoid, replace the purge solenoid.
- Confirm:If the tank pressure value does not change, install the CH-48096 adaptor between the purge line from the canister and the purge solenoid; use no other adaptor or pressurization method.
- Confirm:With the EVAP system CLOSED, pressurize through the adaptor and let the system stabilize, watching the gauge for at least 5 minutes, then add smoke.
- Confirm:Look for smoke or UV trace fluid at the purge solenoid, the engine side, the fuel cap or capless fill door, and the canister vent solenoid filter or fresh-air line.
- Confirm:If smoke testing finds nothing, the leak may exist only under vacuum: use the scan tool Purge/Seal function to pull a vacuum and watch the FTP sensor parameter for vacuum decay.
- Caution:Test pressure must not exceed 13 in H2O (0.5 PSI (= 3.45 kPa)); more can make components perform inaccurately and lead to misdiagnosis.
- Caution:A large temperature difference between vehicle, shop and tester seriously affects accuracy; let the vehicle adjust to shop temperature first.
Open the manufacturer’s document (PDF) ↗ The points above were read from this document.
- Remedy
- This Preliminary Information communication provides information to the technician about vehicles that have a Service Engine Soon Malfunction Indicator Lamp. Technician may find Diagnostic Trouble Code P0442. Technician will need to review Techlink article from May 2013 titled "Using the Evaporative Emissions System Tester" Technician will need to follow these steps to help diagnose the issue. First after the P0442 has been verified do not disturb any of the fuel system components. The technician now can use the scan tool to close the Evaporative Emissions System. If possible change the tank pressure sensor units from inch_H2O to milimeter_Hg for better resolution. Now the vehicle can be stared to monitor the tank pressure sensor output value for approximately two minutes. If the tank pressure sensor value does change, pressurize the fuel tank side of the purge solenoid with the GE 41413-A / J 41413-A and the necessary adaptors. Now add smoke and allow pressure to stabilize for 2 minutes. If smoke is allowed to pass through the purge solenoid, replace the purge solenoid. If the tank pressure sensor value does not change, then install CH-48096 adaptor between the purge line from the canister and the purge solenoid. With the Evaporative Emissions System closed, pressurize the system through the CH-48096 adaptor and allow the system to completely stabilize, by observing the Press / Vac Gauge for a minimum of 5 minutes. Now add smoke to the system with GE 41413-A / J 41413-A after system stabilization. Now inspect the purge solenoid, engine side, fuel cap, canister vent solenoid filter and any line quick connects. When the leak is unable to be located, test under a vacuum condition. his type of leak may be detected by using the scan tool Purge/Seal function to create a vacuum in the Evaporative Emissions System and then observe the FTP sensor parameter for vacuum decay.
Showing 6 of the 7 you can open. Narrow the search to see the rest.