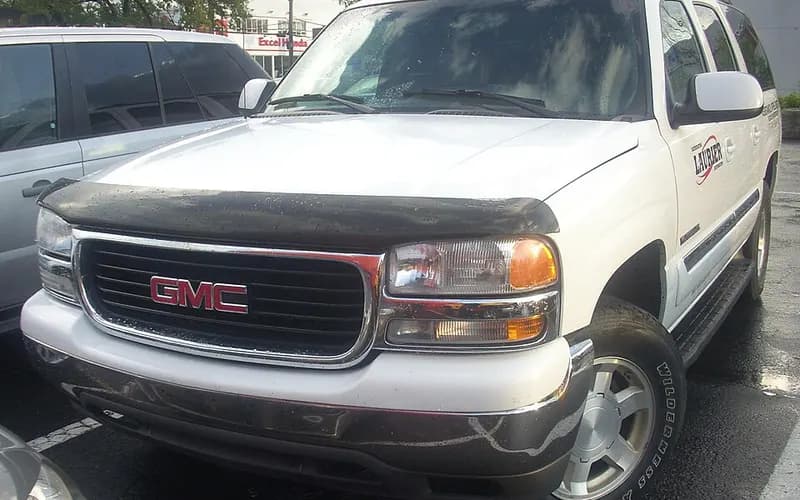
GMC Yukon XL 2000–2006
Common on this vehicle:Vibration or shudderWarning lightCorrosion or rustLeakNoiseShifting faultAir conditioning or heaterLights (headlights, turn signals)
Record by record
86 records state a cause or a remedy. Each record is shown as short labels in the order fault → finding the cause → correction. Press a label to narrow to the records that state it.
Component named as the cause
Work done
How it is said to have ended
- result not stated1
A ribbon is as wide as the records that state both of its ends (only the commonest are drawn). A record that names several symptoms or components runs through each. Orange is records that say the fault came back or was not fixed. Results come from owners’ reports only; one that does not say is “result not stated”. None of this is a likelihood of a cause or a rate at which work succeeds.
Read the records one by one (22)
Known issuesAftermarket part (not the vehicle as built): Federal-Mogul National / Carquest replacement wheel hub assembly retention nut - recall 07E-1061
Recall2006 GMC YUKON XL ・ —
Wheel Hub Assembly Bearing Nut Loosening Recall
1Fault
- The inboard retention nut that maintains the hub bearing assembly can loosen, resulting in an ABS light indication, noise, and/or wheel separation from the vehicle; wheel separation can result in a vehicle crash.
2Finding the cause
Steps to confirm (in the document’s order)
- On 2x4 vehicles, raise the vehicle on an approved hoist first; the hub assembly is good if a yellow, green or blue paint mark is seen on the grease cap on the inboard side of the steering knuckle.
- If the paint mark is not present, remove the wheel and the brake rotor and clean rust from the hub assembly face to check for the date code stamping.
- Defective hub assemblies can be identified by the country of origin on the package together with a recalled date code, by the date code on the package, or by the date code on the hub assembly.
- If a round yellow sticker is present on the box label, the part is good.
3Correction
Repair
- The hub assemblies were manufactured for aftermarket use; owners of these parts should have them removed and replaced as soon as possible.
- Federal-Mogul will replace the recalled hub assemblies free of charge.
Parts
- The recalled part numbers are 515020, 515021, 515025, 515053, 515054, 515059 and 515060.
Read the sentences of the record
From the manufacturer’s document
- Applies to:This is an equipment recall by Federal-Mogul of certain wheel hub assemblies sold as replacement parts only.
- Applies to:The recalled hub assemblies were packaged and sold between January 23, 2006 and December 20, 2007 under the National and CARQUEST Premium (BGS/Blue) brands, in 7 base part numbers.
- Parts:The recalled part numbers are 515020, 515021, 515025, 515053, 515054, 515059 and 515060.
- Applies to:The application lists include GMC 1500 Yukon (2WD) and GMC 1500 Yukon XL (2WD), 2001-2006.
- Applies to:ILJIN manufactured the recalled hub assemblies from December 27, 2005 to November 29, 2007.
- Condition:The inboard retention nut that maintains the hub bearing assembly can loosen, resulting in an ABS light indication, noise, and/or wheel separation from the vehicle; wheel separation can result in a vehicle crash.
- Confirm:On 2x4 vehicles, raise the vehicle on an approved hoist first; the hub assembly is good if a yellow, green or blue paint mark is seen on the grease cap on the inboard side of the steering knuckle.
- Confirm:If the paint mark is not present, remove the wheel and the brake rotor and clean rust from the hub assembly face to check for the date code stamping.
- Confirm:Defective hub assemblies can be identified by the country of origin on the package together with a recalled date code, by the date code on the package, or by the date code on the hub assembly.
- Confirm:If a round yellow sticker is present on the box label, the part is good.
- Repair:The hub assemblies were manufactured for aftermarket use; owners of these parts should have them removed and replaced as soon as possible.
- Repair:Federal-Mogul will replace the recalled hub assemblies free of charge.
- Cause
- CERTAIN FEDERAL-MOGUL REPLACEMENT WHEEL HUB ASSEMBLIES WITH THE BRAND NAMES: NATIONAL, CARQUEST P/NOS. 515020, 515021, 515025, 515053, 515054, 515059, AND 515060, SHIPPED BETWEEN JANUARY 23, 2006, AND DECEMBER 20, 2007, SOLD FOR LIGHT DUTY AND MEDIUM DUTY TRUCKS. THE INBOARD RETENTION NUT USED TO MAINTAIN HUB BEARING ASSEMBLY CAN LOOSEN RESULTING IN AN ABS LIGHT INDICATION, NOISE, AND/OR WHEEL SEPARATION.
- Remedy
- FEDERAL-MOGUL WILL NOTIFY CUSTOMERS AND WILL REPLACE THE HUB ASSEMBLY FREE OF CHARGE. THE RECALL BEGAN ON FEBRUARY 7, 2008. OWNERS CAN CONTACT FEDERAL-MOGUL TOLL-FREE AT 877-489-6659.
- Consequence
- WHEEL SEPARATION CAN RESULT IN A VEHICLE CRASH.
TIRES6
Owner complaint2006 GMC YUKON XL 1500 ・ 2009-08-21
Right front tire sidewall blowout while driving at 60 mph
1Fault
WHILE DRIVING 60 MPH (= 96.6 km/h) THE RIGHT FRONT TIRE SIDE WALL BLEW OUT.
2Finding the cause
3Correction
Read the sentences of the record
- Fault
- WHILE DRIVING 60 MPH (= 96.6 km/h) THE RIGHT FRONT TIRE SIDE WALL BLEW OUT.
- Remedy
- THE VEHICLE WAS TOWED AND THREE TIRES WERE REPLACED.
- Consequence
- THE CONTACT LOST CONTROL OF THE VEHICLE; HOWEVER, HE WAS ABLE TO DRIVE TO THE NEAREST SERVICE STATION.
Manufacturer communication2006 GMC YUKON XL 2500 ・ 2023-12-04(1 earlier editions of this document folded here)
Proper Wheel Installation and Wheel Torque Techniques
1Fault
- Vibration is felt in the steering wheel or the seat, centered at a frequency of 10-14 Hz, between 93-115 km/h (58-72 mph).
2Finding the cause
Possible causes
- Inappropriate wheel torque methods may leave the wheel and tire assembly offset when mounted, so that its mass orbits the axis of the hub and vibrates like a tire with high RFV or an imbalance.
- Improper torque may distort the brake rotor and cause variance in wheel mounting that can produce smooth road shake.
3Correction
Repair
- Remove the tire and wheel assemblies, index them at least two stud positions from the previous position, and re-install them.
- With the wheel off the ground, install all lug nuts hand tight using only a socket.
- Snug all lug nuts in a star or criss-cross pattern with a hand wrench.
- Lower the vehicle until there is just enough contact to provide resistance, then complete torquing to specification with a torque wrench.
Caution
- First order tire/wheel vibration may be misdiagnosed as tire/wheel assembly imbalance or excessive tire radial force variation.
- Do not use torque sticks or an impact driver to tighten wheel lug nuts.
Read the sentences of the record
From the manufacturer’s document
- Applies to:Applies to 2006-2015 GM passenger cars and light duty trucks.
- Condition:Vibration is felt in the steering wheel or the seat, centered at a frequency of 10-14 Hz, between 93-115 km/h (58-72 mph).
- Caution:First order tire/wheel vibration may be misdiagnosed as tire/wheel assembly imbalance or excessive tire radial force variation.
- Cause:Inappropriate wheel torque methods may leave the wheel and tire assembly offset when mounted, so that its mass orbits the axis of the hub and vibrates like a tire with high RFV or an imbalance.
- Cause:Improper torque may distort the brake rotor and cause variance in wheel mounting that can produce smooth road shake.
- Repair:Remove the tire and wheel assemblies, index them at least two stud positions from the previous position, and re-install them.
- Caution:Do not use torque sticks or an impact driver to tighten wheel lug nuts.
- Repair:With the wheel off the ground, install all lug nuts hand tight using only a socket.
- Repair:Snug all lug nuts in a star or criss-cross pattern with a hand wrench.
- Repair:Lower the vehicle until there is just enough contact to provide resistance, then complete torquing to specification with a torque wrench.
Open the manufacturer’s document (PDF) ↗ The points above were read from this document.
- Remedy
- Proper Wheel Installation and Wheel Torque Techniques
Manufacturer communication2003–2006 GMC YUKON XL DENALI ・ 2022-12-12(3 earlier editions of this document folded here)
Tire and Wheel Size Change Information
1Fault
- A request may be made to change the tire size on a vehicle.
2Finding the cause
Steps to confirm (in the document’s order)
- A calibration exists if a vehicle of the same make, model year and trim can be built in the sales order guide and meets the restrictions in its tire section.
3Correction
Repair
- Once confirmed in the sales guide, contact the Techline Customer Support Center (TCSC) to determine calibration availability.
Caution
- GM supports a tire calibration only for tires that have been sized, tested and designed for the vehicle and its applications.
- The customer may be charged for this service; it is not covered under the manufacturer's warranty.
Read the sentences of the record
From the manufacturer’s document
- Applies to:Applies to all models, 2003 - 2023, except Silverado Medium Duty and LCF models.
- Condition:A request may be made to change the tire size on a vehicle.
- Caution:GM supports a tire calibration only for tires that have been sized, tested and designed for the vehicle and its applications.
- Confirm:A calibration exists if a vehicle of the same make, model year and trim can be built in the sales order guide and meets the restrictions in its tire section.
- Repair:Once confirmed in the sales guide, contact the Techline Customer Support Center (TCSC) to determine calibration availability.
- Caution:The customer may be charged for this service; it is not covered under the manufacturer's warranty.
Open the manufacturer’s document (PDF) ↗ The points above were read from this document.
- Remedy
- This Preliminary Information communication provides information to the technician about changing the tire and wheel size on vehicles. General Motors will only support a tire calibration for tires that have been sized, tested and designed for the vehicle in question and its applications. Technician should not use the information that is provided by the antilock braking system tire size selection.
Manufacturer communication2003–2006 GMC YUKON XL ・ 2022-06-13
Tire Pressure Service Information
1Fault
- Ride, handling and road noise concerns may be caused by improperly adjusted tire pressure.
- During cold weather the Tire Pressure Monitor (TPM) indicator (a yellow horseshoe with an exclamation point) may illuminate.
2Finding the cause
Steps to confirm (in the document’s order)
- The first step in diagnosing these concerns is to verify that the tires are inflated to the correct pressures.
- The tire placard is on the driver's side front or rear door edge, the center pillar, or the rear compartment lid.
- Generally a 5.6°C (10°F) temperature change equals a 6.9 kPa (1 psi) tire pressure change.
- A "cold" tire is one that has sat for at least 3 hours or been driven no more than 1.6 km (1 mi).
3Correction
Repair
- If the indicator goes off after the tires warm up, reset the pressure to placard pressure at the cold temperature.
Caution
- The recommended inflation pressure is not the pressure printed on the tire sidewall.
- Always inspect and adjust the pressure when the tires are cold.
- Vehicles with different front and rear pressures need to be adjusted after tire rotation.
- To prevent electrostatic discharge damage to the Tire Pressure Monitoring Sensor (TPMS), the technician should be statically discharged before checking or filling tires.
Read the sentences of the record
From the manufacturer’s document
- Applies to:Applies to 2022 and prior GM passenger cars and light duty trucks.
- Condition:Ride, handling and road noise concerns may be caused by improperly adjusted tire pressure.
- Confirm:The first step in diagnosing these concerns is to verify that the tires are inflated to the correct pressures.
- Confirm:The tire placard is on the driver's side front or rear door edge, the center pillar, or the rear compartment lid.
- Caution:The recommended inflation pressure is not the pressure printed on the tire sidewall.
- Confirm:Generally a 5.6°C (10°F) temperature change equals a 6.9 kPa (1 psi) tire pressure change.
- Confirm:A "cold" tire is one that has sat for at least 3 hours or been driven no more than 1.6 km (1 mi).
- Caution:Always inspect and adjust the pressure when the tires are cold.
- Condition:During cold weather the Tire Pressure Monitor (TPM) indicator (a yellow horseshoe with an exclamation point) may illuminate.
- Repair:If the indicator goes off after the tires warm up, reset the pressure to placard pressure at the cold temperature.
- Caution:Vehicles with different front and rear pressures need to be adjusted after tire rotation.
- Caution:To prevent electrostatic discharge damage to the Tire Pressure Monitoring Sensor (TPMS), the technician should be statically discharged before checking or filling tires.
Open the manufacturer’s document (PDF) ↗ The points above were read from this document.
- Remedy
- This service bulletin provides information for accurate tire pressures that ensure the safe handling and appropriate ride characteristics of GM cars and trucks.
Manufacturer communication2006 GMC YUKON XL ・ 2022-01-03
GM Original Equipment Tires: Vibration and Other Issues
1Fault
- Under certain circumstances a slight tire shake may be noticed within the first few miles/kilometers of operation.
- Until the tires warm up a slight shake may be felt, but it should subside quickly.
2Finding the cause
Possible causes
- When parked overnight or for a period of time, the tires may set (flat spot) and need a few miles/kilometers to reach normal operating temperature.
- Tires may be designed with a nylon overlay configuration to enhance integrity at high speeds.
Steps to confirm (in the document’s order)
- Before measuring tires on force variation equipment, drive the vehicle a minimum of 24 km (15 mi) to remove any flat spotting.
3Correction
Caution
- Do not attempt repairs or replace components for this temporary flat spotting condition.
Read the sentences of the record
From the manufacturer’s document
- Applies to:Applies to 2022 and prior GM passenger cars and light duty trucks.
- Condition:Under certain circumstances a slight tire shake may be noticed within the first few miles/kilometers of operation.
- Cause:When parked overnight or for a period of time, the tires may set (flat spot) and need a few miles/kilometers to reach normal operating temperature.
- Cause:Tires may be designed with a nylon overlay configuration to enhance integrity at high speeds.
- Condition:Until the tires warm up a slight shake may be felt, but it should subside quickly.
- Confirm:Before measuring tires on force variation equipment, drive the vehicle a minimum of 24 km (15 mi) to remove any flat spotting.
- Caution:Do not attempt repairs or replace components for this temporary flat spotting condition.
Open the manufacturer’s document (PDF) ↗ The points above were read from this document.
- Remedy
- This service bulletin provides information for dealers/technicians on Tire/Wheel Characteristics (Vibration, Balance, Shake, Flat Spotting) of GM Original Equipment Tires.
Manufacturer communication2006 GMC YUKON XL ・ 2020-04-27
Nitrogen Gas in Tires Information Bulletin
1Fault
- General Motors does not oppose the use of purified nitrogen as an inflation gas for tires.
- Nitrogen molecules are larger than oxygen molecules and are therefore less prone to seeping through the tire casing.
2Finding the cause
Not stated
3Correction
Caution
- Even occasional inflation with compressed atmospheric air will negate many of the theoretical benefits.
- Non GM valve stem caps can lose sealing at the cap, which may allow contaminants or water into the valve stem.
- These contaminants can damage or destroy the TPMS, and such damage would not be covered by the GM New Vehicle Warranty.
- Whether the tires are inflated with atmospheric air or nitrogen, maintaining inflation pressure is critical for overall tire and vehicle performance.
Read the sentences of the record
From the manufacturer’s document
- Applies to:2020 and prior GM passenger cars and trucks.
- Condition:General Motors does not oppose the use of purified nitrogen as an inflation gas for tires.
- Caution:Even occasional inflation with compressed atmospheric air will negate many of the theoretical benefits.
- Caution:Non GM valve stem caps can lose sealing at the cap, which may allow contaminants or water into the valve stem.
- Caution:These contaminants can damage or destroy the TPMS, and such damage would not be covered by the GM New Vehicle Warranty.
- Condition:Nitrogen molecules are larger than oxygen molecules and are therefore less prone to seeping through the tire casing.
- Caution:Whether the tires are inflated with atmospheric air or nitrogen, maintaining inflation pressure is critical for overall tire and vehicle performance.
Open the manufacturer’s document (PDF) ↗ The points above were read from this document.
- Remedy
- This informational bulletin provides information for dealers/technicians on Use of Nitrogen Gas in Tires.
EQUIPMENT5
Manufacturer communication2000–2006 GMC YUKON XL DENALI ・ 2021-04-26
Aluminum Wheel Refinishing Service Bulletin
1Fault
2Finding the cause
Not stated
3Correction
Read the sentences of the record
- Remedy
- Refinishing Aluminum Wheels This bulletin updates General Motor's position on refinishing aluminum wheels. GM does not endorse any repairs that involve welding, bending, straightening o re-machining. Only cosmetic refinishing of the wheel's coatings, using recommended procedures, is allowed. Evaluating Damage In evaluating damage, it is the GM Dealer's responsibility to inspect the wheel for corrosion, scrapes, gouges, etc. The Dealer must insure that such damage is not deeper than what can be sanded or polished off. The wheel must be inspected for cracks. If cracks are found, discard the wheel. Any wheels with bent rim flanges must not be repaired or refinished. Wheels that have been refinished by an outside company must be returned to the same vehicle. The Dealer must record the wheel ID stamp or the cast date on the wheel in order to assure this requirement. Refer to Refinisher's Responsibility  Outside Company later in this bulletin.
Manufacturer communication2000–2006 GMC YUKON XL DENALI ・ 2021-04-26
Aluminum Wheel Refinishing Guidelines
1Fault
2Finding the cause
Not stated
3Correction
Read the sentences of the record
- Remedy
- Refinishing Aluminum Wheels This bulletin updates General Motor's position on refinishing aluminum wheels. GM does not endorse any repairs that involve welding, bending, straightening o re-machining. Only cosmetic refinishing of the wheel's coatings, using recommended procedures, is allowed. Evaluating Damage In evaluating damage, it is the GM Dealer's responsibility to inspect the wheel for corrosion, scrapes, gouges, etc. The Dealer must insure that such damage is not deeper than what can be sanded or polished off. The wheel must be inspected for cracks. If cracks are found, discard the wheel. Any wheels with bent rim flanges must not be repaired or refinished. Wheels that have been refinished by an outside company must be returned to the same vehicle. The Dealer must record the wheel ID stamp or the cast date on the wheel in order to assure this requirement. Refer to Refinisher's Responsibility  Outside Company later in this bulletin.
Manufacturer communication2005–2006 GMC YUKON XL ・ 2020-03-09(1 earlier editions of this document folded here)
General Motors Wheel Alignment Customer Concerns Information
1Fault
Not stated
2Finding the cause
Steps to confirm (in the document’s order)
- Verify that no aftermarket suspension "lift" or "lowering" kit or other suspension alteration has been done to the vehicle.
- Before aligning, inspect tire inflation and irregular wear, wheel bearings for excessive play, and all suspension and steering parts for looseness, wear or damage.
- For a verified steering wheel angle complaint, front and rear toe are the only alignment values that affect the angle of the steering wheel.
- If a pull is verified but all alignment settings are within specification, the tires may be the cause; swap the front tires left to right and re-evaluate.
3Correction
Repair
- On vehicles requiring a 4-wheel alignment, set the rear wheel alignment angles first to obtain proper front angles.
- Jounce the front and rear bumpers 3 times before checking the wheel alignment.
Caution
- Vehicles follow road crown or slope as part of normal operation, and a wheel alignment will generally not correct this.
- Slight or mild feathering, cupping, edge or heel/toe wear of the tread shoulders is normal and can appear very early; it does not affect tire performance or tread life.
- Vibration concerns are generally not due to wheel alignment; alignments are not to be performed to investigate or correct vibration.
- Tramlining (following ruts and grooves in the road) occurs to some degree on all vehicles, more with low aspect ratio, wide tires.
- Front or rear toe out of specification does not cause a true vehicle pull; if only toe is out on a confirmed pull, something else is causing it.
Read the sentences of the record
From the manufacturer’s document
- Applies to:Applies to 2020 and prior GM passenger cars and light duty trucks.
- Confirm:Verify that no aftermarket suspension "lift" or "lowering" kit or other suspension alteration has been done to the vehicle.
- Caution:Vehicles follow road crown or slope as part of normal operation, and a wheel alignment will generally not correct this.
- Caution:Slight or mild feathering, cupping, edge or heel/toe wear of the tread shoulders is normal and can appear very early; it does not affect tire performance or tread life.
- Caution:Vibration concerns are generally not due to wheel alignment; alignments are not to be performed to investigate or correct vibration.
- Caution:Tramlining (following ruts and grooves in the road) occurs to some degree on all vehicles, more with low aspect ratio, wide tires.
- Confirm:Before aligning, inspect tire inflation and irregular wear, wheel bearings for excessive play, and all suspension and steering parts for looseness, wear or damage.
- Repair:On vehicles requiring a 4-wheel alignment, set the rear wheel alignment angles first to obtain proper front angles.
- Repair:Jounce the front and rear bumpers 3 times before checking the wheel alignment.
- Confirm:For a verified steering wheel angle complaint, front and rear toe are the only alignment values that affect the angle of the steering wheel.
- Confirm:If a pull is verified but all alignment settings are within specification, the tires may be the cause; swap the front tires left to right and re-evaluate.
- Caution:Front or rear toe out of specification does not cause a true vehicle pull; if only toe is out on a confirmed pull, something else is causing it.
Open the manufacturer’s document (PDF) ↗ The points above were read from this document.
- Remedy
- This informational bulletin provides retail, wholesale and fleet personnel with General Motors recommendations for customer concerns related to wheel alignment.
Manufacturer communication2005–2006 GMC YUKON XL ・ 2019-12-16
Aluminum wheel bead seat cleaning and resurfacing procedure
1Fault
- A tire slowly loses air pressure over a period of days or weeks.
2Finding the cause
Possible causes
- Abrasive elements may intrude between the tire and wheel at the bead seat, and the relative motion between tire and wheel lets the particles wear the wheel and tire materials.
Steps to confirm (in the document’s order)
- The corrosion may be on the inboard or outboard bead seating surface and is not visible until the tire is dismounted from the wheel.
- After a water dunk tank leak test, if the source of the leak is around the bead seat of the wheel, dismount the tire to examine the bead seat.
- Bead seat corrosion looks like blistering of the wheel finish, giving a rough or uneven surface on which the tire has difficulty keeping a proper seal.
- For vehicles with 32,186 km (20,000 mi) or less, the total combined linear area of repairable corrosion is 100 mm (4 in) or less; beyond that the wheel should be replaced.
- For vehicles that have exceeded 32,186 km (20,000 mi), the total combined linear area of repairable corrosion is 200 mm (8 in) or less.
3Correction
Repair
- Use a clean-up (fine cut) sanding disc or biscuit to remove the corrosion and any flaking paint, back to material that is stable and firmly bonded to the wheel.
- Once the corrosion is eliminated, coat the repaired area with a commercially available tire sealant such as Patch Brand Bead Sealant or equivalent.
Parts
- Part number 16118, Patch Bead Sealer (1 Quart (= 0.946 L)).
Caution
- Do not replace a wheel for slow air loss unless the wheel has been evaluated and/or repair has been tried with this procedure.
Read the sentences of the record
From the manufacturer’s document
- Applies to:Applies to 2005-2020 GM passenger cars and light duty trucks.
- Condition:A tire slowly loses air pressure over a period of days or weeks.
- Cause:Abrasive elements may intrude between the tire and wheel at the bead seat, and the relative motion between tire and wheel lets the particles wear the wheel and tire materials.
- Confirm:The corrosion may be on the inboard or outboard bead seating surface and is not visible until the tire is dismounted from the wheel.
- Caution:Do not replace a wheel for slow air loss unless the wheel has been evaluated and/or repair has been tried with this procedure.
- Confirm:After a water dunk tank leak test, if the source of the leak is around the bead seat of the wheel, dismount the tire to examine the bead seat.
- Confirm:Bead seat corrosion looks like blistering of the wheel finish, giving a rough or uneven surface on which the tire has difficulty keeping a proper seal.
- Confirm:For vehicles with 32,186 km (20,000 mi) or less, the total combined linear area of repairable corrosion is 100 mm (4 in) or less; beyond that the wheel should be replaced.
- Confirm:For vehicles that have exceeded 32,186 km (20,000 mi), the total combined linear area of repairable corrosion is 200 mm (8 in) or less.
- Repair:Use a clean-up (fine cut) sanding disc or biscuit to remove the corrosion and any flaking paint, back to material that is stable and firmly bonded to the wheel.
- Repair:Once the corrosion is eliminated, coat the repaired area with a commercially available tire sealant such as Patch Brand Bead Sealant or equivalent.
- Parts:Part number 16118, Patch Bead Sealer (1 Quart (= 0.946 L)).
Open the manufacturer’s document (PDF) ↗ The points above were read from this document.
- Remedy
- This technical bulletin provides a procedure on how to clean and resurface aluminum wheel bead seats for vehicles that have the condition of Tire Slowly Goes Flat, Tire Air Loss, Low Tire Pressure Warning Light Illuminated, Aluminum Wheel Bead Seat Corrosion.
Manufacturer communication2005–2006 GMC YUKON XL ・ 2018-06-04
Informational Bulletin Revision 07-03-10-015B
1Fault
- The bulletin clarifies which conditions on GM OEM wheels are warrantable.
2Finding the cause
Not stated
3Correction
Read the sentences of the record
From the manufacturer’s document
- Applies to:Applies to 2014 and prior GM passenger cars and light duty trucks.
- Condition:The bulletin clarifies which conditions on GM OEM wheels are warrantable.
Open the manufacturer’s document (PDF) ↗ The points above were read from this document.
- Remedy
- This informational bulletin provides a revision for 07-03-10-015B to add the 2013-2014 model years and remove the Saab Warranty Information.
WHEELS5
Manufacturer communication2006 GMC YUKON XL 2500 ・ 2024-05-01(1 earlier editions of this document folded here)
Tire Radial Force Variation (RFV) Service Bulletin
1Fault
- The most common ride concern involving tire radial force variation is shake on smooth roads at highway speed, 105-115 km/h (65-70 mph).
2Finding the cause
Possible causes
- Tire related smooth road highway speed shake can be caused by three conditions: imbalance, out of round and tire force variation.
Steps to confirm (in the document’s order)
- With the vehicle raised, center the wheels on the hub by loosening all wheel nuts and hand-tightening them while shaking the wheel, then torque to specification with a torque wrench, not a torque stick.
- If light brake application increases the pulsation felt in the steering wheel, go to the brake-induced pulsation diagnosis in the Brakes section of the service manual.
- A reading of 35 to 50 Hz typically indicates a first order propshaft vibration.
- Generally a reading between 10 and 20 Hz indicates a tire/wheel vibration.
- If vibration continues after 10 minutes of driving above 72 km/h (45 mph), temporary tire flat-spotting can be ruled out.
3Correction
Repair
- If the radial runout of a tire/wheel assembly is more than 0.040 in (1.02 mm), match mount the tire to the wheel to get below 0.040 in (1.02 mm).
Caution
- On the balancer always center the wheel by the pilot bore; never use the hub-cap bore, since it is not a precision machined surface.
Read the sentences of the record
From the manufacturer’s document
- Applies to:Applies to 2024 and prior GM passenger cars and light duty trucks.
- Condition:The most common ride concern involving tire radial force variation is shake on smooth roads at highway speed, 105-115 km/h (65-70 mph).
- Cause:Tire related smooth road highway speed shake can be caused by three conditions: imbalance, out of round and tire force variation.
- Confirm:With the vehicle raised, center the wheels on the hub by loosening all wheel nuts and hand-tightening them while shaking the wheel, then torque to specification with a torque wrench, not a torque stick.
- Confirm:If light brake application increases the pulsation felt in the steering wheel, go to the brake-induced pulsation diagnosis in the Brakes section of the service manual.
- Confirm:A reading of 35 to 50 Hz typically indicates a first order propshaft vibration.
- Confirm:Generally a reading between 10 and 20 Hz indicates a tire/wheel vibration.
- Confirm:If vibration continues after 10 minutes of driving above 72 km/h (45 mph), temporary tire flat-spotting can be ruled out.
- Caution:On the balancer always center the wheel by the pilot bore; never use the hub-cap bore, since it is not a precision machined surface.
- Confirm:Assembly radial force variation guide: P-Metric tires on light trucks, 24 lbs (11 kg) or less.
- Confirm:Assembly radial force variation guide: LT-tires on light trucks, 35 lbs (16 kg) or less.
- Repair:If the radial runout of a tire/wheel assembly is more than 0.040 in (1.02 mm), match mount the tire to the wheel to get below 0.040 in (1.02 mm).
Open the manufacturer’s document (PDF) ↗ The points above were read from this document.
- Remedy
- This service bulletin provides information for dealers/technicians on Tire Radial Force Variation (RFV).
Manufacturer communication2000–2006 GMC YUKON XL DENALI ・ 2023-10-25(2 earlier editions of this document folded here)
Hunter Wheel Road Force Balancer Service Information
1Fault
- Effective February 2017 (May 2017 for Canada), a Generation 3, 4 or 5 Hunter Road Force Balancer is designated as Essential Dealer Equipment.
2Finding the cause
Not stated
3Correction
Read the sentences of the record
From the manufacturer’s document
- Applies to:All GM passenger cars and trucks (includes medium duty), model years 2000 to 2024.
- Condition:Effective February 2017 (May 2017 for Canada), a Generation 3, 4 or 5 Hunter Road Force Balancer is designated as Essential Dealer Equipment.
Open the manufacturer’s document (PDF) ↗ The points above were read from this document.
- Remedy
- This service bulletin provides information about the Hunter wheel Road Force balancers that should be utilized for all repairs requiring balance and Road Force measurement.
Manufacturer communication2006 GMC YUKON XL 2500 ・ 2023-06-05(2 earlier editions of this document folded here)
Vibration After Tire Mounting / Wheel Slip Prevention
1Fault
2Finding the cause
Possible causes
- Vibration shortly after tires are mounted may be caused by the tires slipping on the wheels, which moves the imbalance point of the tire away from the weight location.
- Wheel slip is most common on clear coated or chrome wheels with very smooth bead seat areas, but may also occur on other alloy or steel wheels.
- One reason is an excessive amount of lubricant, or lubricant applied in the wrong locations.
Steps to confirm (in the document’s order)
- Put a temporary mark on the tire at the valve stem and drive: slip of less than one inch is probably not contributing; slip greater than one inch with a ride disturbance felt may be causing the vibration.
3Correction
Repair
- On the wheel, lubricate the safety humps, leave the rim flanges dry and lubricate the drop center area only for difficult to mount tires.
- Complete the mounting within 10 minutes of applying the mounting lubricant.
- Inflate the tires to 275 kPa (40 psi) when mounting, then reduce to the desired operating pressure.
- After rebalancing and fitting, park the vehicle for one hour to let the lubricant evaporate.
Caution
- This test is only effective if the vehicle was serviced within the last couple of hours.
- Do not use products containing silicone, alcohol, petroleum based products, solvents or corrosives for cleaning or lubrication.
- The vehicle should not be driven aggressively (hard acceleration or braking) for up to 24 hours after tire mounting, so the lubricant can dry.
Read the sentences of the record
From the manufacturer’s document
- Applies to:Applies to 2024 and prior GM passenger cars and trucks.
- Cause:Vibration shortly after tires are mounted may be caused by the tires slipping on the wheels, which moves the imbalance point of the tire away from the weight location.
- Cause:Wheel slip is most common on clear coated or chrome wheels with very smooth bead seat areas, but may also occur on other alloy or steel wheels.
- Cause:One reason is an excessive amount of lubricant, or lubricant applied in the wrong locations.
- Confirm:Put a temporary mark on the tire at the valve stem and drive: slip of less than one inch is probably not contributing; slip greater than one inch with a ride disturbance felt may be causing the vibration.
- Caution:This test is only effective if the vehicle was serviced within the last couple of hours.
- Caution:Do not use products containing silicone, alcohol, petroleum based products, solvents or corrosives for cleaning or lubrication.
- Repair:On the wheel, lubricate the safety humps, leave the rim flanges dry and lubricate the drop center area only for difficult to mount tires.
- Repair:Complete the mounting within 10 minutes of applying the mounting lubricant.
- Repair:Inflate the tires to 275 kPa (40 psi) when mounting, then reduce to the desired operating pressure.
- Repair:After rebalancing and fitting, park the vehicle for one hour to let the lubricant evaporate.
- Caution:The vehicle should not be driven aggressively (hard acceleration or braking) for up to 24 hours after tire mounting, so the lubricant can dry.
Open the manufacturer’s document (PDF) ↗ The points above were read from this document.
- Remedy
- This service bulletin provides information for dealers/technicians on Vibration Shortly After Tires are Mounted/Preventing Vibration from Wheel Slip (Tire Sliding on Wheel).
Manufacturer communication2000–2006 GMC YUKON XL ・ 2021-05-17
Torque Converter Bolt Removal Warning
1Fault
- Customers may comment on noise coming from underneath a vehicle equipped with an automatic transmission.
- Technicians may find that the noise comes from the bell housing area.
2Finding the cause
Possible causes
- Running the engine with those bolts removed may damage the pilot on the front of the torque converter, the pilot hole in the end of the crankshaft, or both.
Steps to confirm (in the document’s order)
- Use chassis ears to isolate the component or assembly that is the loudest source of the noise.
3Correction
Caution
- Do not remove the flex plate to torque converter bolts, push the torque converter back toward the transmission and start the engine to tell whether the noise comes from the engine or the transmission.
Read the sentences of the record
From the manufacturer’s document
- Applies to:Applies to all brands, models, engines and transmissions, 2000 - 2021.
- Condition:Customers may comment on noise coming from underneath a vehicle equipped with an automatic transmission.
- Condition:Technicians may find that the noise comes from the bell housing area.
- Caution:Do not remove the flex plate to torque converter bolts, push the torque converter back toward the transmission and start the engine to tell whether the noise comes from the engine or the transmission.
- Cause:Running the engine with those bolts removed may damage the pilot on the front of the torque converter, the pilot hole in the end of the crankshaft, or both.
- Confirm:Use chassis ears to isolate the component or assembly that is the loudest source of the noise.
Open the manufacturer’s document (PDF) ↗ The points above were read from this document.
- Remedy
- This Preliminary Information communication provides information to the technician to not remove the torque converter bolts and start the engine as this may cause damage to the torque converter of the crankshaft on vehicles equipped with an automatic transmission.
Manufacturer communication2005–2006 GMC YUKON XL ・ 2018-06-04
Chromed Aluminum Wheels—Chemical Staining and Corrosion
1Fault
2Finding the cause
Possible causes
- Chemical staining mostly results from acid based cleaners; the stains are frequently milky, black or greenish.
- A second type of staining comes from road chemicals such as calcium chloride used for dust control on unpaved roads; it looks like small pitting.
- A third type comes from prolonged exposure to brake dust, which penetrates the chrome.
3Correction
Repair
- After cleaning, wax the wheel with ACDelco Cleaner Wax, P/N 88865218 (in Canada, 2675208), to protect it from brake dust.
- For milky stains from acidic cleaners, apply 3M Chrome and Metal Polish #39527 with a clean terry cloth towel; the staining diminishes as it is applied.
Part numbers printed in the document
88865218Wax,Cleaner Acdelco 16OzLook up at RockAuto (aftermarket candidates) ↗Search the web ↗
Discontinued (no successor stated)as stated by GMPartsGiant (checked 2026-10-06) ↗
The numbers are as the document prints them. The name and the replacing number are what the pages of GMPartsGiant, a reseller of genuine parts and not GM, state. Aftermarket equivalents are not checked here (the links only search by number). Confirm the fit for the vehicle (VIN) before ordering.
Caution
- Do not use cleaning solutions containing hydrofluoric, oxalic and most other acids on chrome wheels (or any wheels).
- Any wheel cleaner must be thoroughly rinsed off the wheel with clean, clear water.
- The wheels must be cleaned before the polish is applied, to avoid scratching the wheel surface.
- The polish reduces the thickness of the chrome plating and, used incorrectly or excessively, may remove it altogether.
- On wheels spotted by road chemicals the procedure may improve the condition marginally but will not restore the finish or remove the pitting.
Read the sentences of the record
From the manufacturer’s document
- Applies to:2015 and prior GM passenger cars and trucks.
- Cause:Chemical staining mostly results from acid based cleaners; the stains are frequently milky, black or greenish.
- Caution:Do not use cleaning solutions containing hydrofluoric, oxalic and most other acids on chrome wheels (or any wheels).
- Caution:Any wheel cleaner must be thoroughly rinsed off the wheel with clean, clear water.
- Cause:A second type of staining comes from road chemicals such as calcium chloride used for dust control on unpaved roads; it looks like small pitting.
- Cause:A third type comes from prolonged exposure to brake dust, which penetrates the chrome.
- Repair:After cleaning, wax the wheel with ACDelco Cleaner Wax, P/N 88865218 (in Canada, 2675208), to protect it from brake dust.
- Repair:For milky stains from acidic cleaners, apply 3M Chrome and Metal Polish #39527 with a clean terry cloth towel; the staining diminishes as it is applied.
- Caution:The wheels must be cleaned before the polish is applied, to avoid scratching the wheel surface.
- Caution:The polish reduces the thickness of the chrome plating and, used incorrectly or excessively, may remove it altogether.
- Caution:On wheels spotted by road chemicals the procedure may improve the condition marginally but will not restore the finish or remove the pitting.
Open the manufacturer’s document (PDF) ↗ The points above were read from this document.
- Remedy
- This informational bulletin provides information on chemical staining, pitting, corrosion and/or spotted appearance of chromed aluminum wheels, along with warranty information regarding these conditions.
ELECTRICAL SYSTEM2
Manufacturer communication2006 GMC YUKON DENALI XL ・ 2024-05-06(2 earlier editions of this document folded here)
Magnetically Controlled Suspension Electrical Connector Not Seated
1Fault
- The subject names a Service Suspension System message with DTCs C0575, C0580, C0585 or C0590.
- Some customers may comment on a Service Suspension System message displayed on the Drivers Information Center (DIC).
2Finding the cause
Possible causes
- During assembly, the 90 degree electrical connector at the top end of a shock absorber (actuator) may not have been fully seated, or may have been bumped firmly enough to partially disconnect it or create an internal contact concern.
Steps to confirm (in the document’s order)
- Visually examine the green insulator and center post of the electrical connector to make sure it is straight and in serviceable condition; replace the connector and retest if required.
- Reconnect the electrical connector to the shock absorber (actuator), clear the suspension DTC and confirm that the code does not reset.
- If the code returns, remove the electrical connector from the shock absorber (actuator) and pigtail, and swap it with the connector on the opposite side shock absorber (actuator).
3Correction
Repair
- If the DTC follows the connector to the other side, replace the connector; if not, refer to SI and follow the diagnostics for the DTC originally found.
Parts
- Part number 19180262, Connector, S/ABS Elec Susp Control.
Part numbers printed in the document
19180262Connector, Solenoid, Shock Absorber Electronic Suspension Control Actuator(Gray)Look up at RockAuto (aftermarket candidates) ↗Search the web ↗
Replaced by: 13586171as stated by GMPartsGiant (checked 2026-10-06) ↗Look up at RockAuto (aftermarket candidates) ↗Search the web ↗
The numbers are as the document prints them. The name and the replacing number are what the pages of GMPartsGiant, a reseller of genuine parts and not GM, state. Aftermarket equivalents are not checked here (the links only search by number). Confirm the fit for the vehicle (VIN) before ordering.
Caution
- Complete the document's steps before attempting shock absorber (actuator) replacement.
Read the sentences of the record
From the manufacturer’s document
- Applies to:The model list includes the 2006-2014 GMC Yukon and Yukon XL.
- Applies to:It applies to vehicles equipped with RPO F55, Z55 or Z95.
- Condition:The subject names a Service Suspension System message with DTCs C0575, C0580, C0585 or C0590.
- Condition:Some customers may comment on a Service Suspension System message displayed on the Drivers Information Center (DIC).
- Cause:During assembly, the 90 degree electrical connector at the top end of a shock absorber (actuator) may not have been fully seated, or may have been bumped firmly enough to partially disconnect it or create an internal contact concern.
- Caution:Complete the document's steps before attempting shock absorber (actuator) replacement.
- Confirm:Visually examine the green insulator and center post of the electrical connector to make sure it is straight and in serviceable condition; replace the connector and retest if required.
- Confirm:Reconnect the electrical connector to the shock absorber (actuator), clear the suspension DTC and confirm that the code does not reset.
- Confirm:If the code returns, remove the electrical connector from the shock absorber (actuator) and pigtail, and swap it with the connector on the opposite side shock absorber (actuator).
- Repair:If the DTC follows the connector to the other side, replace the connector; if not, refer to SI and follow the diagnostics for the DTC originally found.
- Parts:Part number 19180262, Connector, S/ABS Elec Susp Control.
Open the manufacturer’s document (PDF) ↗ The points above were read from this document.
- Remedy
- Magnetically Controlled Suspension Electrical Connector Not Seated.
Manufacturer communication2000–2006 GMC YUKON XL ・ 2019-04-08
Tire Pressure Monitor and Diagnostic Tool Software Update
1Fault
2Finding the cause
Not stated
3Correction
Repair
- The document gives the steps to download or update the AFIT, TPM, GR8, MIT, PICO Scope or VDR tools.
Read the sentences of the record
From the manufacturer’s document
- Applies to:Applies to 1995-2017 vehicles of all brands and models.
- Repair:The document gives the steps to download or update the AFIT, TPM, GR8, MIT, PICO Scope or VDR tools.
Open the manufacturer’s document (PDF) ↗ The points above were read from this document.
- Remedy
- This Preliminary Information communicates to the dealer the process for downloading or updating operating software for the Tire Pressure Monitor, Active Fuel Injector tester, multi media tester, PICO Scope, GR8 starting/charging tester and Vehicle Data Recorder tools, giving website address and step by step instructions to complete the update.
SUSPENSION2
Manufacturer communication2001–2006 GMC YUKON XL ・ 2023-12-26(1 earlier editions of this document folded here)
Suspension Service Communication
1Fault
- Condition 1 (2009 or prior vehicles): a Service Suspension System message on the DIC with incorrect rear ride height, and DTC C0696 or C0711 set in the Electronic Suspension Control (ESC) module.
- Condition 2: a Service Suspension System message on the DIC, possibly with low rear ride height under a heavy payload, and DTC C0711 set in the ESC module.
- Condition 3: a loose hose hangs down at the left rear; upon inspection the hose may be found damaged or disconnected from the air inlet filter of the auto leveling suspension air compressor.
2Finding the cause
Possible causes
- Condition 1 can be caused by the wiring to the automatic level control (ALC) pressure sensor being shorted to ground.
- Condition 2 may be caused by an internal fault in the ALC pressure sensor, which can occur when moisture gets into the sensor.
Steps to confirm (in the document’s order)
- The air compressor assembly may have to be removed to see whether the wiring is pinched between the compressor assembly and the frame.
- If system pressure at start up is below 10 psi (69 kpa), the system runs the compressor to add air to the shocks as a replenishment cycle.
3Correction
Repair
- For condition 1, repair any damaged or shorted circuits and reposition the wiring so it is not damaged again when the compressor assembly is installed.
- The sensor is no longer serviced separately; to replace it, install a complete air filter, dryer and sensor assembly.
- For condition 3, replace the auto leveling compressor air inlet filter and hose assembly (PN 22197160).
Part numbers printed in the document
The numbers are as the document prints them. The name and the replacing number are what the pages of GMPartsGiant, a reseller of genuine parts and not GM, state. Aftermarket equivalents are not checked here (the links only search by number). Confirm the fit for the vehicle (VIN) before ordering.
Parts
- Vehicles built before May, 2012 need a jumper harness for the updated sensor, which is included with assembly PN 22964558; vehicles built in May, 2012 and later need no jumper harness and use PN 22941807.
Part numbers printed in the document
22964558Filter Assembly, Auto Level Control Air CompressorLook up at RockAuto (aftermarket candidates) ↗Search the web ↗
Discontinued (no successor stated)(replaces 20982305 / 22197161)as stated by GMPartsGiant (checked 2026-10-06) ↗
22941807Filter Assembly, Auto Level Control Air CompressorLook up at RockAuto (aftermarket candidates) ↗Search the web ↗
Discontinued (no successor stated)as stated by GMPartsGiant (checked 2026-10-06) ↗
The numbers are as the document prints them. The name and the replacing number are what the pages of GMPartsGiant, a reseller of genuine parts and not GM, state. Aftermarket equivalents are not checked here (the links only search by number). Confirm the fit for the vehicle (VIN) before ordering.
Caution
- Do not replace the complete air compressor assembly for this concern.
- Condition 4 (no compressor self test at start up): the automatic level system normally does not, or only very infrequently does, cycle the compressor at key up.
Read the sentences of the record
From the manufacturer’s document
- Applies to:Applies to 2001-2013 GMC Yukon, Yukon XL LD, Yukon Denali and Yukon Denali XL (note: the years run later than the years this service covers).
- Applies to:Vehicles with RPO Z55 or Z95 are covered.
- Condition:Condition 1 (2009 or prior vehicles): a Service Suspension System message on the DIC with incorrect rear ride height, and DTC C0696 or C0711 set in the Electronic Suspension Control (ESC) module.
- Cause:Condition 1 can be caused by the wiring to the automatic level control (ALC) pressure sensor being shorted to ground.
- Confirm:The air compressor assembly may have to be removed to see whether the wiring is pinched between the compressor assembly and the frame.
- Repair:For condition 1, repair any damaged or shorted circuits and reposition the wiring so it is not damaged again when the compressor assembly is installed.
- Caution:Do not replace the complete air compressor assembly for this concern.
- Condition:Condition 2: a Service Suspension System message on the DIC, possibly with low rear ride height under a heavy payload, and DTC C0711 set in the ESC module.
- Cause:Condition 2 may be caused by an internal fault in the ALC pressure sensor, which can occur when moisture gets into the sensor.
- Repair:The sensor is no longer serviced separately; to replace it, install a complete air filter, dryer and sensor assembly.
- Parts:Vehicles built before May, 2012 need a jumper harness for the updated sensor, which is included with assembly PN 22964558; vehicles built in May, 2012 and later need no jumper harness and use PN 22941807.
- Condition:Condition 3: a loose hose hangs down at the left rear; upon inspection the hose may be found damaged or disconnected from the air inlet filter of the auto leveling suspension air compressor.
- Repair:For condition 3, replace the auto leveling compressor air inlet filter and hose assembly (PN 22197160).
- Caution:Condition 4 (no compressor self test at start up): the automatic level system normally does not, or only very infrequently does, cycle the compressor at key up.
- Confirm:If system pressure at start up is below 10 psi (69 kpa), the system runs the compressor to add air to the shocks as a replenishment cycle.
Open the manufacturer’s document (PDF) ↗ The points above were read from this document.
- Remedy
- Suspension.
Manufacturer communication2003–2006 GMC YUKON XL DENALI ・ 2021-04-16
Fluid Leakage vs. Seepage Identification Guide
1Fault
2Finding the cause
Not stated
3Correction
Read the sentences of the record
- Remedy
- Information Regarding the Differences Between Fluid Leakage and Seepage This bulletin is intended to help identify the differences between what is considered a fluid leak and what is considered seepage. Improper diagnosis may lead to unnecessary component replacement. Use the following information to determine if the condition is normal acceptable seepage or a defective component
ENGINE AND ENGINE COOLING1
Manufacturer communication2004–2006 GMC YUKON XL 2500 ・ 2023-11-22(1 earlier editions of this document folded here)
Vibration Analysis Worksheet Service Bulletin
1Fault
2Finding the cause
Steps to confirm (in the document’s order)
- When diagnosing vibration, use the worksheet together with the Vibration Analysis - Road Testing procedure in the service information.
- Place the sensor where the vibration is felt: on the seat track for a seat complaint, on the steering column for a steering wheel complaint.
- Moving the sensor to other areas, look for the same Hz reading with the greatest amplitude.
- If a system balance was attempted and the vibration remains, check ring gear backlash at each tooth; readings should not vary more than 0.050 mm (0.002 in).
- Aluminum wheel/tire runout measured on the vehicle: maximum 0.030 in (.762 mm).
3Correction
Read the sentences of the record
From the manufacturer’s document
- Applies to:Applies to 2024 and prior GM passenger cars and trucks.
- Confirm:When diagnosing vibration, use the worksheet together with the Vibration Analysis - Road Testing procedure in the service information.
- Confirm:Place the sensor where the vibration is felt: on the seat track for a seat complaint, on the steering column for a steering wheel complaint.
- Confirm:Moving the sensor to other areas, look for the same Hz reading with the greatest amplitude.
- Confirm:If a system balance was attempted and the vibration remains, check ring gear backlash at each tooth; readings should not vary more than 0.050 mm (0.002 in).
- Confirm:Aluminum wheel/tire runout measured on the vehicle: maximum 0.030 in (.762 mm).
- Confirm:Hub mounting surface runout: maximum 0.005 in (0.132 mm).
- Confirm:Wheel stud runout: maximum 0.010 in (0.254 mm).
Open the manufacturer’s document (PDF) ↗ The points above were read from this document.
- Remedy
- This service bulletin provides a vibration analysis worksheet the technician can use in conjunction with the appropriate Vibration Analysis-Road testing procedure when diagnosing vibration concerns.
Showing 22 of the 86 you can open. Narrow the search to see the rest.